This post may contain affiliate links.
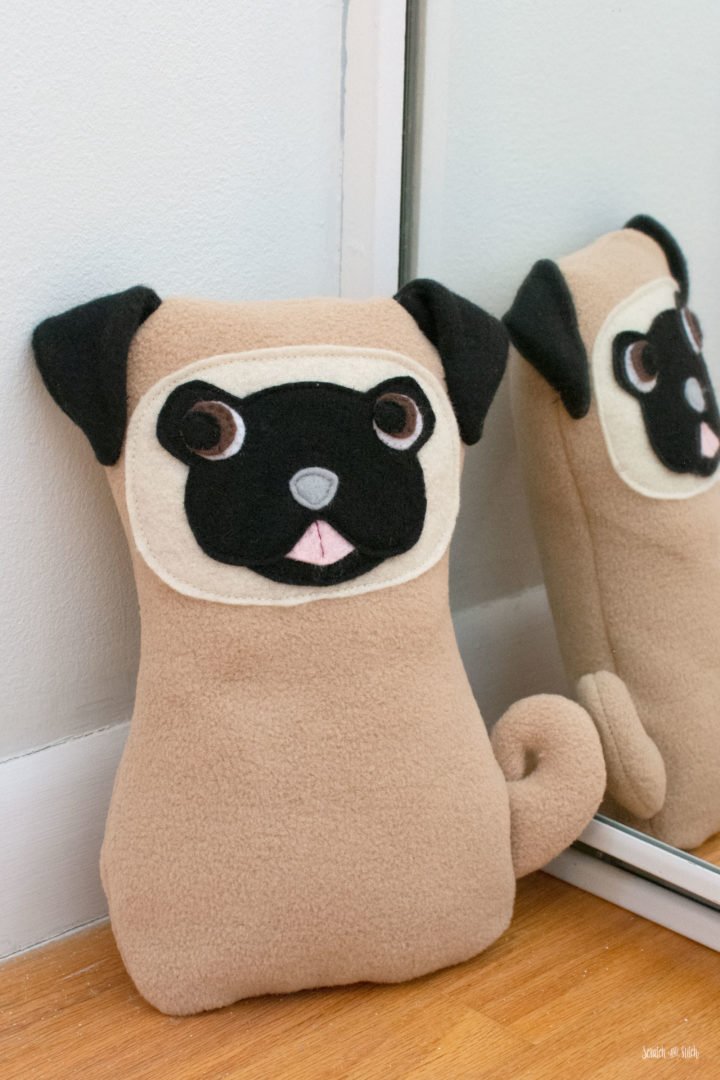
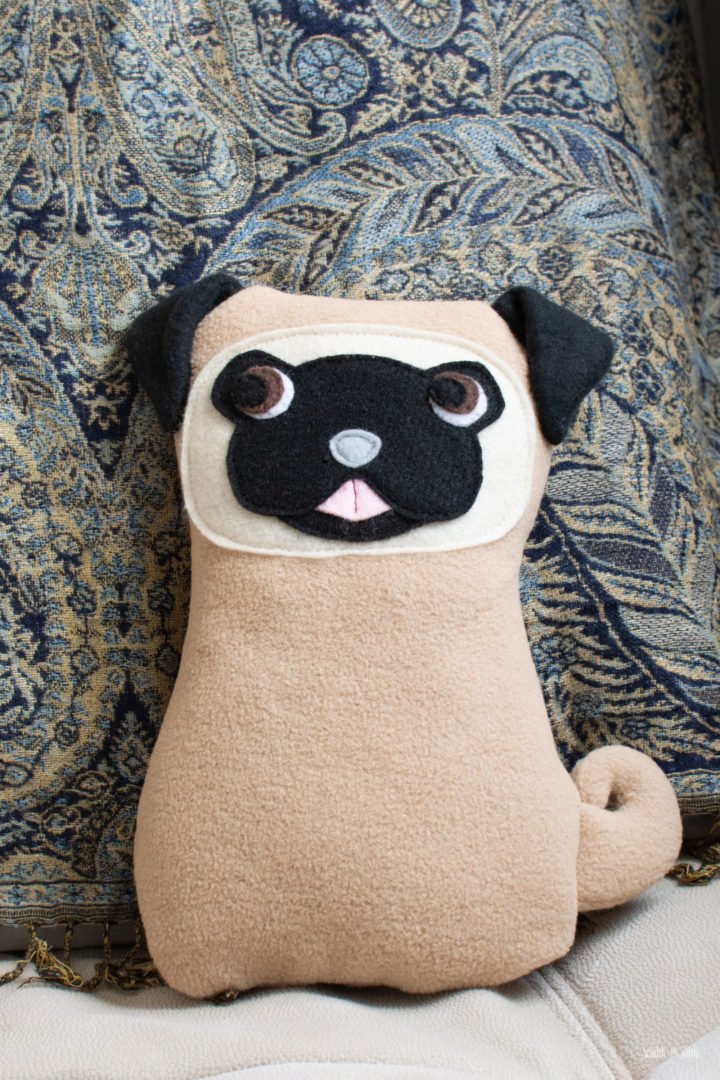
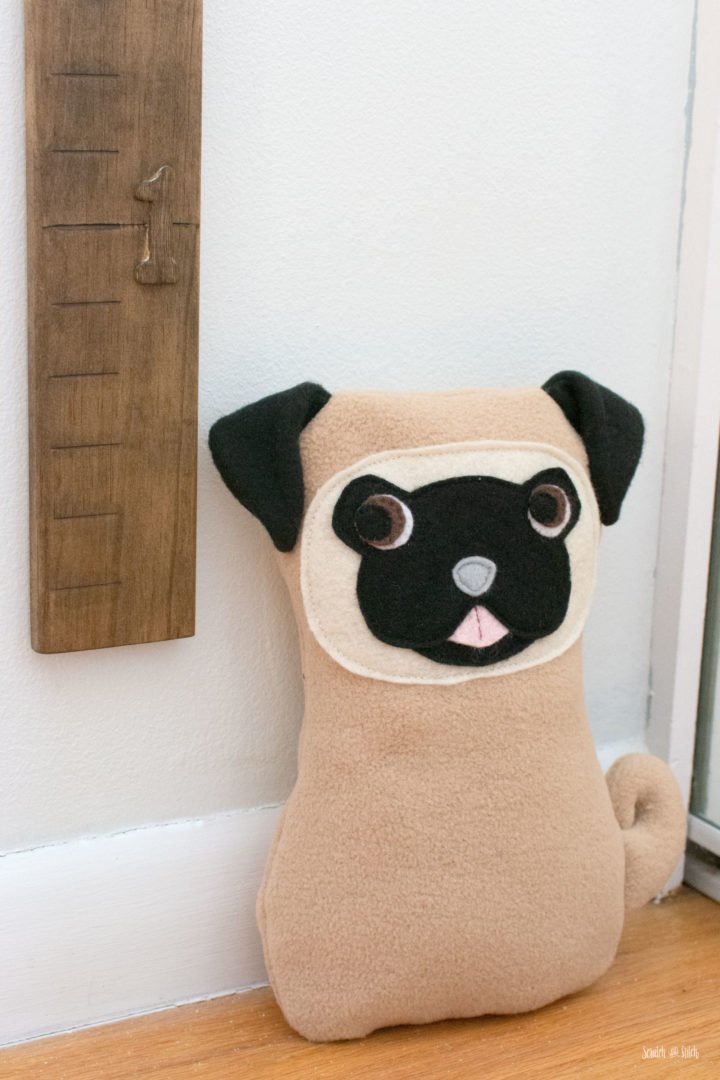
Today I bring you a super easy dog stuffed animal sewing pattern, Puggy the Pug.
This dog stuffed animal pattern was inspired by a commenter on my 30 Free Stuffed Animal Sewing Patterns with Tutorials post. In that post, I had included a plush pug sewing pattern that is no longer available due to the company shutting down. The commenter mentioned that her daughter badly wanted to make the stuffed animal. That comment struck me, so I immediately started to create a plush pug pattern.
Free Dog Stuffed Animal Sewing Pattern
This stuffed dog sewing pattern is a great introductory project for a beginner sewer that wants to learn to make stuffed animals. The free stuffed animal sewing pattern uses fleece and felt fabrics plus poly-fil stuffing. The eyes can be created from felt or safety eyes can be used in place of felt. The stuffed pug toy can be sewn by machine or by hand.
By submitting your email address you will be added to the Scratch and Stitch email newsletter. You can opt-out at any time :)
Materials
- pug sewing pattern (download above)
- tan fleece
- black fleece (ears)
- off-white felt (face)
- black felt (face and eyes)
- pink felt (tongue)
- gray felt (nose)
- safety eyes *optional
- white felt (eyes)
- brown felt (eyes)
- poly-fil stuffing
- coordinating thread
- basic sewing supplies
How to Make the Plush Pug
Download and print the paper pattern. Cut out all paper pattern pieces.
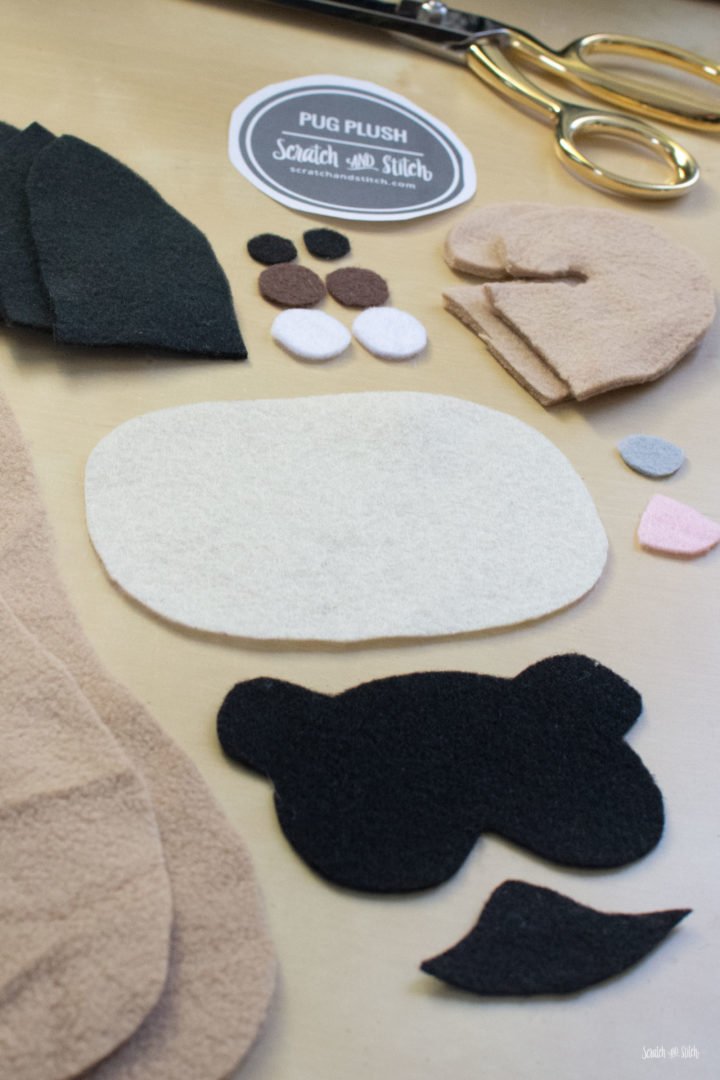
Transfer all pattern pieces onto the fleece and felt fabrics and cut out.
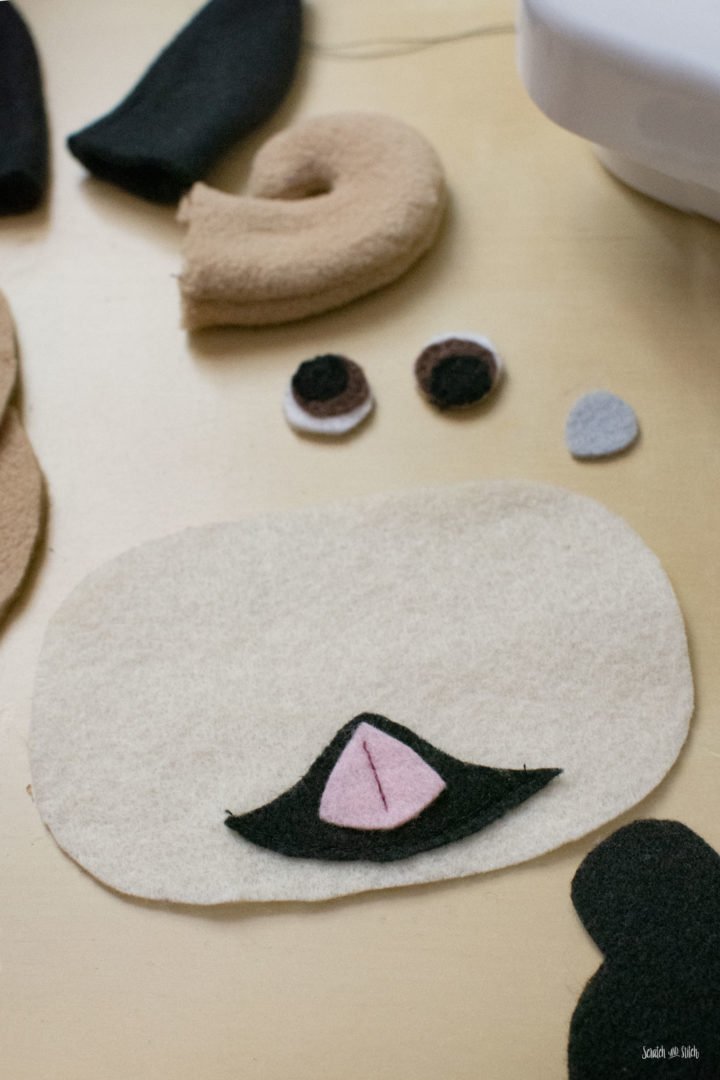
Sew FACE B onto the OUTER FACE. Sew the tongue onto the OUTER FACE with a single vertical straight stitch down the middle of the tongue.
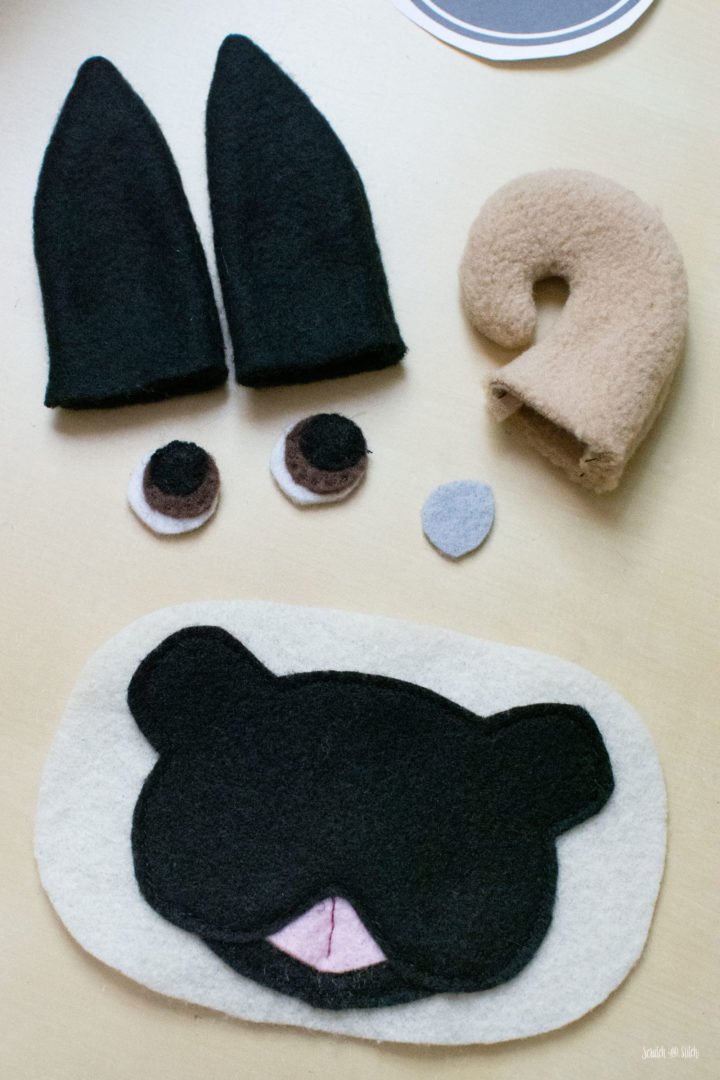
Sew FACE A onto the OUTER FACE, so it slightly overlaps FACE B and the TONGUE.
Layer the eye circles with the white on the bottom, then brown, then black. The white and brown should peek out to one side.
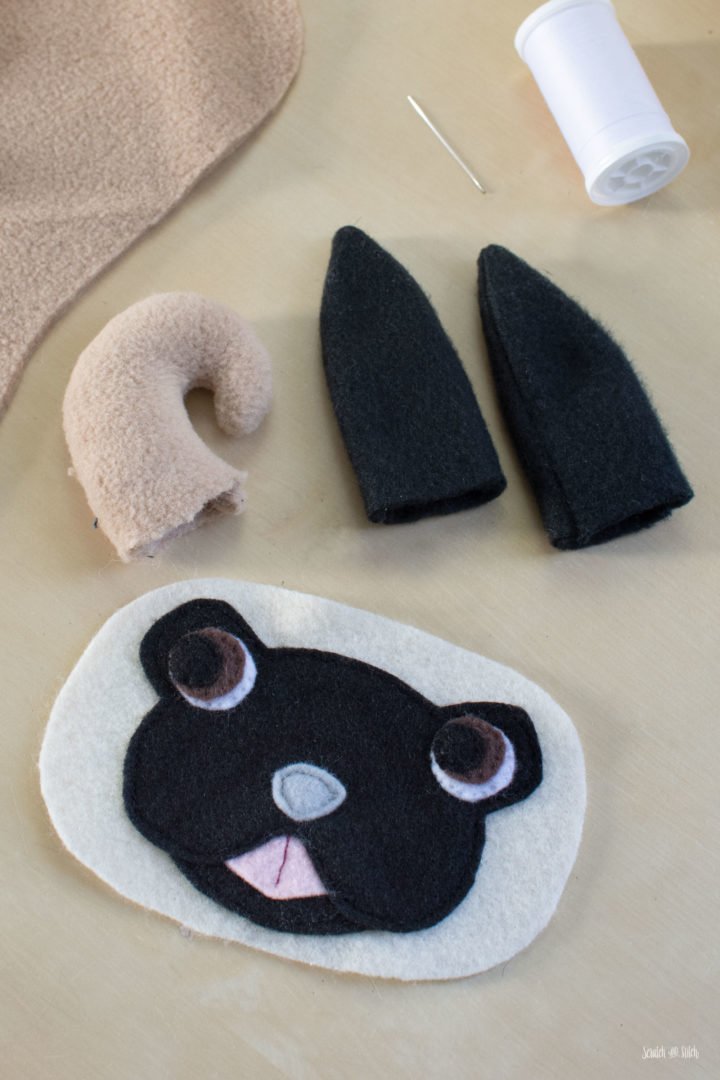
Sew the eyes and nose onto the face.
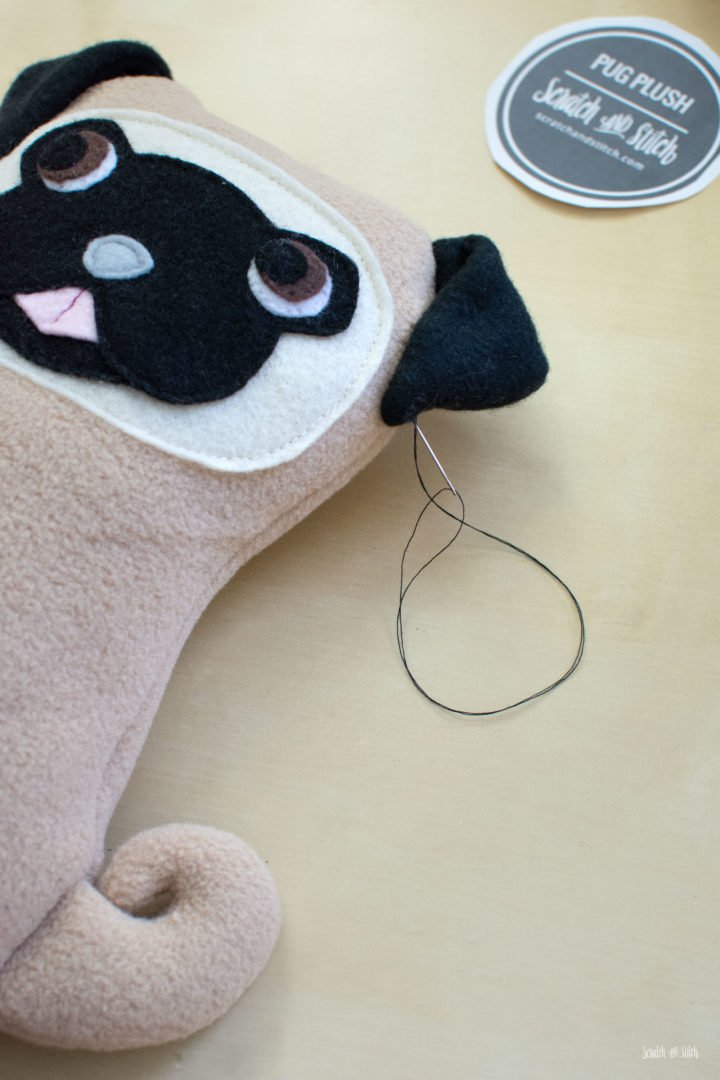
Layer two EAR pieces right-sides together and sew around the edges with a 1/4″ seam allowance, leaving the bottom edge open. Clip the seam allowance at the point to reduce bulk. Turn right-side out. Repeat with the second ear and set aside.
Layer two TAIL pieces right-sides together and sew around the edges with a 1/4″ seam allowance, leaving the bottom edge open. Clip the seam allowance at the point and around the corners to reduce bulk. Turn right-side out and set aside.
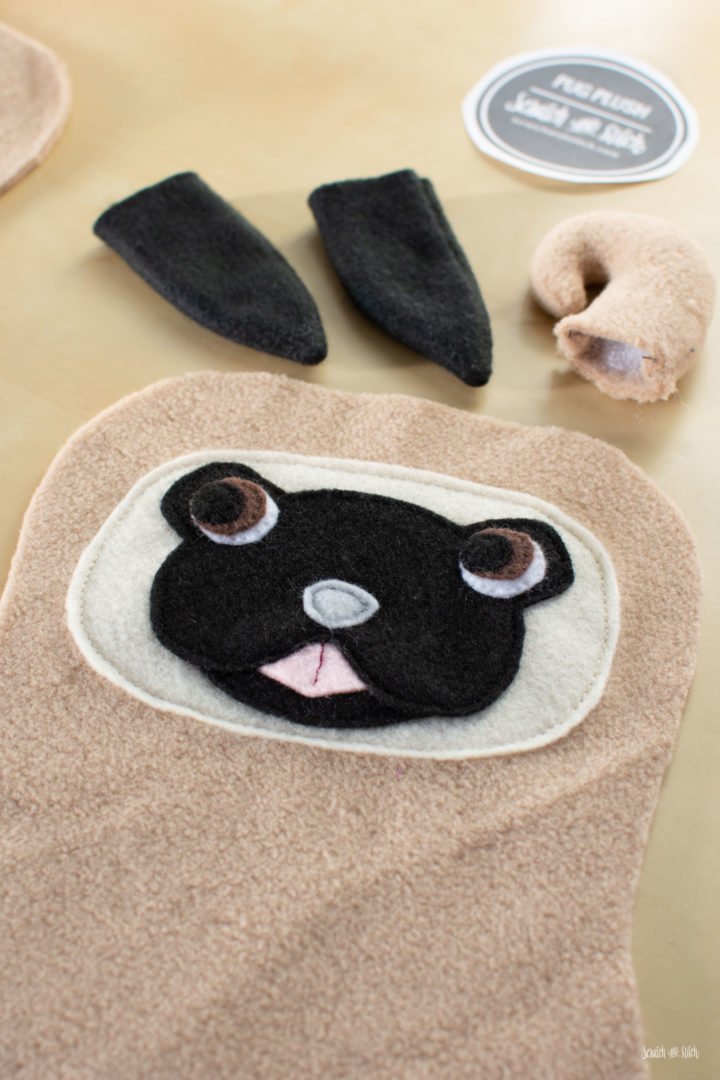
Place the FACE onto one BODY piece and sew in place.
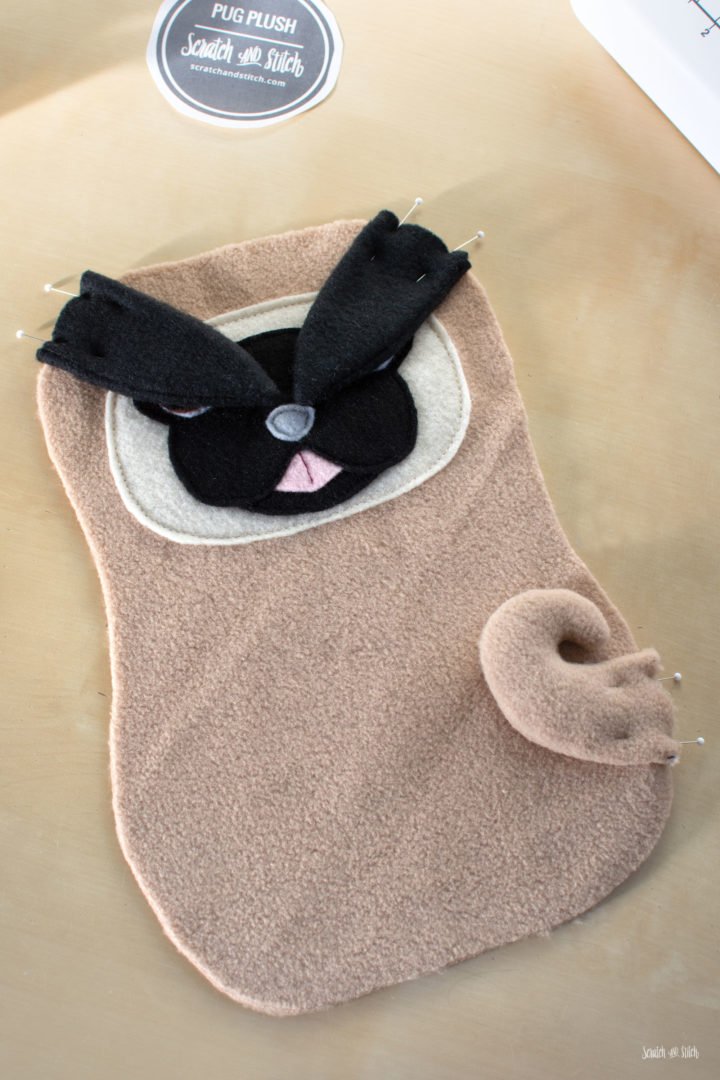
Pin the EARS and TAIL in place onto one BODY piece. The ears and tail should face inward (see photo above).
Place the other BODY piece on top and pin together. Sew around the perimeter with a 1/4″ seam allowance, making sure to leave the bottom open for stuffing.
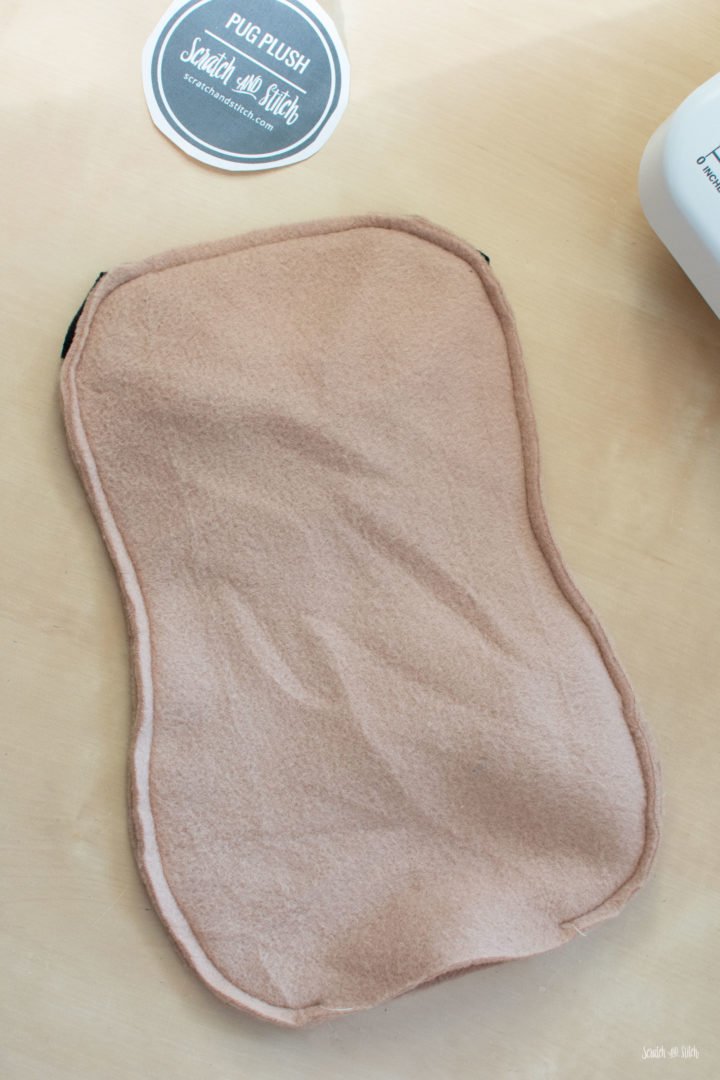
Carefully turn the pug right side out and fill with stuffing.
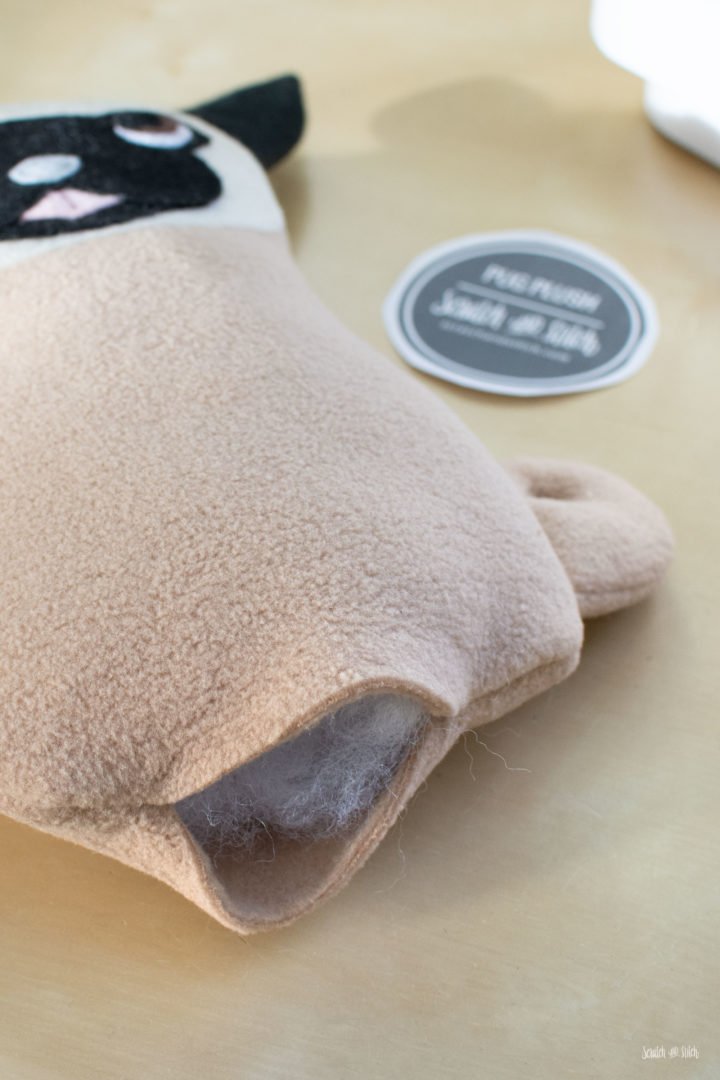
Close up the hole with a ladder stitch.
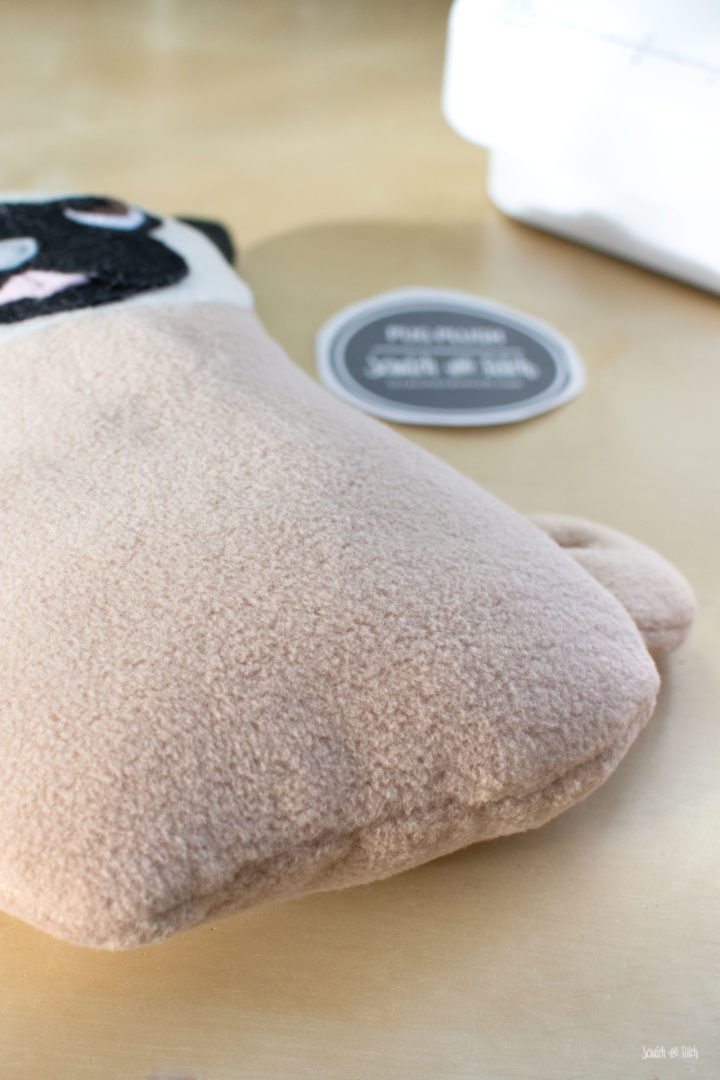
To finish making the plush pug, fold down the ears and hand stitch into place.
My toddler son decided to name his dog stuffed animal Puggy the Pug, and says he’s a good cuddler. :)
30 Free Stuffed Animal Patterns with Tutorials
Download these free stuffed animal patterns and follow along with written sewing tutorials.
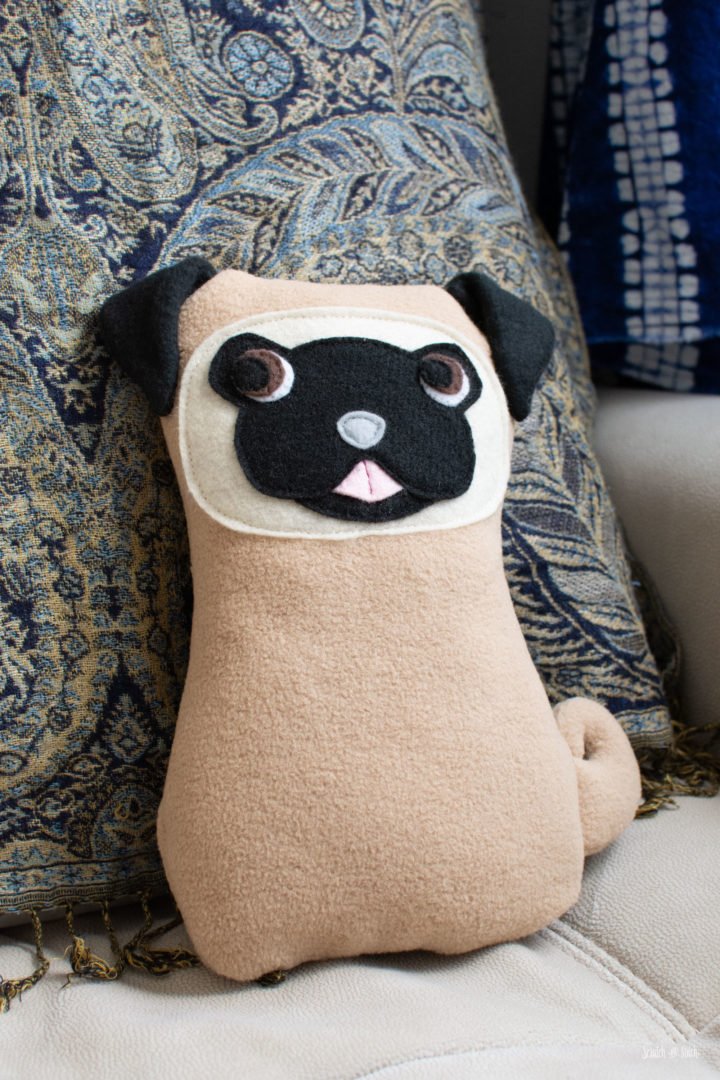
If you are a beginner sewer, this pug is a great introductory project to making stuffed animals. Kids and pug lovers will enjoy this squishy pug toy.
Did you make the plush pug? I’d love to see it! You can send me a picture of your creation or tag me on Instagram @scratchandstitch or #scratchandstitch.
I love all the patterns you give away and they are fun to see.
Thankyouu
Awww…thank you! I appreciate hearing that :)
I love the detail that you put in the tutorials very comfortably to follow
Thank Shellie, I appreciate hearing that :)
This is super adorable!! Wish I was a sewer!
There’s no better time than now to get started :) This is a great beginner project too.
Thank you for this adorable pug plush. My 10 year old grandson LOVED it as soon as he opened it on Christmas morning. He is quite the pug officienado, so he welcomed this new addition to his collection of pug related items.
This is wonderful to hear Angie! I know how serious kids get when they really love one particular thing. :) I would love to see pics.
Thank you for this cute pattern and easy tutorial! I made a few of them, and put my own spin on the face. My kids enjoyed making them as well!
This pug was really easy and fun to make. I didn’t have any black or off-white felt, so I used some flannel instead.
Thank you for sharing your fun projects.
So glad you enjoyed. Thank you for sharing. :)
I made several of the pugs! Two were created to look like “puppy dog pals”, a show that my grandsons watch. They did not put them down for two days solid!
I also made two in shades of pink and white for Valentines day gifts.
Excellent pattern and tutorial. THANKS!
My granddaughter will love this. Pattern was super easy to follow and looks amazing when finished. Thank you xXx