This post may contain affiliate links.
Pattern weights are one of those simple sewing-room tools that quickly become something you reach for all the time.
These DIY paw print pattern weights are an easy scrap-friendly sewing project designed to hold paper patterns in place while you trace and cut. Each finished paw measures about 4.5″ x 4.5″ and holds approximately 1 cup of weighted beads, giving it plenty of weight without taking up much room on your pattern.
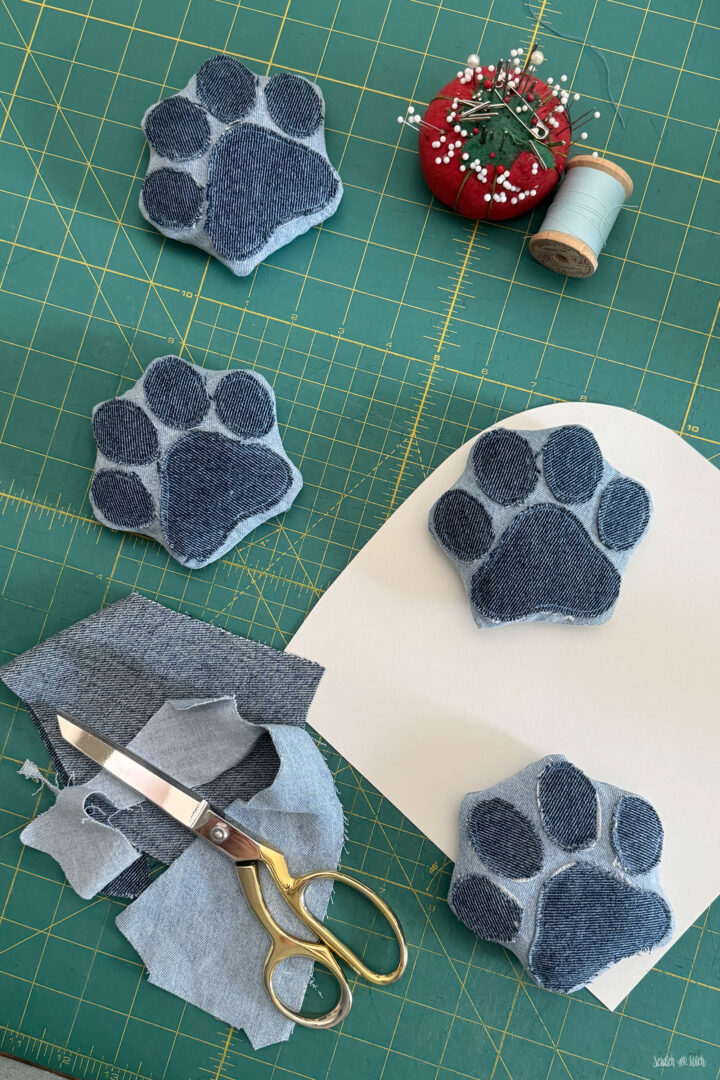
I made the set shown here from denim scraps, which gives the pattern weights a sturdy finish with just enough grip to stay put on the cutting table. You can use all kinds of fabrics though, so this is an easy one to customize with whatever you already have in your stash.
The paw pads are added with simple raw-edge appliqué, so there are no tiny pieces to turn under or complicated details to sew. You can make them with a sewing machine or stitch them completely by hand.
Use the free paw print template below to make one, but four paw prints seems like the perfect number.
Why Use Pattern Weights?
Pattern weights hold sewing patterns and templates on top of your fabric so you can easily trace pattern pieces onto your fabric. It’s the better alternative to placing random objects from your studio to hold down patterns.
If you’re like me, you may have been just grabbing for heavy things that were in reach like a hammer, fabric scissors, and a poly roller. But now I have these adorable paw print pattern weights to hold down my fabric and paper patterns.
These paw print weights are:
- Approximately 4.5″ x 4.5″
- Filled with about 1 cup of weighted beads
- Scrap-friendly!
- Easy to customize with different fabrics
- Sewable by machine or by hand
- Useful for sewing patterns, templates, tracing, and other cutting-table projects
And, of course, they look considerably more interesting sitting around your sewing room than a stack of washers.

Watch the Paw Print Pattern Weights Video
Watch this sped-up process video with a few extra seconds of fun with the camera in the studio.
[VIDEO EMBED]
Download the Free Paw Print Pattern Weight Template
Use the free printable template to cut the base and paw pad pieces for your pattern weight.
Paw Print Pattern Weights
Enter your email to get the free pattern in your inbox.
By submitting your email address you will be added to the Scratch and Stitch email newsletter. You can opt-out at any time :)
Finished size: Approximately 4.5″ x 4.5″
Print the template at 100% or Actual Size unless otherwise noted on the pattern page.
Materials and Tools
You don’t need much fabric for these, which makes them a great way to use some of the smaller pieces hiding in your scrap bin. And they don’t even need to match, so pull out those scraps and get creative with different colors and textures.
Related: If your denim scrap pile is getting a little out of control, you can also put those smaller pieces to work with my denim plushies.
Fabric
Choose fabrics with a little grip rather than anything especially slick or slippery. You want the finished weight to stay put on your pattern.
Good fabric options include:
- Quilting cotton (+ interfacing)
- Felt
- Fleece
- Denim
- Canvas
- Leather
If you’re using lightweight quilting cotton, I recommend adding fusible interfacing to give it a little more structure.
Mix fabrics for the base and paw pads, keep everything monochromatic, or make each paw completely different.
Because the paw pads are sewn with exposed raw edges, fabrics such as felt and fleece will stay especially clean around the edges. Woven fabrics like quilting cotton, denim, and canvas may soften or fray slightly over time, which can also be part of the look.
I like the slightly frayed edge that denim develops around the paw pads, but felt or fleece are great choices if you want completely clean raw edges.
You’ll Also Need
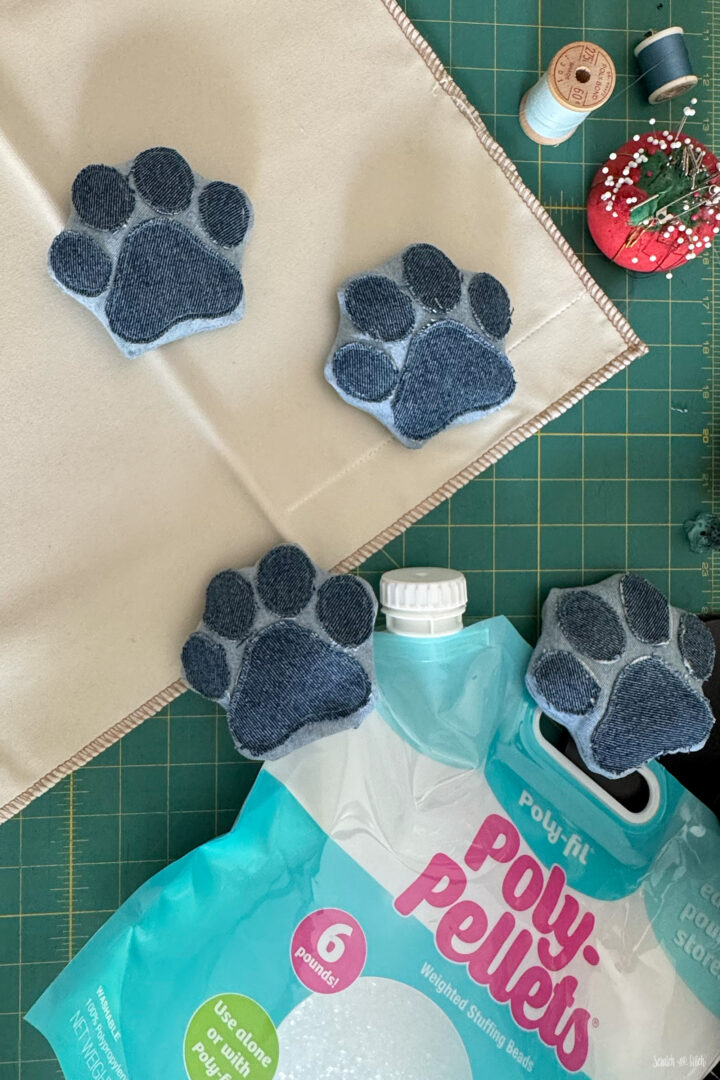
- Weighted beads, such as Fairfield World Poly-Pellets
- Coordinating thread
- School glue stick
- Fusible interfacing (i.e. Pellon SF101), if needed
- Pins or sewing clips
- Fabric scissors
- Sewing machine or hand-sewing needle
- Hand-sewing needle for closing the opening
I used Poly-Pellets for mine because they add plenty of weight while still letting the finished paw stay flexible and lie nicely against the cutting table.
RELATED: I also use weighted beads in my Cone Gnome sewing pattern to give the gnomes a sturdy base, so they’re handy to keep around for more than just pattern weights.
How to Sew a Paw Print Pattern Weight
The following instructions make one paw print pattern weight.
1. Cut the Pattern Pieces
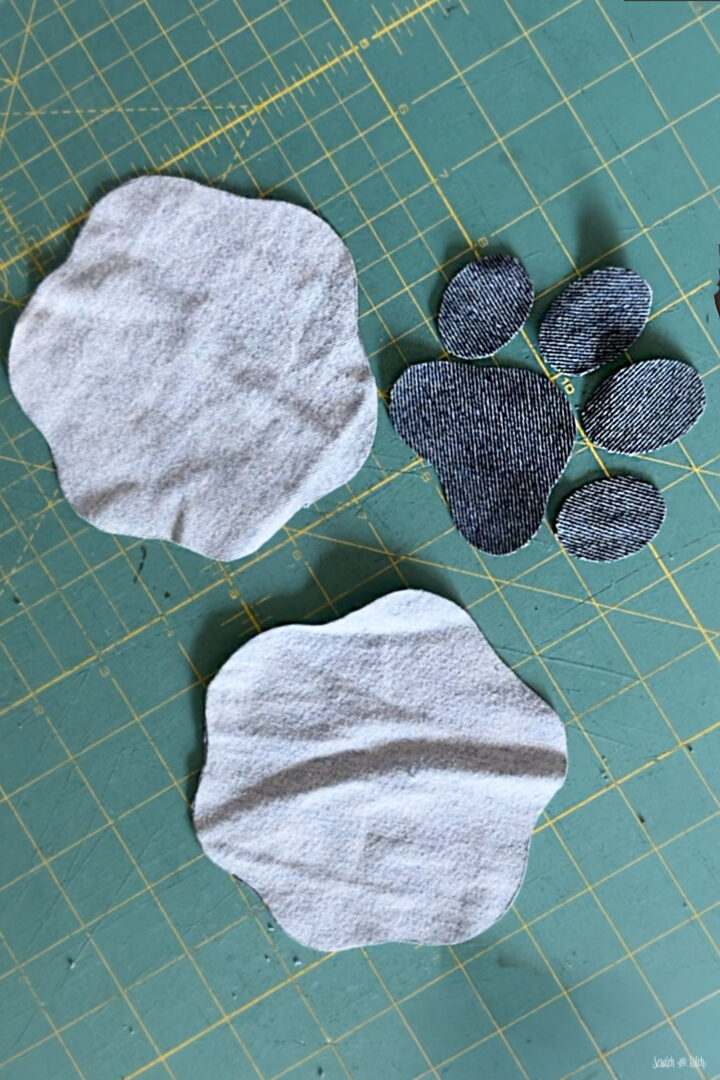
Using the free template, cut:
- 2 Base pieces
- 1 of each Paw Print piece
If you’re interfacing lightweight fabric, fuse the interfacing to the wrong side of the fabric before cutting.
2. Arrange the Paw Print
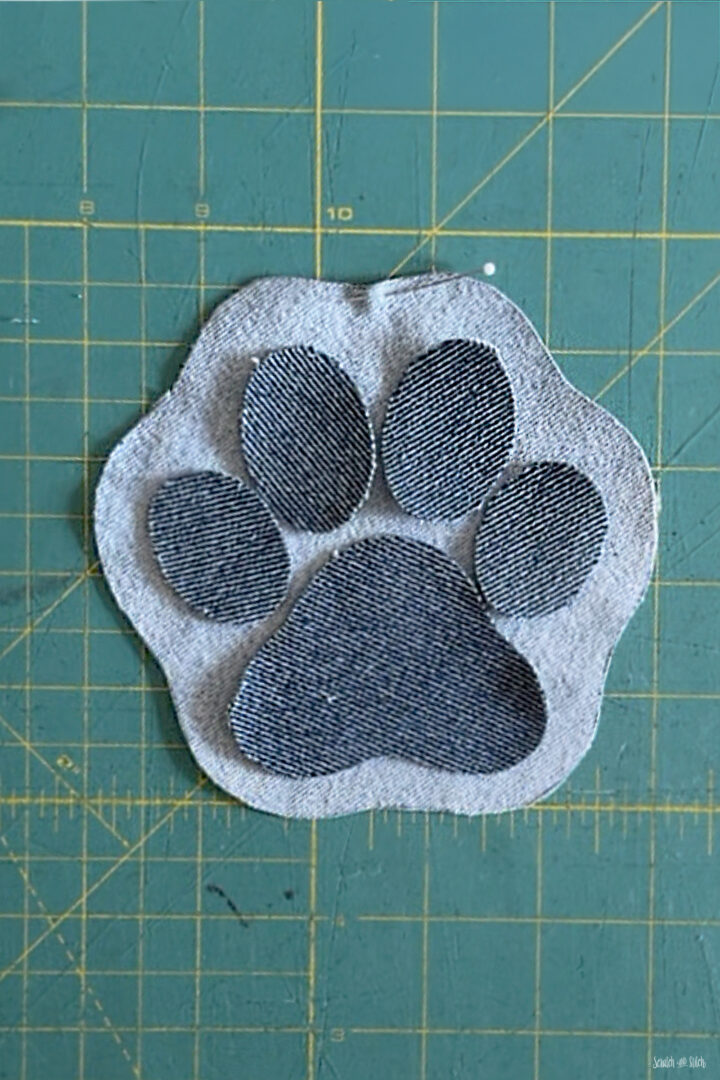
Place one Base piece right side up.
Arrange the Paw Print pieces on top making sure to leave about 1/2″ around the edge between the Paw Print and the edge of the Base. There will be about 1/8″ of space between the Paw Print pieces.
Once you’re happy with the placement, use a small amount of school glue stick on the back of each paw piece to temporarily hold it in position.
3. Sew the Paw Pieces
Sew around the edge of each paw print piece approximately 1/8″ from the raw edge.
Take your time around the curves and pivot as needed.

4. Sew the Base Pieces Together
Place the second Base piece over the finished paw print piece with right sides together.
Pin or clip around the edges.
Mark a section approximately 1 1/2″ wide along the bottom edge. This opening will be used for turning and filling the pattern weight.
Starting at one side of the marked opening, backstitch and sew around the perimeter using a 1/4″ seam allowance.
Stop at the opposite side of the opening and backstitch again.
Be sure to leave the marked section unsewn.

5. Clip the Curves
Make several small snips into the seam allowance along the inward curves of the paw shape.
Cut close to the stitching without cutting through it.
Clipping these areas allows the seam allowance to spread when the paw is turned and helps the curves lie more smoothly.
Alternatively you can cut around the entire perimeter with a pinking shears.
6. Turn the Paw Right Side Out
Carefully turn the entire pattern weight right side out through the opening.
Use a your fingers or a chopsitck (or similar tool) to gently push out the curves.
Don’t worry about getting it completely flat. Once the weighted beads are added, the paw will naturally take on a little shape.

7. Add the Weighted Beads
Fill the paw print with approximately 1 cup of weighted beads.
I use Fairfield World Poly-Pellets to fill these pattern weights.
Add enough that the paw feels full and plump, but not tightly stuffed. The beads should still be able to move around slightly inside.
That flexibility helps the pattern weight settle against the fabric and keeps it from feeling like a rigid beanbag.
A small funnel or rolled piece of paper can make this step much easier. Or use a spoon!

8. Close the Opening
Turn the raw edges of the opening approximately 1/4″ toward the inside and pin or clip them together.
Hand sew the opening closed using a ladder stitch.
Your paw print pattern weight is finished!

Make a Whole Pack
One paw will hold down a smaller pattern piece, but this is definitely one of those projects where making multiples makes sense.
Use coordinating scraps to create a matching set, or give each paw its own fabric combination.
A handful scattered around the cutting table makes it easy to hold down larger sewing patterns without stopping to pin everything in place.
And apparently, when no one is looking, they may also wander across the cutting table on their own.
Tips for Making Fabric Pattern Weights
Choose fabric with some grip.
Very slick fabrics can slide around on top of paper patterns. Quilting cotton, felt, fleece, denim, and canvas are all good choices.
Don’t overfill them.
A slightly flexible pattern weight sits flatter against the pattern than one packed completely solid.
Use scraps.
The pieces are small enough that you probably already have plenty of fabric options in your scrap bin.
Glue the paw pieces first.
A basic school glue stick is one of my favorite ways to temporarily hold pieces together before sewing.
Make several at once.
Once you’re already cutting paw pieces, it’s hardly any more work to create a whole set. Plus, a set of four is extra cute.
Can I Sew the Pattern Weights by Hand?
Yes! A sewing machine makes this a very quick project but the entire paw print pattern weight can be sewn by hand.
Use a small running stitch or backstitch to attach the paw pieces and construct the outer edge. Finish the filling opening with a ladder stitch as described above.
What Can I Use to Fill Pattern Weights?
Weighted plastic beads such as Poly-Pellets work especially well because they create a substantial weight while still allowing the finished project to remain flexible.
Each of these paw print weights uses approximately 1 cup of weighted beads.
The goal isn’t to stuff the paw completely solid. You want enough weight to hold your sewing pattern securely while still allowing the beads to shift and settle against the surface.
More Scrap-Friendly Sewing Projects

Denim Plushies
Turn old jeans and denim scraps into soft toys with style. Play with denim details like belt loops and zippers.

Upcycled Denim Tote
Combine scraps into a one-of-a-kind tote that’s durable, stands on it’s own, and is fun to make.
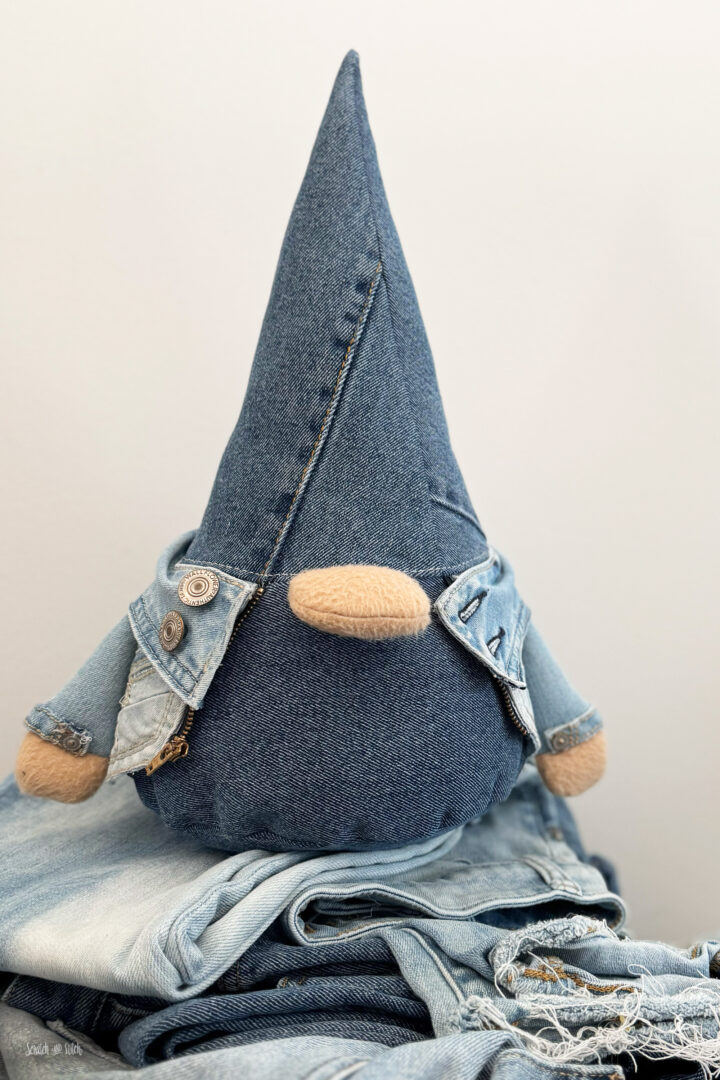
Cone Gnome Plush
Another beginner-friendly project that can use both fabric scraps and weighted beads.

More Sewing Projects
If your sewing room could use another little handmade helper, download the free paw print template and put some of those fabric scraps to work.
These are quick enough to sew in multiples, easy to customize, and much harder to lose on the cutting table when they look like a pack of paws.
Happy sewing!