This post may contain affiliate links.
Looking for a funny homemade Halloween costume? This DIY Butter Costume is made with upholstery foam, an old bedsheet, and a little fabric dye to create a giant, wearable stick of butter!
Every year, our son gets to choose the theme for our family Halloween costumes. This year, he picked Pun Bugs, which meant each of us needed to dress as a bug with a silly twist. Dad’s costume was a Butter Fly. Yes, a giant stick of butter with fly eyes, antennae, and wings!

All of our costumes are handmade (and have been for many years), and this year was no different. For the DIY Butter Costume, I wanted something that looked like a recognizable stick of salted butter but was lightweight, comfortable to wear, and made mostly from materials I already had on hand.
So I built a rectangular costume using 1/4-inch upholstery foam and covered it with a dyed and stenciled fabric wrapper. The foam provided the structure, while the fabric gave it the soft appearance of an actual stick of butter.
Keep reading for all the details on how I made this DIY Butter Costume and transformed it into a Butter Fly!
RELATED: See all three of our Pun Bugs, including the Snack Spider and Queen Bee, in the DIY Pun Bug Family Halloween Costumes post.
Materials for a DIY Butter Costume
This costume combines a few basic sewing supplies with materials you might not normally use for clothing. The upholstery foam is what gives the butter its shape, while a lightweight fabric covering creates the finished look.
Butter costume supplies:
- 1/4-inch upholstery foam (I got a 2 pack of this)
- Old beige bedsheet or lightweight cotton fabric
- Yellow Rit Dye
- Printable adhesive sheets for making a stencil
- Blue MTN 94 spray paint (I used Freedom blue)
- Sewing machine
- Coordinating thread
- Fabric scissors
- Measuring tape
- Fabric marking tools
- Basic sewing supplies
Additional Butter Fly accessories:
- Black baseball cap or similar hat
- One 4-inch Styrofoam ball (cut in half)
- Stretch holographic fabric
- Old fishnet stockings (or stretch mesh fabric)
- Thick black cord for antennae
- Two wire coat hangers
- Black fabric scraps or bias tape
- White tulle
- Hot glue gun and glue sticks
Upcycled and recycled materials: I used several repurposed materials for this project, including an old bedsheet, a pair of fishnet stockings, wire hangers, and leftover jersey fabric from a previous T-shirt resizing project.

How to Make a DIY Butter Costume
The basic butter costume is a long rectangular box made from thin upholstery foam that’s covered and lined with fabric. You can customize the dimensions to fit the person wearing it, but you’ll want to leave enough room for comfortable movement and for getting it on and off.
I worked on the fabric first, dyeing it before assembling the final costume.
Dye the Fabric Butter Yellow
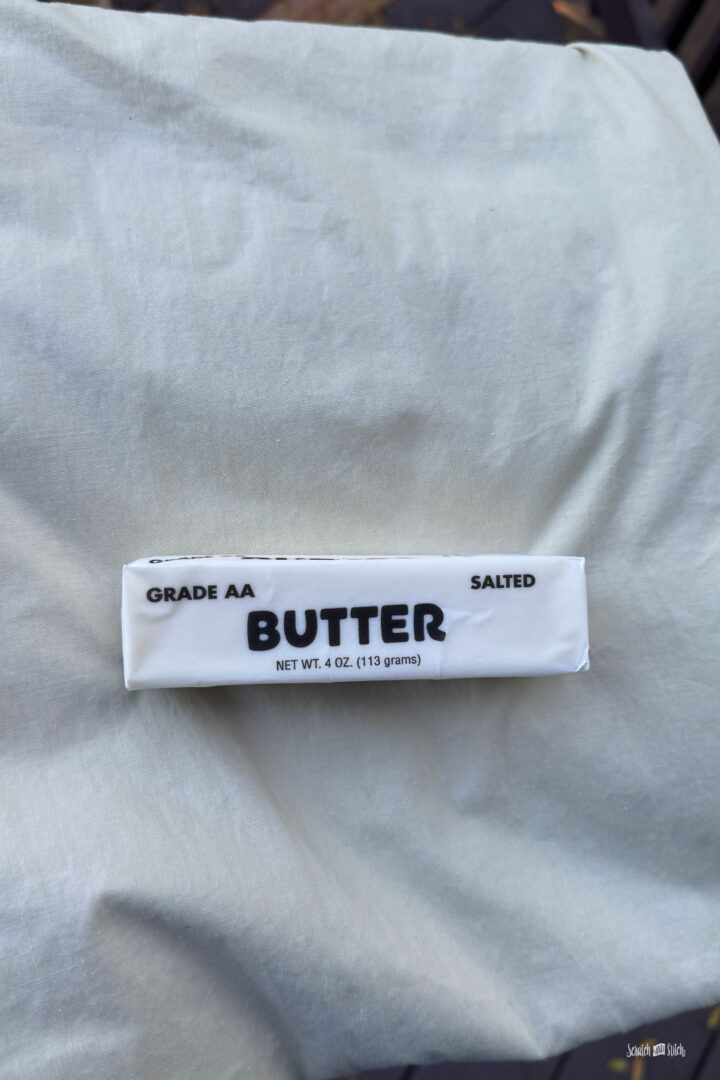
Getting the right color was one of the first challenges. I wanted the fabric to look like the pale, creamy yellow of real butter.
I had both an old white sheet and a light beige sheet on hand, plus half a bottle of yellow fabric dye. I decided the white sheet might turn out too pastel, so I opted for the beige sheet.
With just a couple of tablespoons of dye and the washing machine method, the fabric turned out to be the perfect shade of butter!
Create the Butter Shape with Upholstery Foam
Next, I made the structure of the butter costume using 1/4-inch upholstery foam. The goal was to create a tall rectangular butter shape with openings for the head and arms.
I chose upholstery foam because it’s flexible and lightweight but still has enough body to hold a rectangular shape. It also allowed me to make something that could move with the wearer rather than a rigid cardboard box.
I used two pieces of 1/4-inch × 24-inch × 72-inch upholstery foam.
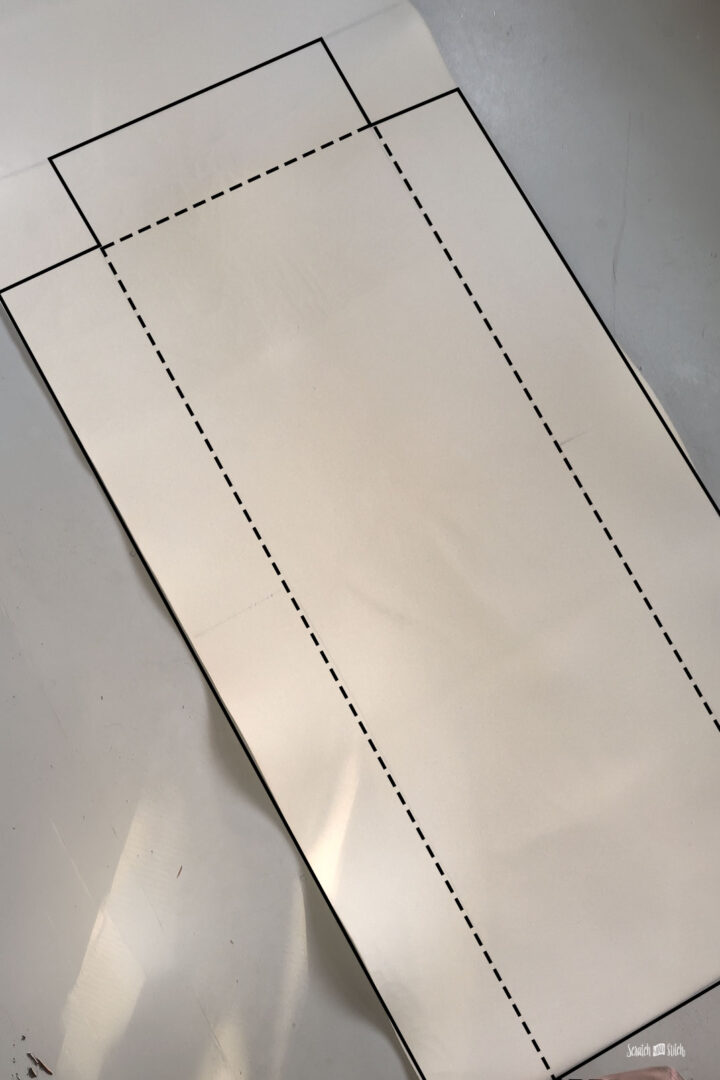
On both pieces of foam, I measured and marked a length of 52 inches, then cut them to size. Next, I marked lines 5 inches in from both long edges and one short end. I cut out two 5-inch squares from one end of each piece.
I then folded and clipped the foam along the marked lines and sewed with approximately a 1/4-inch seam allowance to create the squared sides. I brought the two corners together at the top, clipped them, and sewed those as well.

This created one side of the stick of butter. I repeated the process with the second piece of foam.
To connect the two sides, I turned the pieces wrong side out, matched and clipped the edges together, and sewed. Then I turned everything right side out, leaving me with a foam rectangle with one open end.
To create the head and arm openings, I cut ovals into the top and sides. After confirming that the foam structure could be worn comfortably, I reinforced the seams around the head and arm openings.

Make a Salted Butter Lettering Stencil
Before stenciling and sewing the fabric covering, I cut the fabric pieces to match the foam pieces.
To make the costume look like an actual wrapped stick of butter, I wanted the words SALTED BUTTER printed across the front and back. I could have added more details, but this did the trick!

To create the lettering stencil, I printed SALTED BUTTER onto adhesive paper, carefully cut out the letters, and arranged the stencil in the center of the front and back fabric panels.
Once the stencil was positioned on the dyed fabric, I grabbed a can of blue MTN 94 spray paint from my husband’s collection and lightly sprayed the lettering.
After removing the stencil and allowing the paint to dry, I had a custom butter wrapper ready to sew into the costume.

[VIDEO: Making and spray-painting the butter lettering stencil]
Make the Butter Fabric Covering and Lining
With the foam structure ready and the butter fabric dyed and stenciled, it was time to bring the two pieces together.
I sewed the fabric into a rectangular covering that fit over the foam structure, with matching openings for the head and arms.
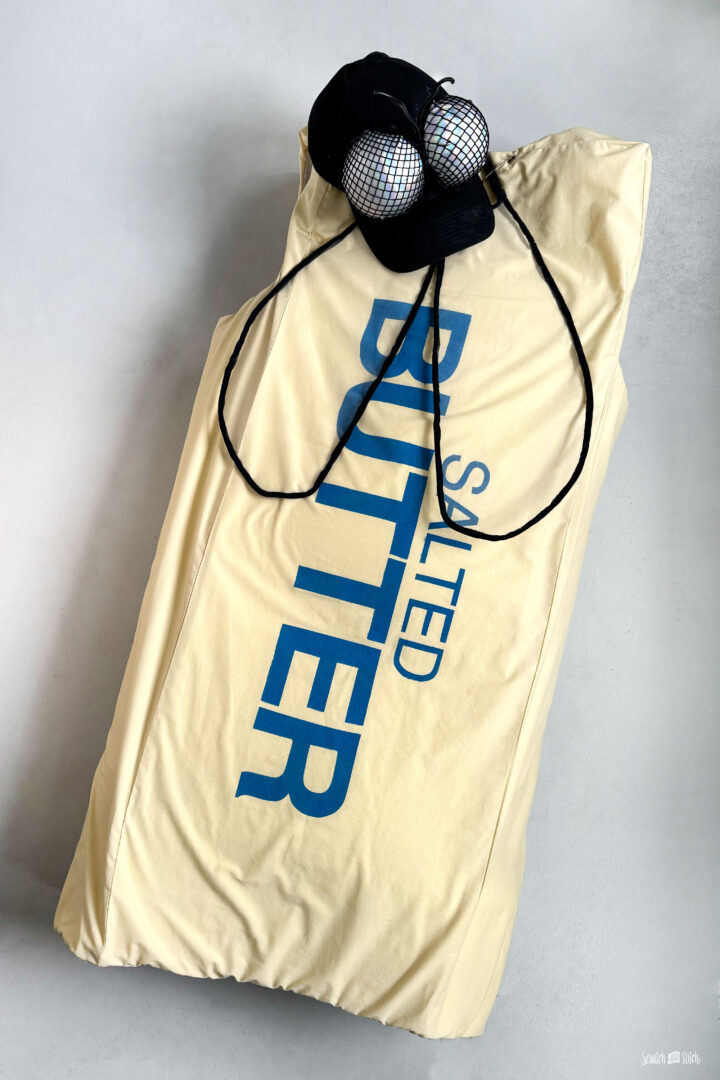
I also created a lining for the inside of the costume using fabric cut and sewn just like the outer covering.
To finish everything, I folded in the raw edges of the outer covering and lining, then hand-sewed them together to completely encase the foam.
And the DIY Butter Costume was complete!
[VIDEO: Sewing and assembling the fabric butter costume]
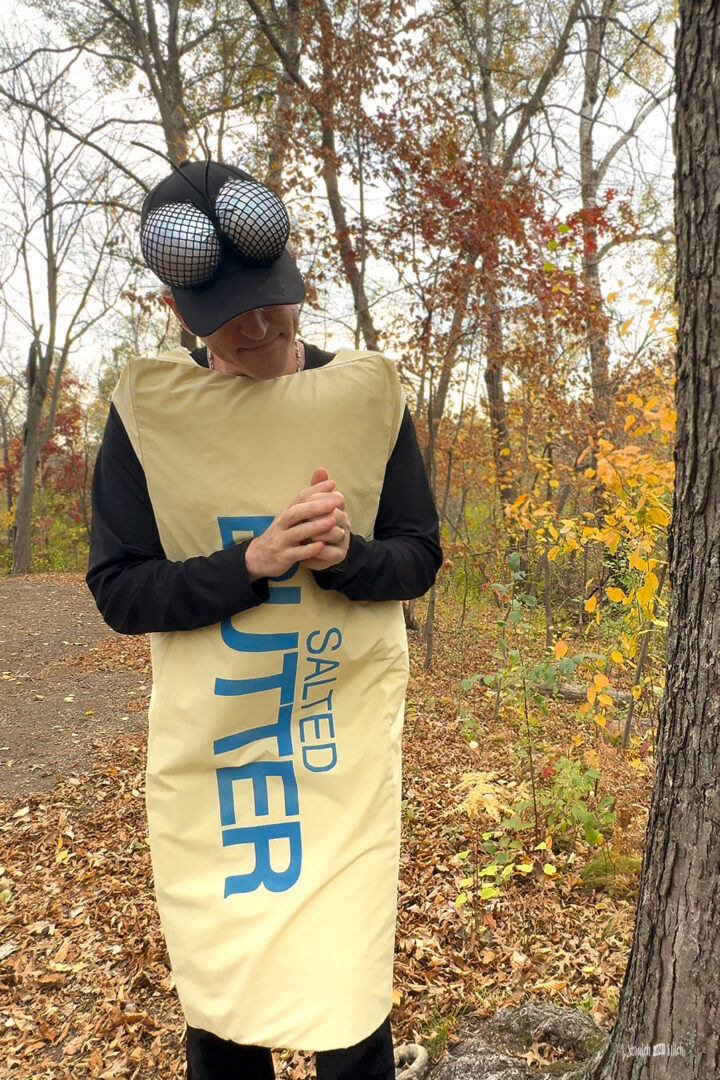
Optional: Turn the Butter Costume into a Butter Fly
For our family’s Pun Bugs theme, a stick of butter wasn’t quite enough. We needed to turn it into a Butter Fly!
To make the transformation, I added handmade oversized fly eyes and antennae to a black hat, along with a lightweight pair of wings.
Most of the materials were things I already had around the studio, including some old fishnet stockings, wire coat hangers, and leftover fabric scraps.
Make Oversized Fly Eyes from a Styrofoam Ball
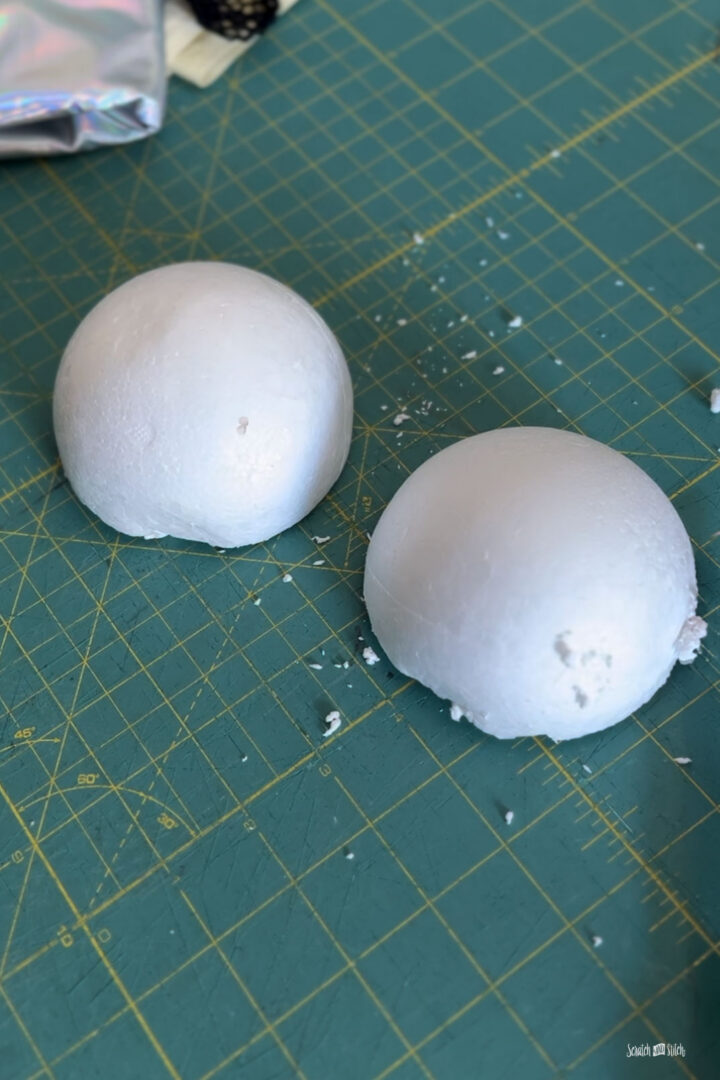
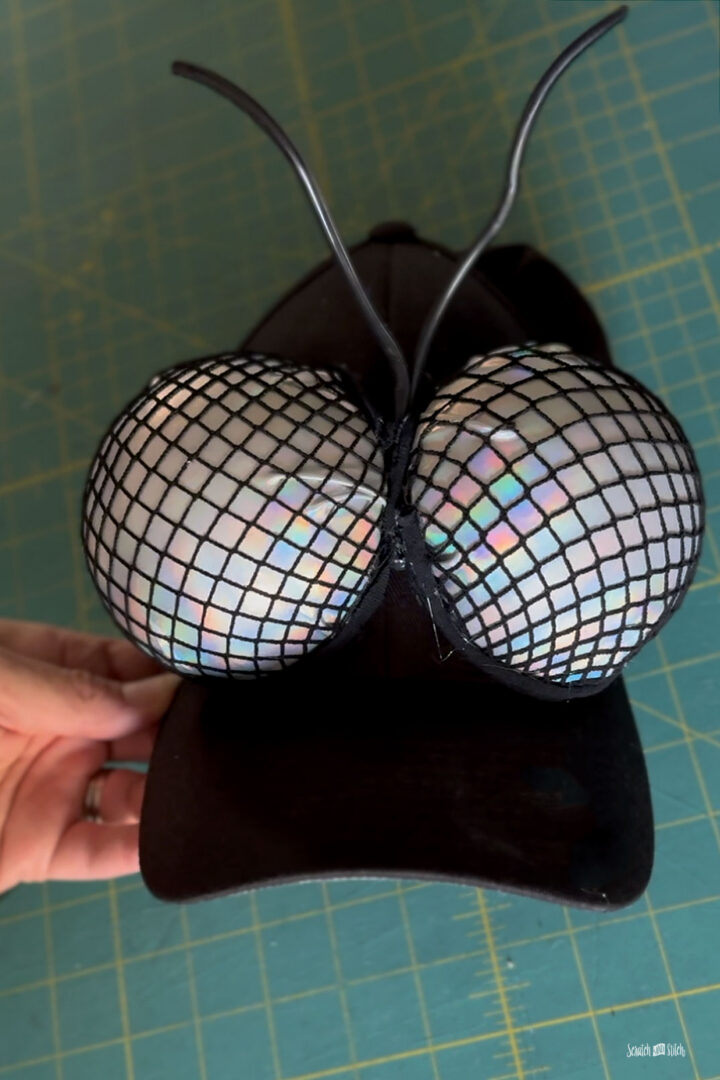
Starting with a 4-inch Styrofoam ball cut in half, I covered each piece with stretch holographic fabric, then layered an old fishnet stocking over the top. Both eyes were hot-glued to an old black baseball cap.
I added a strip of black jersey fabric around the base of the eyes to cover the edges. Next, I added two pieces of heavy black cord as antennae.
The finished fly hat was a simple way to create an oversized insect head without making a separate mask.
[VIDEO: Making the DIY fly eyes and attaching them to the hat]
Make DIY Fly Wings from Wire Hangers
This isn’t the first pair of DIY wings I’ve made from wire hangers for a Halloween costume, and it probably won’t be the last!
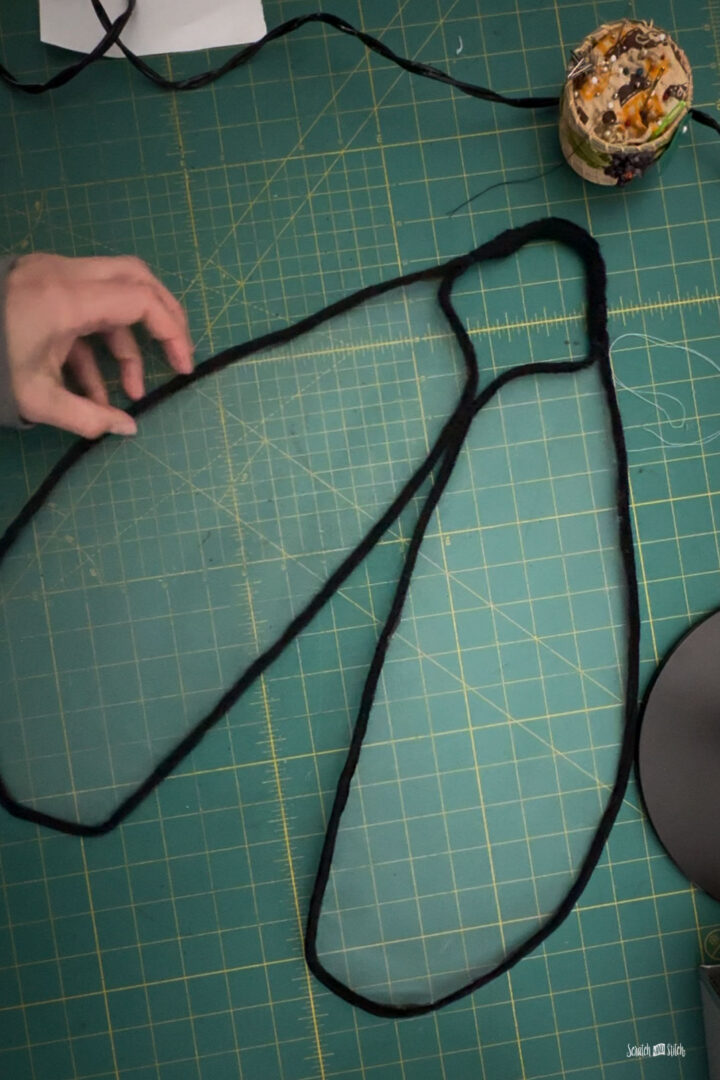
Using two wire hangers, I bent them into the shape of fly wings. Next, I hot-glued a piece of white tulle to each wing. Finally, I hot-glued a strip of stretchy jersey fabric around the perimeter of each wing.
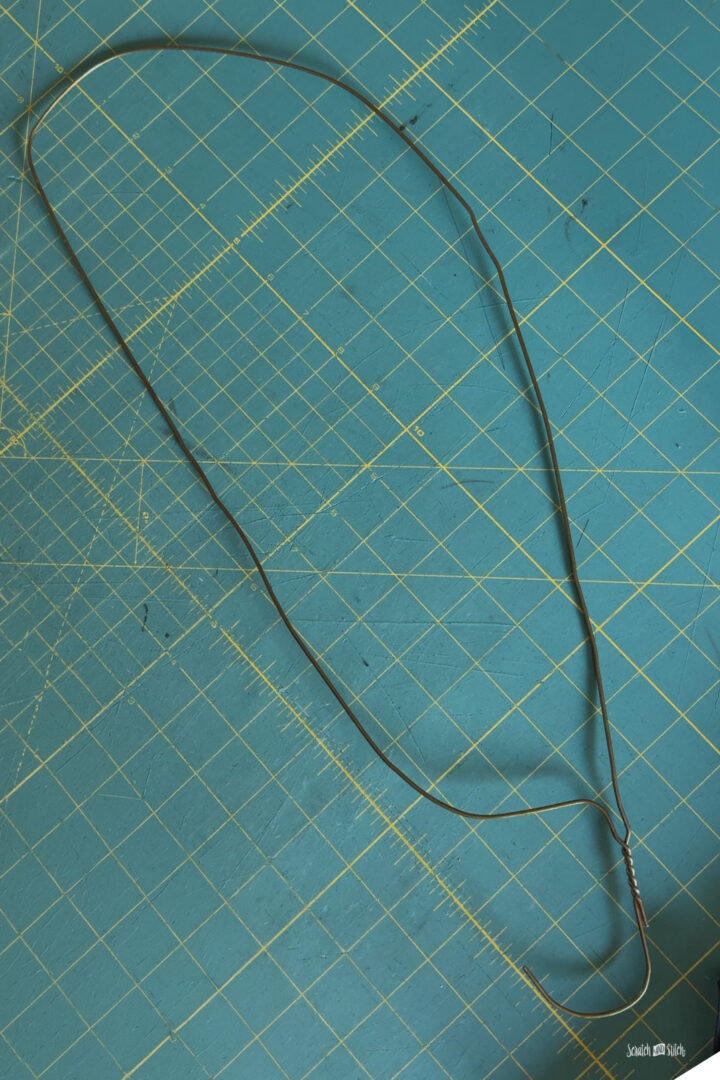
I connected the two wings at the hanger hooks and where the frames touched near the center, creating one set of wings.
The wings were simply safety-pinned to the back of the Butter Costume.
[VIDEO: Constructing the fly wings]
Put Together the Butter Fly Costume
With the butter costume, fly hat, and wings finished, it was time to put everything together.
We layered the butter costume, wings, and fly-eye hat over a black long-sleeve shirt and black pants to bring the whole look together.
It was definitely one of the more unusual costumes I’ve made, but that’s part of the fun of letting our son choose our family Halloween theme each year!

Tips for Making a DIY Butter Costume
Here are a few things I learned from making this costume that are worth considering if you’re making your own stick of butter:
- 1/4-inch foam for the win! I had some 1/2-inch foam, but it was just too thick to wear. The 1/4-inch foam was the best option for providing structure without the bulk and rigidity of a cardboard box.
- Test your fabric dye first. Starting with beige fabric helped create the soft butter-yellow color I wanted. Different fabrics and dye concentrations will produce different results. Here’s a link to the Rit Dye color formulas.
- Adhesive stencils work best! Using an adhesive stencil helped prevent overspray, keeping the letters crisp and straight.
- Test for comfort and fit. Make sure the head and arm openings are large enough for comfortable movement and for getting the costume on and off. Test the fit multiple times during construction.
- Use what you have. An old bedsheet, leftover fabric scraps, and a few repurposed craft supplies helped keep this project practical and inexpensive.
Although I made this costume as a stick of butter, the same basic foam construction technique could be adapted for many other rectangular costumes. Minecraft costume, anyone?!?
Our Family’s Pun Bug Halloween Costumes
Meet the Butter Fly, the Queen Bee, and the Snack Spider!

More DIY Halloween Costume Ideas
If you’re looking for more homemade Halloween costume inspiration, check out these other projects:
- Easy DIY Spider Costume for Kids
- DIY My Singing Monsters Family Halloween Costumes
- DIY Queen Bee and Beekeeper Costume
- More DIY Family Halloween Costume Ideas
Whether you’re sewing a costume from scratch, repurposing old clothing, or experimenting with unexpected materials, Halloween is a great opportunity to get creative without breaking the bank.
Happy Halloween!