
This post may contain affiliate links.
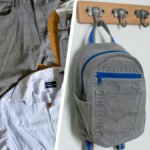
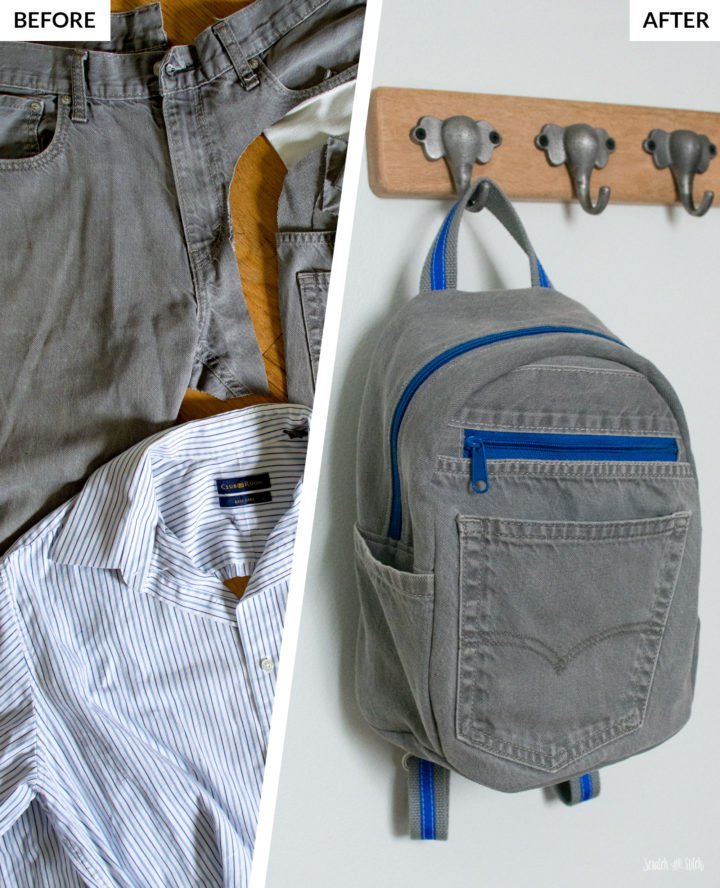
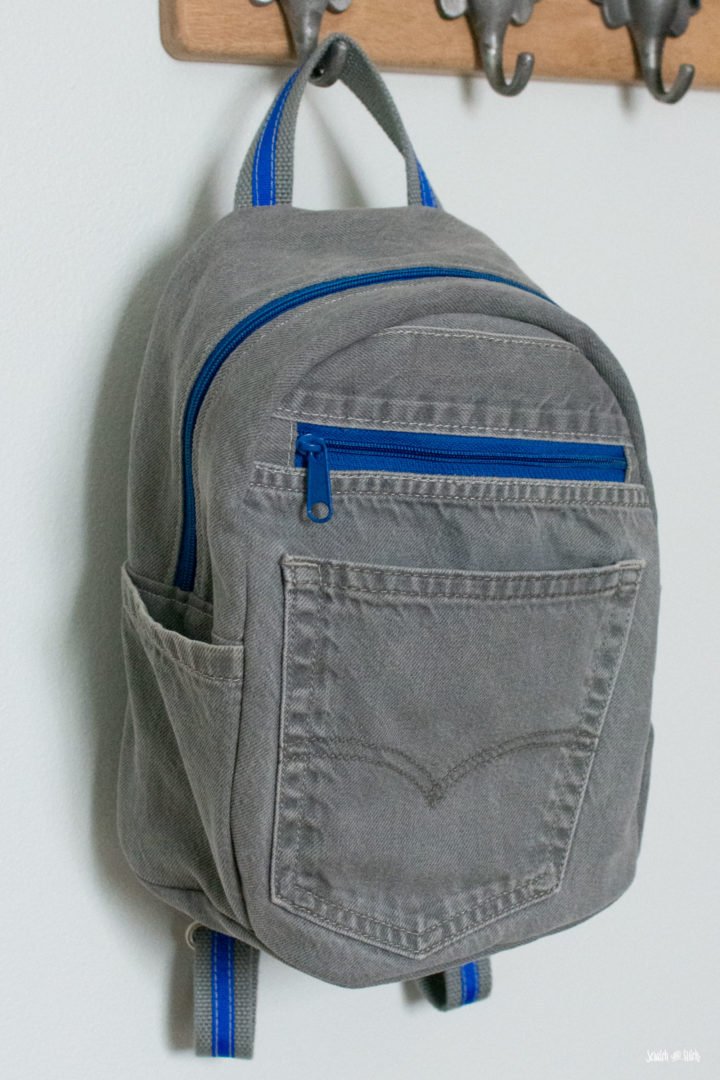
When my husband gave me an old pair of gray Levis, I instantly knew I would be upcycling those jeans into a bag. The interior of the backpack would be made out of an old button shirt of his too. It was the perfect opportunity to create a small toddler backpack upcycled from Daddy’s old clothes. First I needed to find a small backpack sewing pattern.
Using a Small Backpack Sewing Pattern to create a Toddler Backpack out of Levi Jeans
I found this free small backpack pattern with tutorial by So Sew Easy that is just the right size for a toddler-sized backpack. The pattern and tutorial are super easy to follow and great for any level of sewer. Along with the free pattern there step-by-step videos to making the small backpack sewing pattern. I highly recommend it! There are a few variations to the pattern for the pockets and straps. However, I mostly followed the tutorial for assembly of this upcycled denim backpack.
Materials I Used with the Small Backpack Sewing Pattern
- gray denim Levi jeans (bag exterior)
- men’s button-up dress shirt (bag lining)
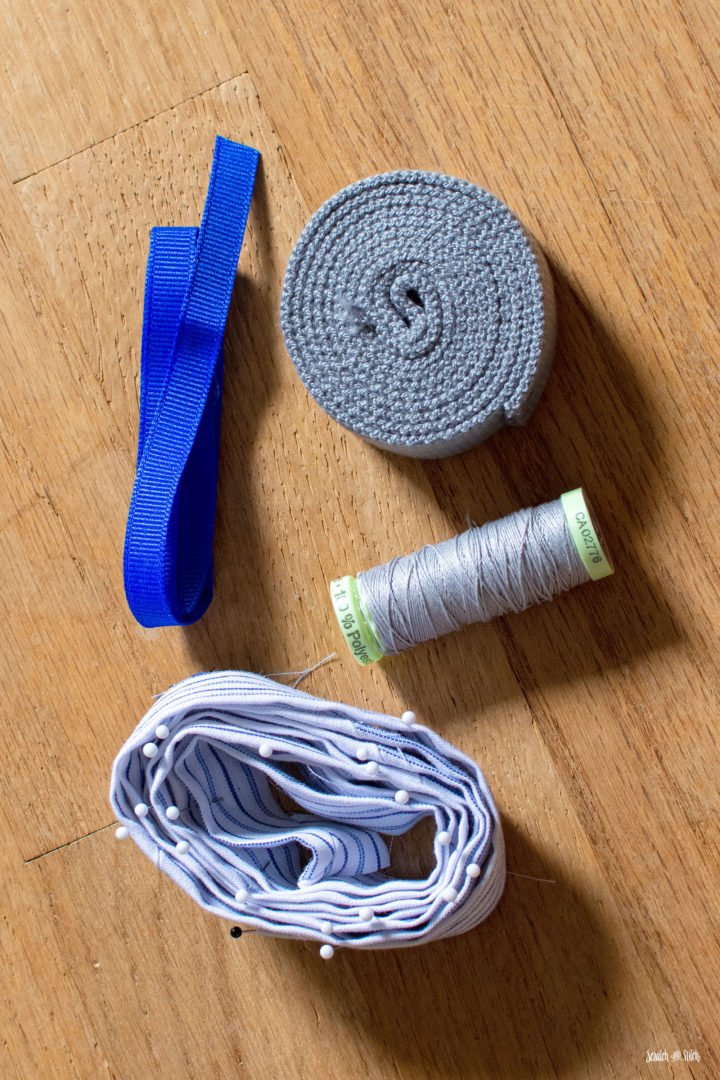
- 2 1/2 yards 1″ cotton strapping/webbing (for the straps and grab handle)
- 2 1/2 yards 1/2″ grosgrain ribbon (added as an accent on the straps and handle)
- heavy duty upholstery thread (for the denim layers and straps)
- regular weight coordinating thread (for the construction of the lining)
- medium – heavyweight fusible interfacing (like Pellon SF101)
- iron-on temporary fusible tape
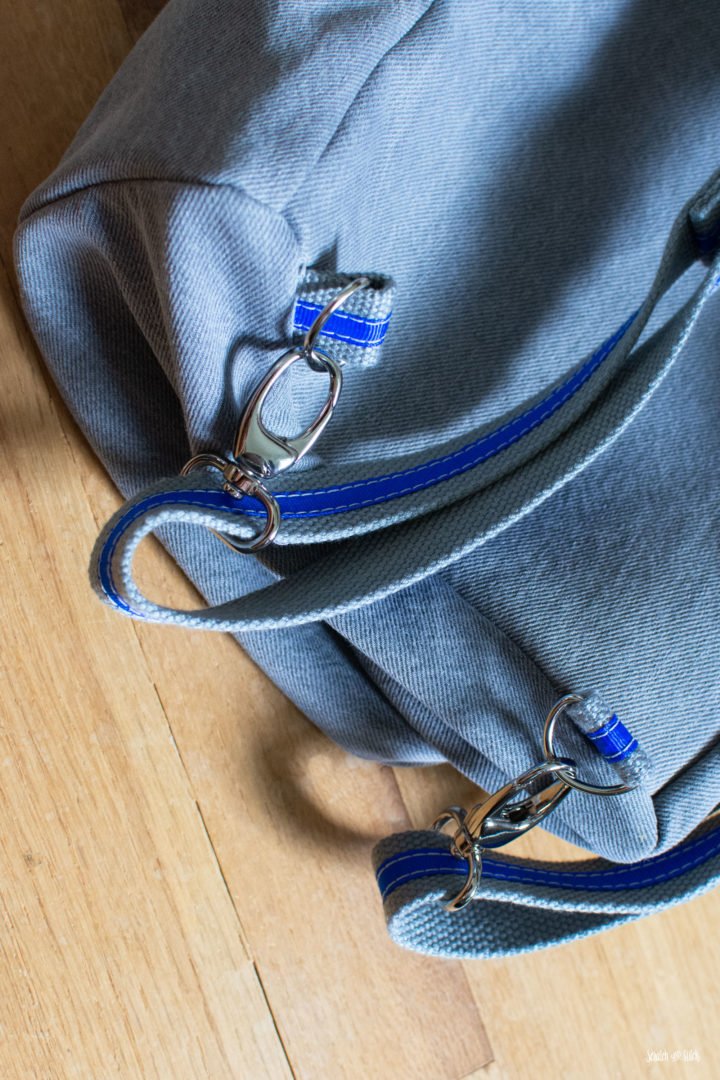
- 4 – 1″ D-ring
- 2 – 1″ lobster clasps
- 2 – 1″ adjustable sliders
- 2 – 40″ double zip polyester zippers (cut into 3 smaller zippers) (I like ByAnnie zippers)
- 2″ bias tape (cut from the men’s dress shirt)
Tri-Fold Toiletry Bag Sewing Pattern
The Hanging Toiletry Bag can be made using upcycled denim jeans. Using denim will create heavy-duty bag that will withstand the ware-and-tear of travel.
To get started on this upcycled denim backpack I printed and cut out the paper pattern. Before cutting into the jeans and shirt, I sketched out a plan for how to cut out the small backpack sewing pattern pieces from the fabric. Laying out the paper pattern pieces on the fabric also helped me decide where to cut each piece from.
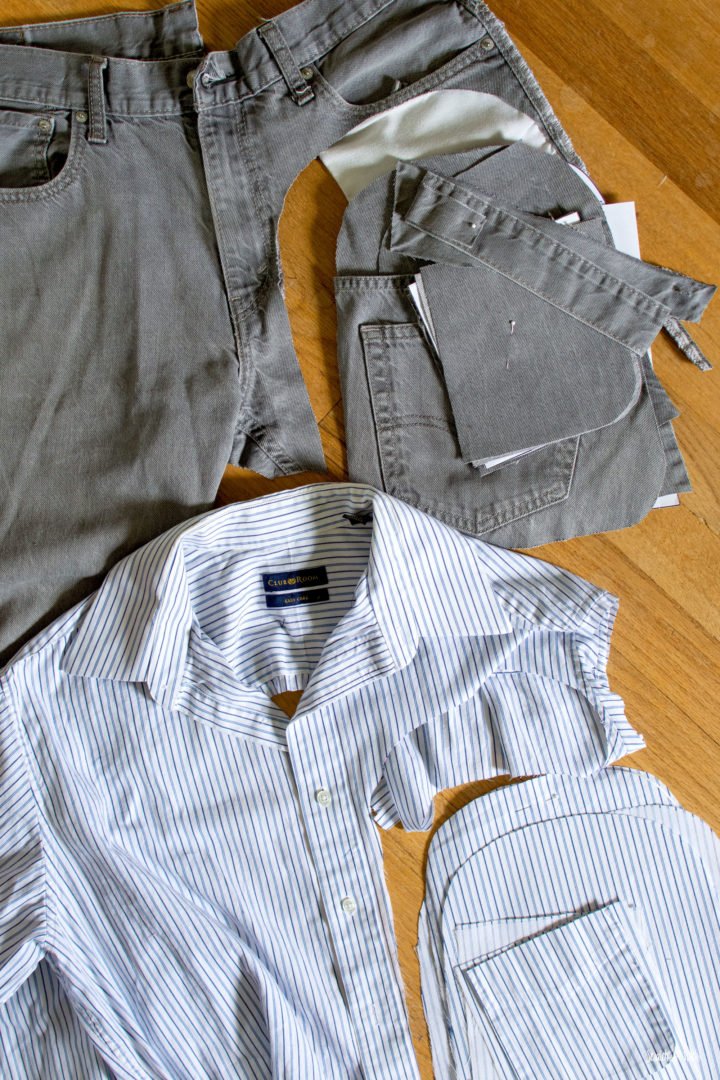
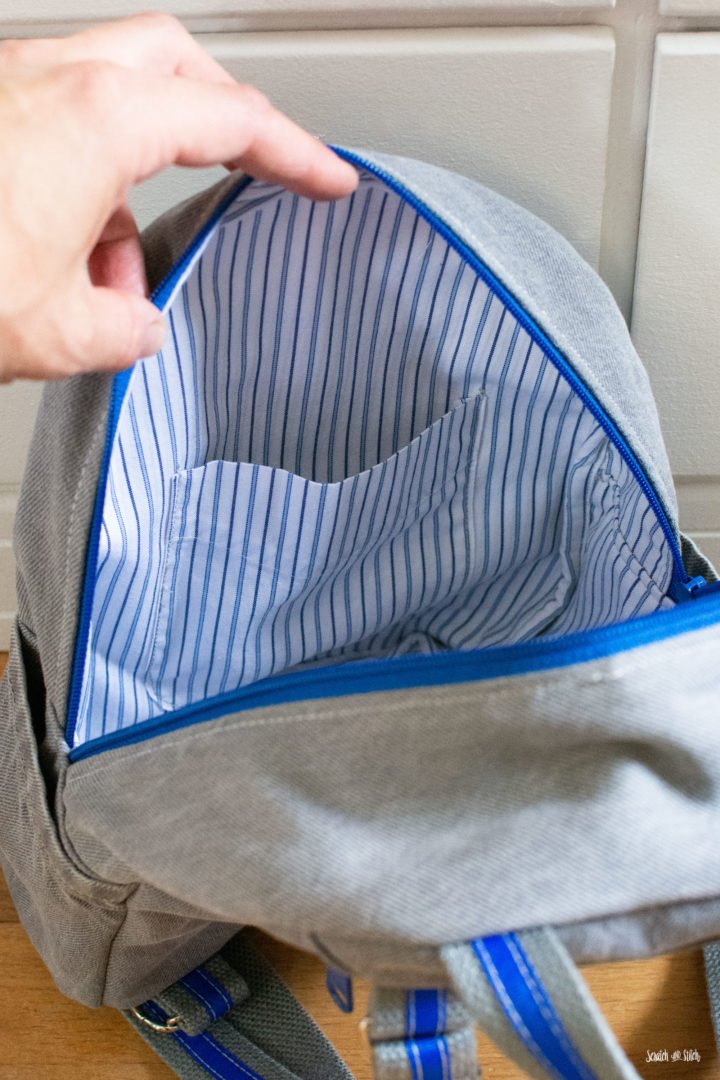
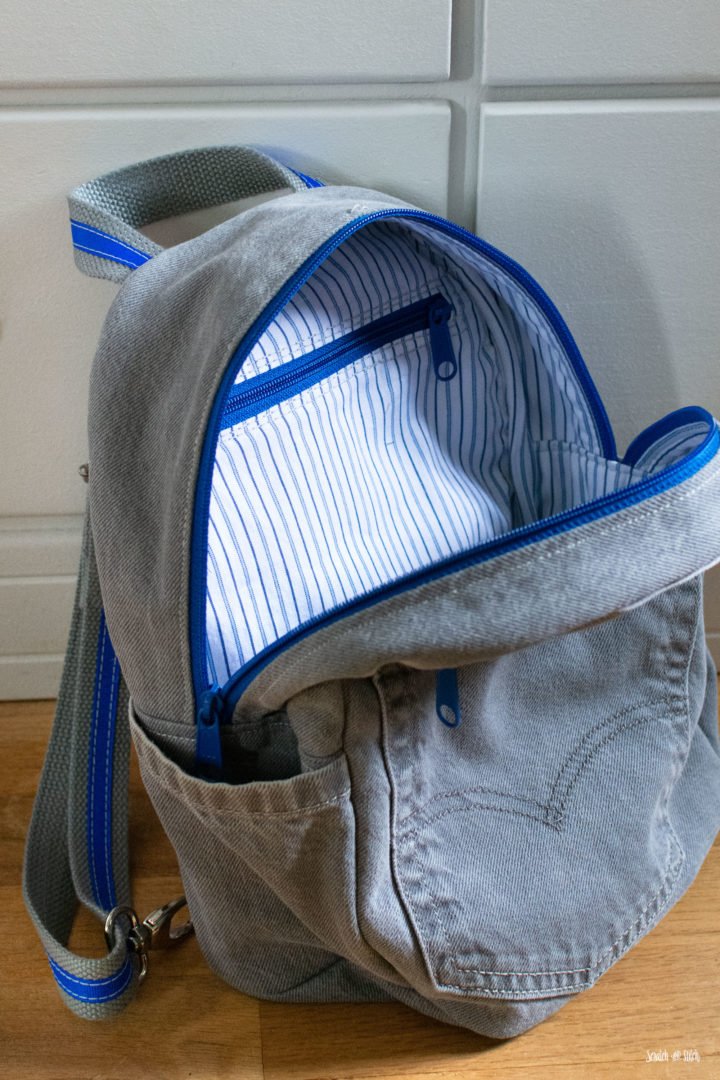
For the bag lining pieces cut from the dress shirt, I added fusible interfacing to give it more structure and reduce any stretching.
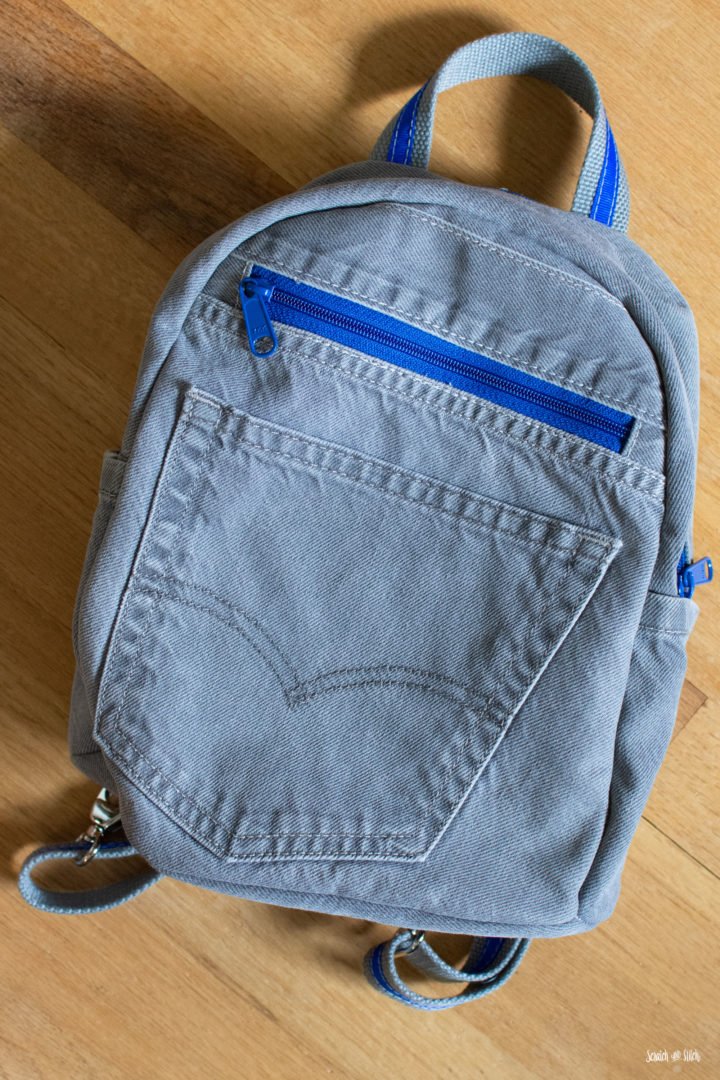
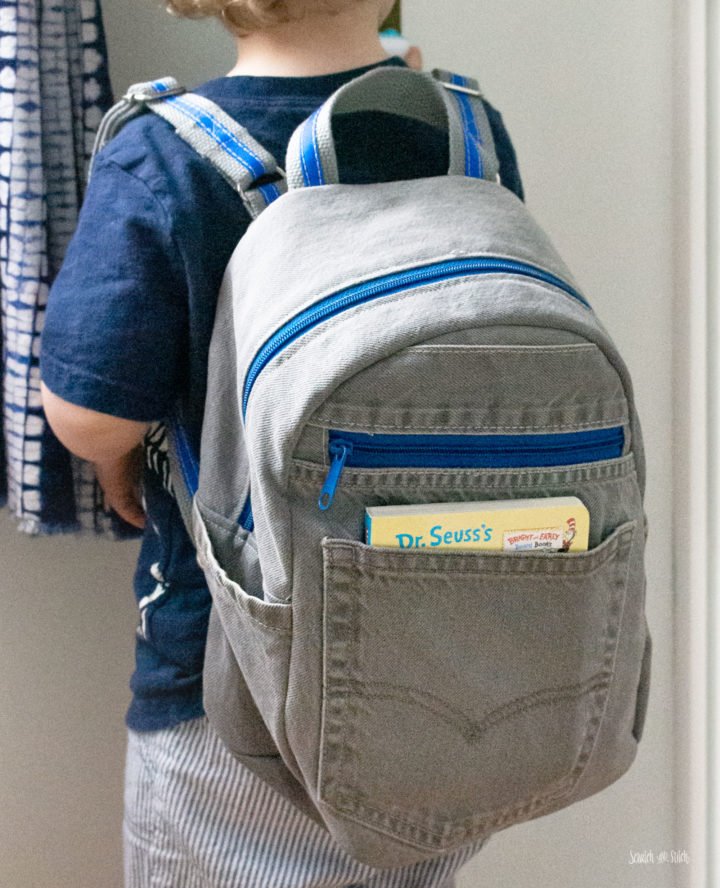
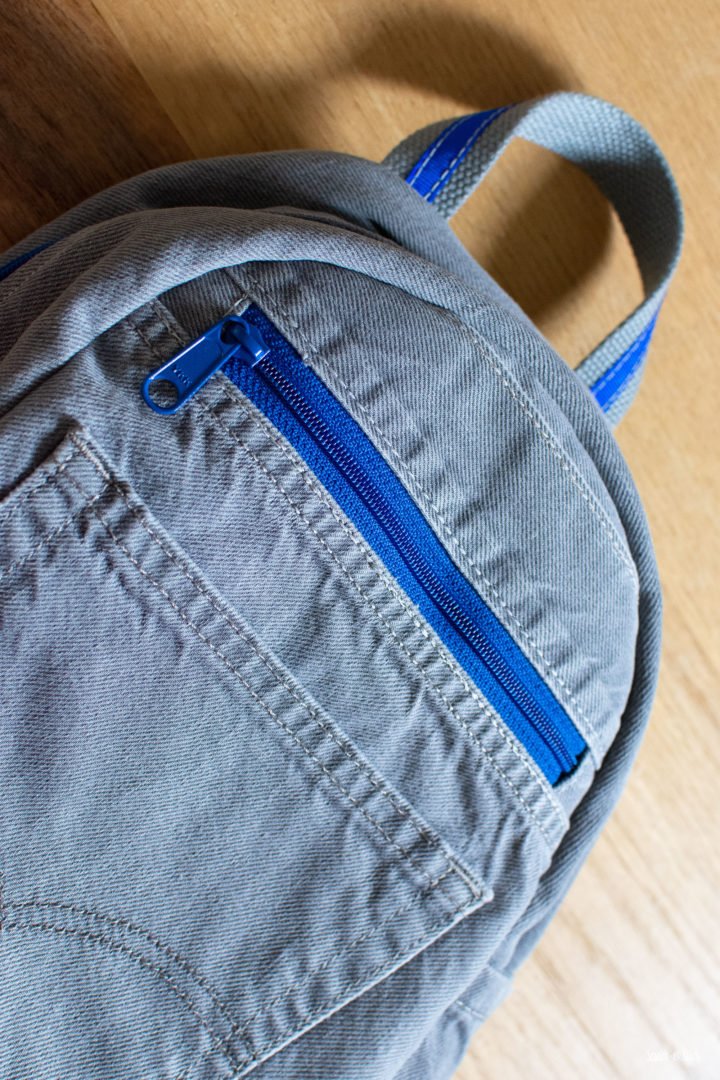
Instead of adding the pattern’s pocket to the front of the backpack, I used one of the back pockets from the jeans. Above the jeans pocket, I added a zipper pocket by piecing together several pieces of denim to create the front panel of the backpack. The front panel is backed with lining and a double layer of the dress shirt lining to create the pocket.
RELATED: See how I turned a pair of knee-high boots into a chic clutch purse.
I also added the existing shirt pocket to the interior for an extra slip pocket inside, the perfect size for a phone.
The exterior side pockets were cut from the bottom of the jean legs and are not lined.
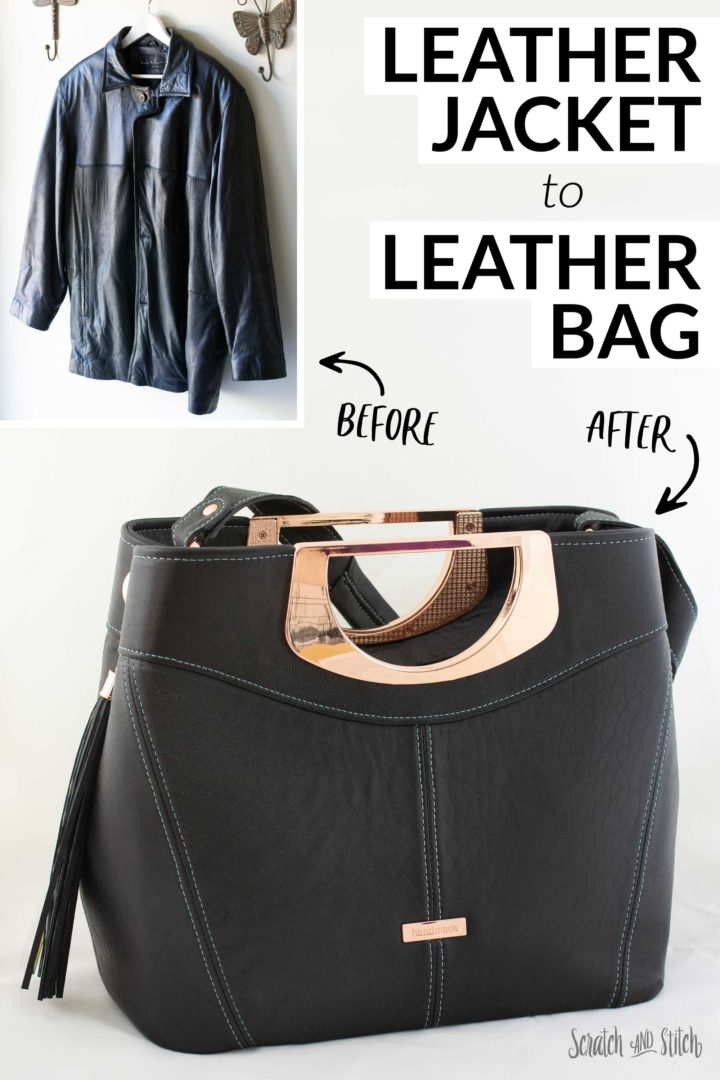
Upcycled Leather Jacket to Leather Handbag
See how your can turn an old leather jacket into a beautiful designer handbag.
For the back exterior zipper pocket, I followed the native small backpack sewing pattern tutorial.
To create the back panel interior pocket, I followed the same directions as the exterior back pocket on the back lining.
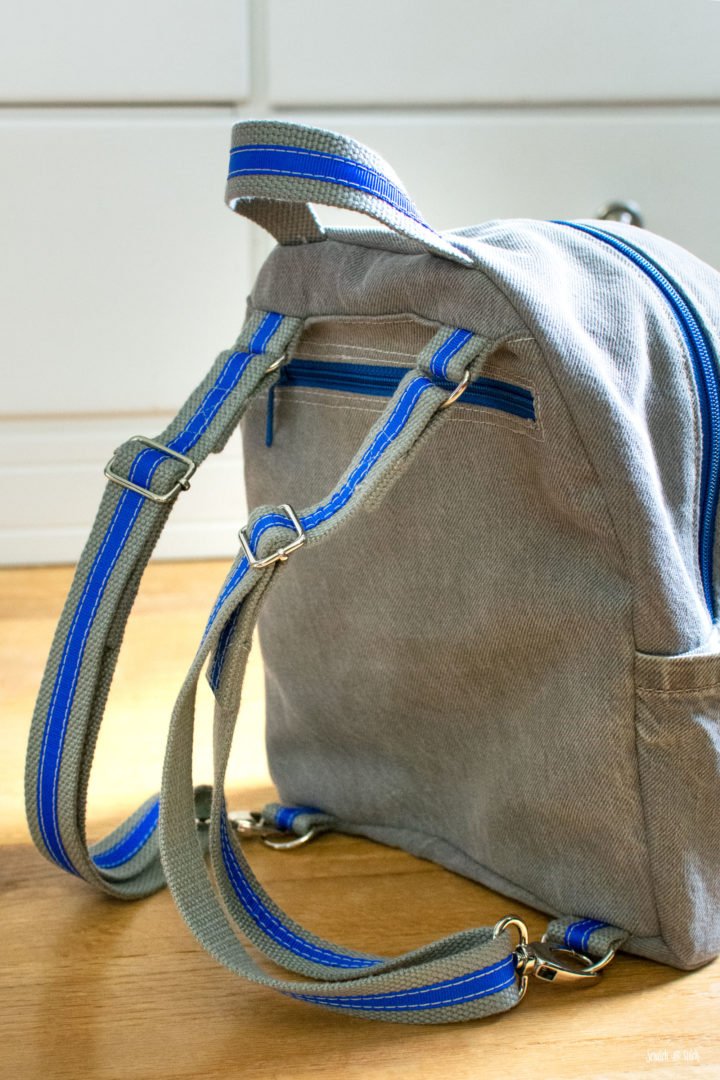
The straps are made from 1″ gray cotton webbing and lined down the center with grosgrain ribbon. I added a long stitch with upholstery thread to accent the topstitching. To keep the ribbon straight down the middle of the webbing, I used an iron-on temporary fusible tape before stitching. A glue stick would also work well for temporarily holding the ribbon to the webbing.
RELATED: Got denim? See more Upcycled Denim Project ideas here.
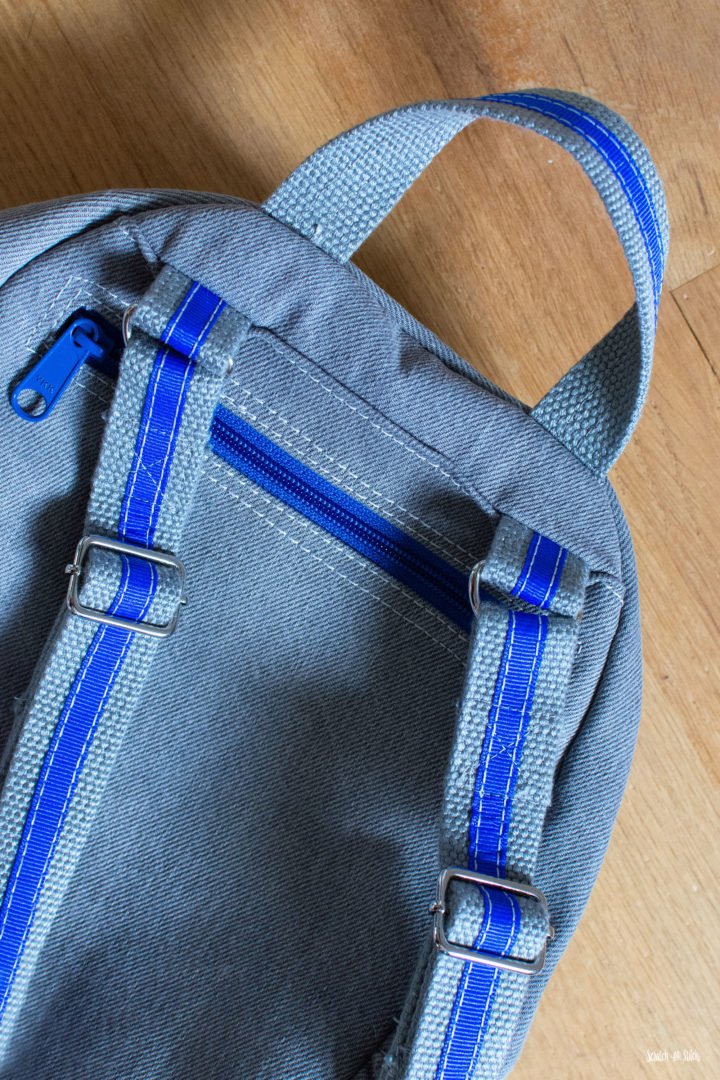
The top of the backpack straps are attached slightly different than the tutorial. I added a panel at the top of the back of the bag and secured the straps there between two layers of denim. I also added a small grab handle to the top of the small backpack sewing pattern.
I had just enough shirt fabric left to create bias tape to use as binding to finish the inside lining of the bag.
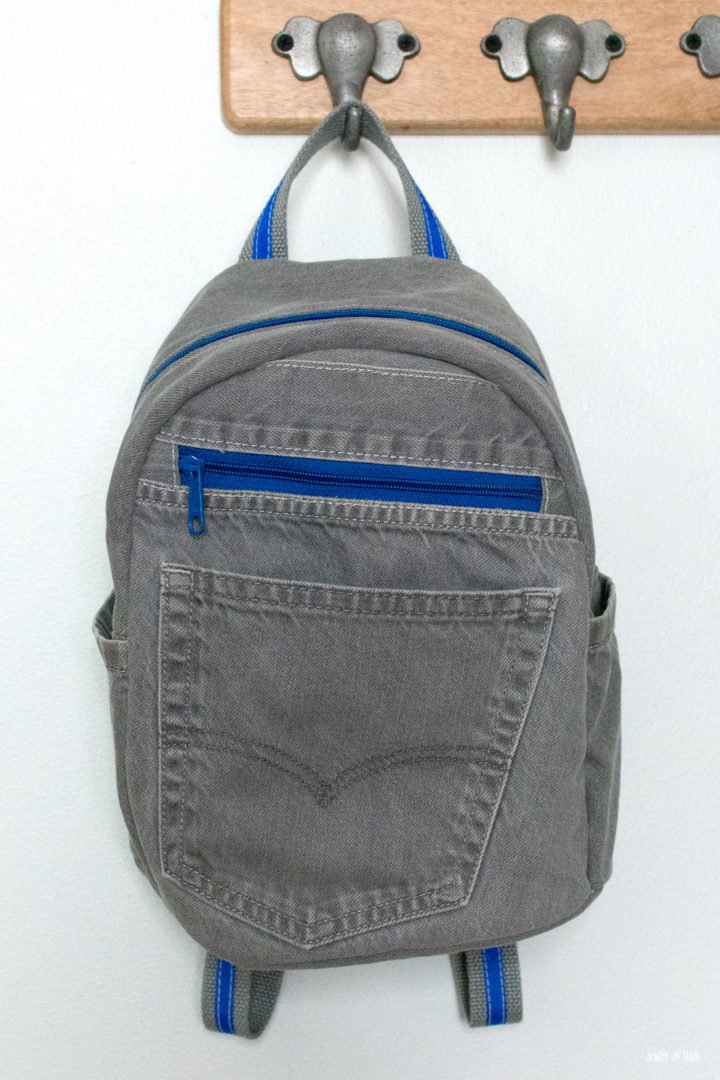
This small backpack is a great size to use as a toddler backpack with some room to grow. Upcycling the denim jeans created a sturdy bag that will withstand wear and tear. The button-up shirt for the inside gives it a light, soft interior.
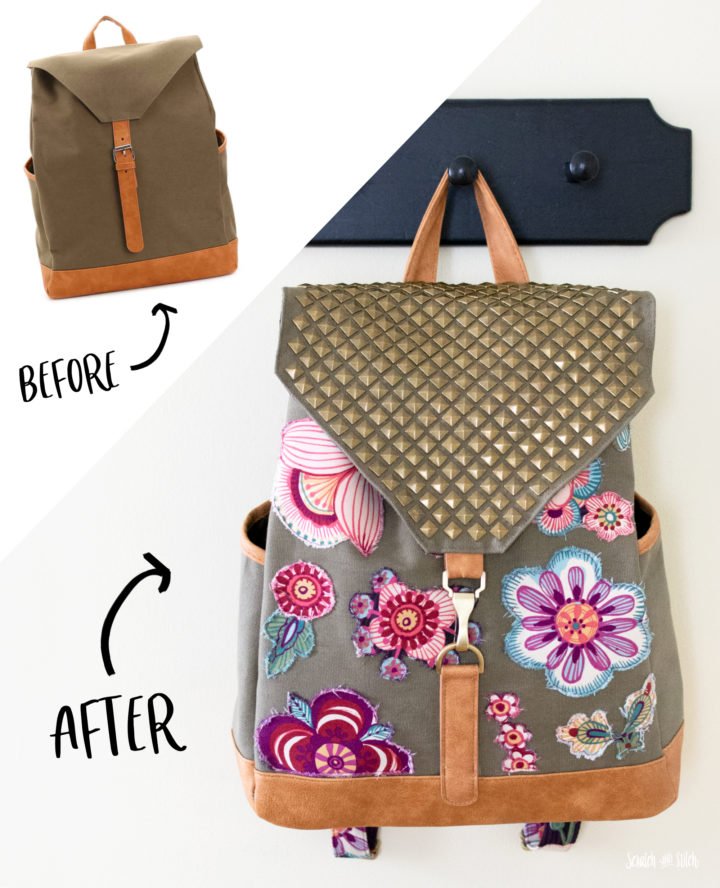
BACKPACK REFASHION
Get inspired to turn a plain bag into a statement piece. Learn to make your own fabric patches and easy ways to install metal studs.
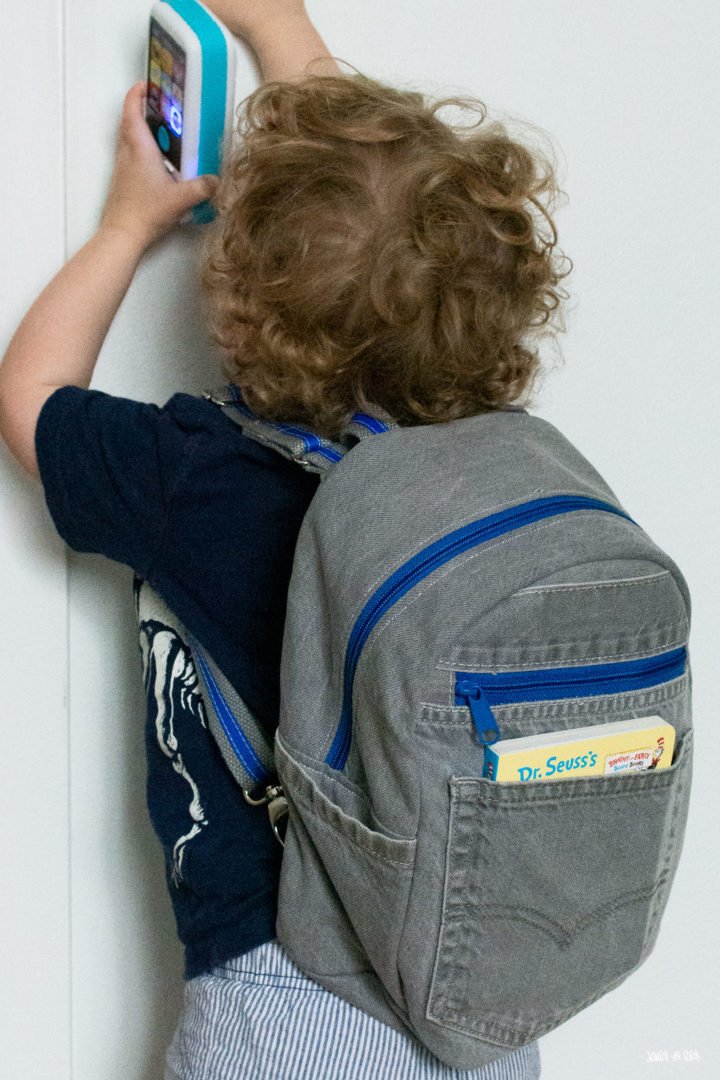
This upcycled denim project turned into the perfect backpack for my toddler. Now I need to refashion other clothes to use this small backpack sewing pattern for myself, so I don’t have to borrow his!
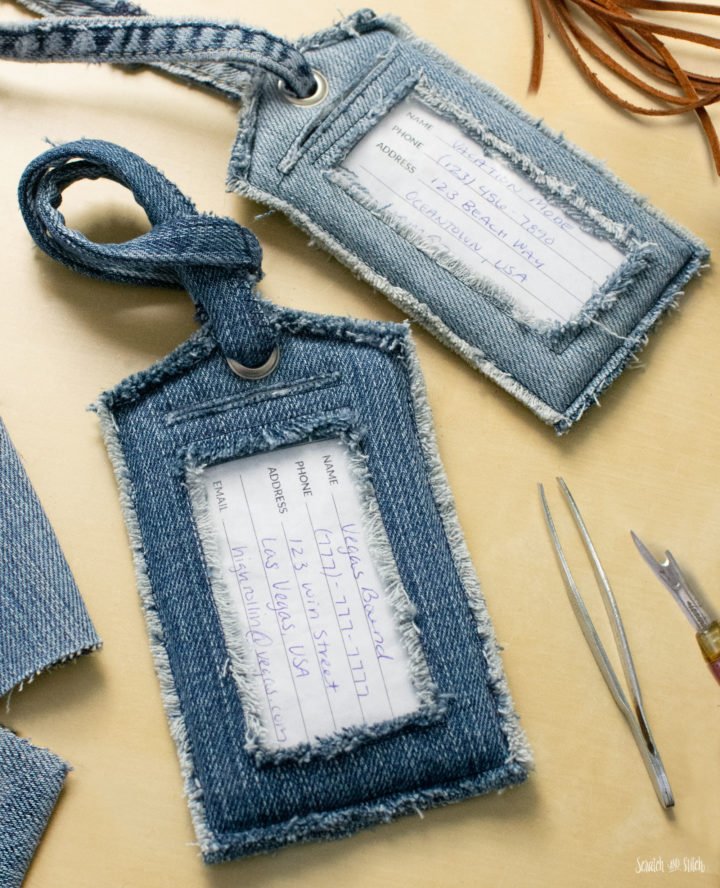
DENIM LUGGAGE TAGS WITH FREE SEWING PATTERN
Use up leftover denim scraps and make luggage tags to mark your bags. These DIY luggage tags will help your bags stand out from the rest of the bags.
Do you like to upcycle clothes? Check out my other refashions here.
love this backpack idea! why not make one instead of buying!!!
Right!?!?! And denim is so durable!
Very nice! Love it. Want to try it myself,but not very good at lining😢. So impressed you recycled things to make this backpack. Trying to do more of that myself. Saw a simpler backpack made by a young oriental girl. May try that one first as a warm-up. It didn’t have all the extra pockets or zippers and wasn’t lined. My husband ordered two long zippers from Amazon for me lol. One can always use an extra backpack.
I say you can never have too many backpacks! I get a lot of pleasure out of recycling clothes into something new. An easy way to line a bag is to attach the lining to the exterior fabric (either by basting or you can use a fusible adhesive product (like Heat n Bond), then finish the seams by covering with binding.
I think this is great. Will have a go my self. Very clever – Thankyou
Send pics! I would love to see how it turns out :)
is there a way (unless other wise) i can add length to the straps for an adult to use like myself but the bag itself can stay the same?
Absolutely! I can wear this backpack with this length when it’s at full length. It wouldn’t hurt to add length for an adult.
You did an amazing job!!!! This looks like it was bought at the Levi’s store!!! You did awesome matching the zipper and other royal blue elements.
That is such a kind comment. :) Thank you!
This looks absolutely brilliant !! how do you get pattern please
Hi Eleanor – Thanks! It’s a great bag and pattern. You can find the free backpack pattern here.
Would love to make one. Is there tutorial video on this.
It’s such a great bag! Yes, there is a video tutorial (several videos I believe) here.