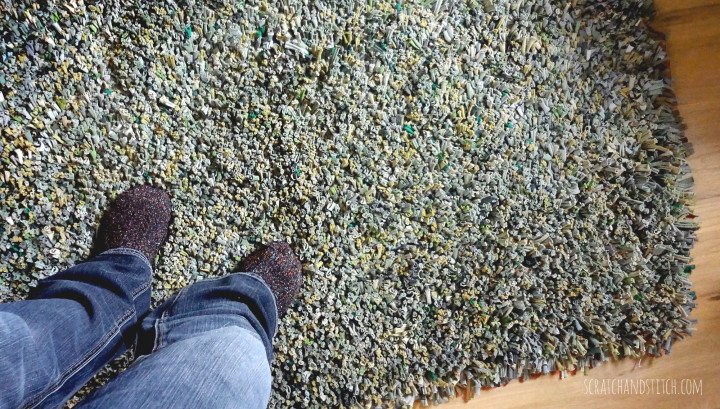
The t-shirt rug is probably the hardest, definitely the longest, and absolutely the most rewarding handmade project I’ve ever undertaken. This t-shirt rug uses around 80 shirts, cut into 14,000 1″ x 4″ strips, dyed into various shades of green, then latch-hooked to a 36″ x 60″ mesh rug canvas. Sound complicated? Not really. It just requires some time. :)
DIY No-Sew Rug Made with T-Shirts | Directions, Materials, & Tools
These are my tips, tricks, and recommendations for anyone wanting to learn how to make a t-shirt rug.
Use a Latch-hook Rug Canvas
Rug canvases come in various sizes and can be cut into any shape. I used a 36″ x 60″ mesh rug canvas.
How Many T-shirts for a T-Shirt Rug?
For a 3′ X 5′ t-shirt rug, I estimated that I needed at least 14,000 strips, which boiled down to about 80 large or x-large t-shirts. See below to figure out how many t-shirts you need for your rug. I sought-out garage sale and thrift store t-shirts that had minimal graphics in shades of green or any light color that would easily take on fabric dye. All shirts were washed and dried before cutting to ensure there would be no shrinkage later, and they’d be prepped to take on fabric dye.
T-shirts come in several different thicknesses and sizes. The thick cotton shirts make for thick strips that are harder to pull through the mesh canvas. I recommend going for large t-shirts that are thin and soft cotton jersey fabric that will be much easier to latch-hook.
How many t-shirt strips for a t-shirt rug?
Count the number of squares in the mesh canvas on two adjacent sides. Multiply those two numbers. This equals the total amount of squares. Divide that number in half to latch-hook every-other square.
Example:
- 40 squares wide, 40 squares tall
- 40 x 40 = 1,600
- 1,600 / 2 = 800
- At approximately 175 strips per large t-shirt, you’d need 4.5 shirts.
Rotary Cutter
Every crafter should own a good rotary cutter. Splurge on a good one with an ergonomic grip (trust me!). This tool is great for cutting many things from plastic to paper to fabric. I have this one.
Self-healing Cutting Mat
Another tool every maker should own is a self-healing cutting mat. Get a big one even if you don’t think you need it now because you will later.
Clear Ruler with Grid
You can find a clear ruler with the grid at fabric and sewing stores. This is a great set of clear grid rulers to have for multiple projects.
Fabric Dye
I love Rit-Dye’s liquid fabric dye. I used different combinations of Apple Green, Kelly Green, Dark Green, and Golden Yellow.
Latch-Hook
Two words for choosing a latch-hook tool: COMFORT GRIP! I started out with a cheap wooden-handled latch-hook and within the first few inches of the tshirt rug I went out and purchased a comfort grip latch-hook (like this one).
Needle-Nose Pliers
I thank my husband for this one! He handed me needle-nose pliers and I never looked back. The hardest part of the whole t-shirt rug project is pulling the strips tight. At first, I could only work on the project for short periods of time (30 minutes per session at most) because of the repetitive stress on my hands. With the needle-nose pliers, it wasn’t an issue.
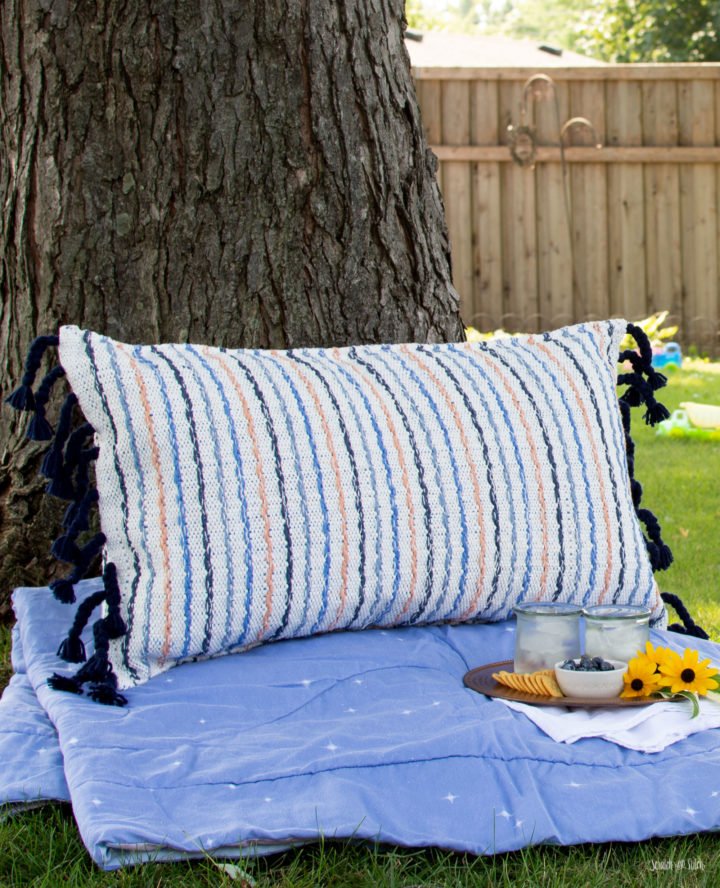
DIY Pillow made from Rugs
Make a pillowcase with two rugs. Makes a great pillow for outdoor use or a playroom.
How to Make a T-Shirt Rug
Now that you’ve gathered your tools and materials, let’s make a t-shirt rug.
Cutting T-shirts for a Rug
Like I mentioned above, for a large latch-hook t-shirt rug, you’ll need about 80 large to x-large t-shirts and approximately 14,000 1″ x 4″ strips. (See above for how to calculate how many t-shirts you need.)
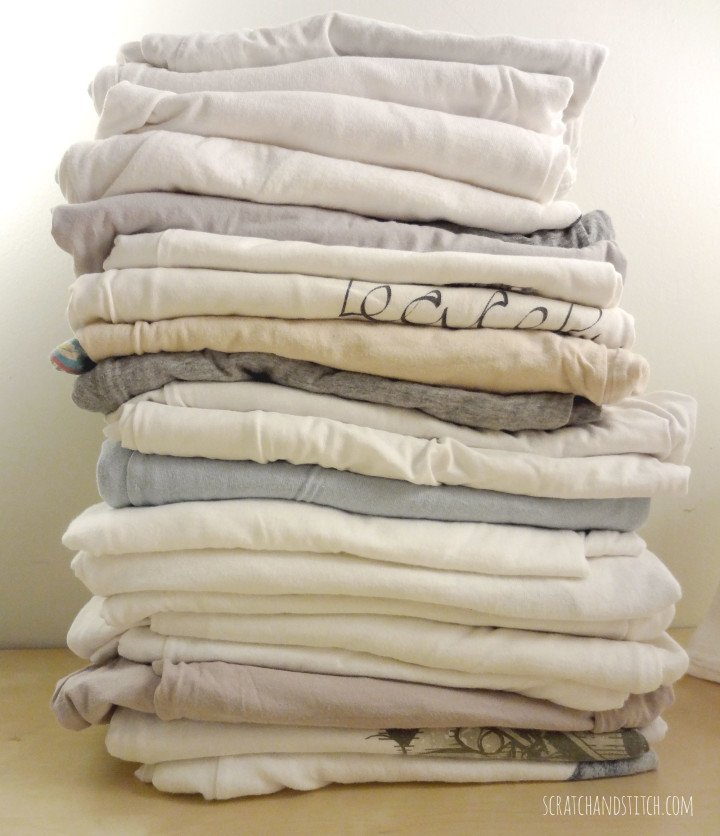
On your self-healing cutting mat, layout a shirt. Begin by cutting off the neck hole and sleeves. Using your ruler and rotary cutter, cut off the shirt’s bottom hem and the two sides. This will give you nice straight edges to work with. Starting at the bottom of the shirt, cut 1″ strips across all the way to the neckline.
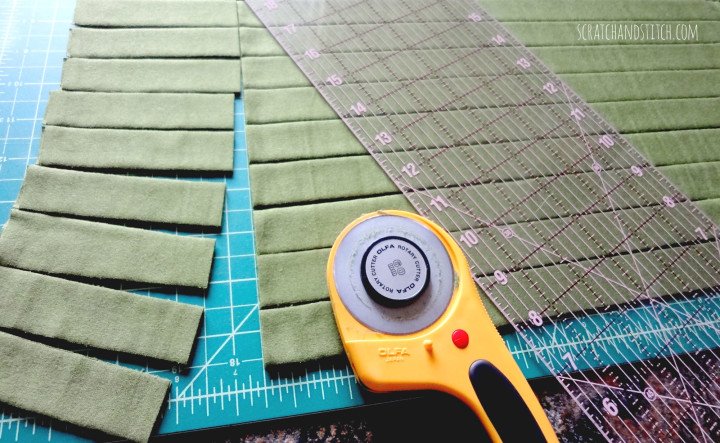
After that, turn your ruler 90º and cut every 4 inches. Cut off and discard any extra scraps.
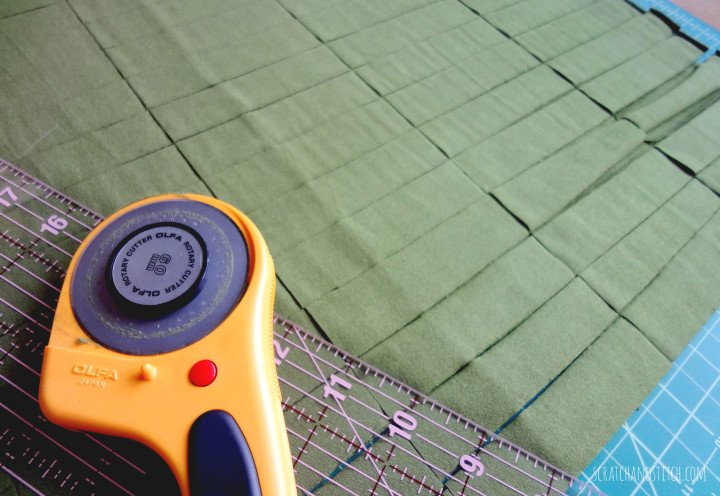
Different size t-shirts will provide different amounts of strips. Write down a rough count of how many strips each t-shirt provides. You’ll want to know this later, so you know when to stop cutting up shirts. Make sure to cut extra strips!
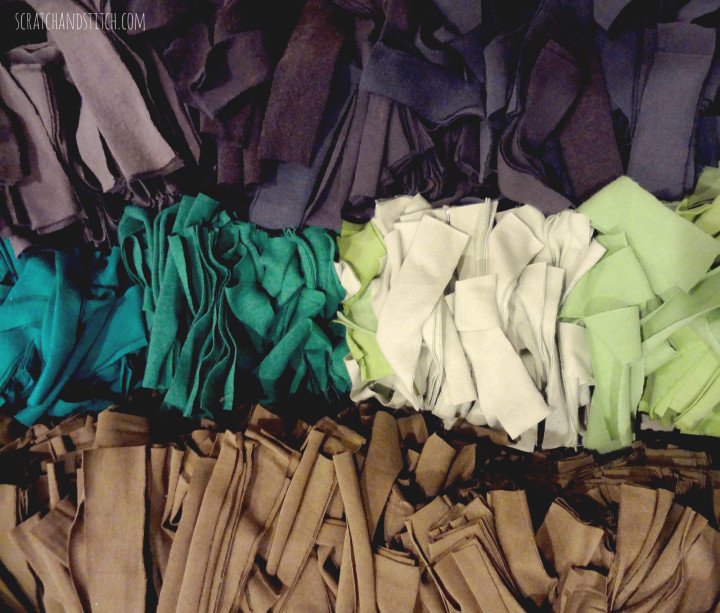
Dying T-Shirts for a Rug
Welcome back and congratulations, the hardest part of the t-shirt rug is complete!
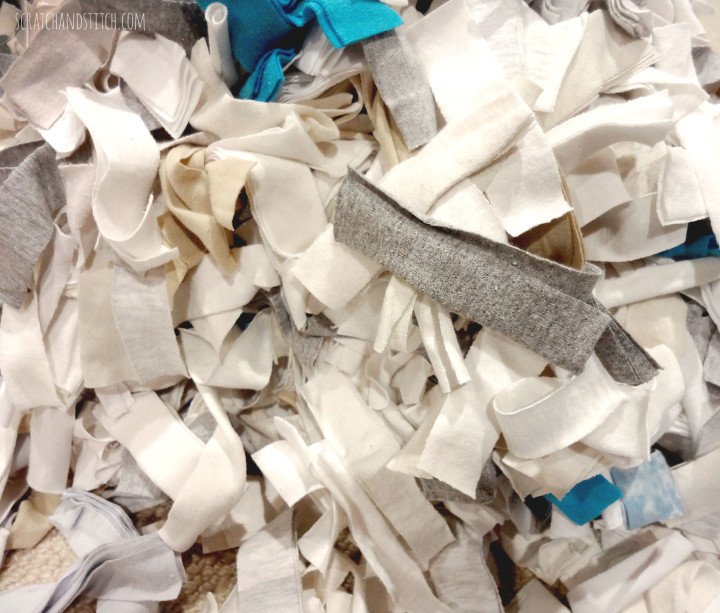
Mix up all of your strips so all the t-shirt fabrics, textures, and colors are evenly combined.
How to Dye T-Shirts with Fabric Dye
Soak your fabric in hot water before dyeing. Follow the fabric dyeing instructions included with your fabric dye as there is a certain ratio of fabric-to-dye that you’ll want to follow.
I weighed piles of t-shirts strips with a luggage scale in plastic bags and used the washing machine to dye the fabric.
I used Rit-Dye’s color formula chart to mix dyes to get the several shades of green.
After dyeing, dry the t-shirt strips in your clothes dryer to set the fabric dye.
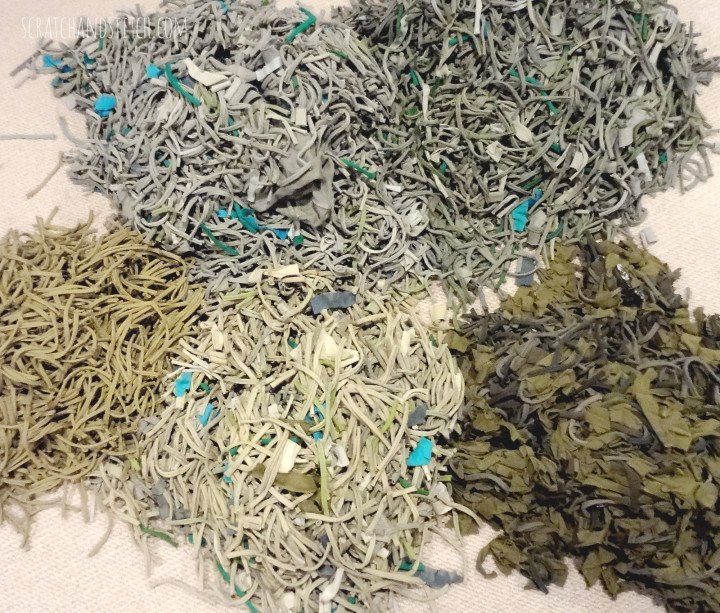
Remove any t-shirt strips that didn’t take the fabric dye or don’t curl the same. Mix all the strips together.
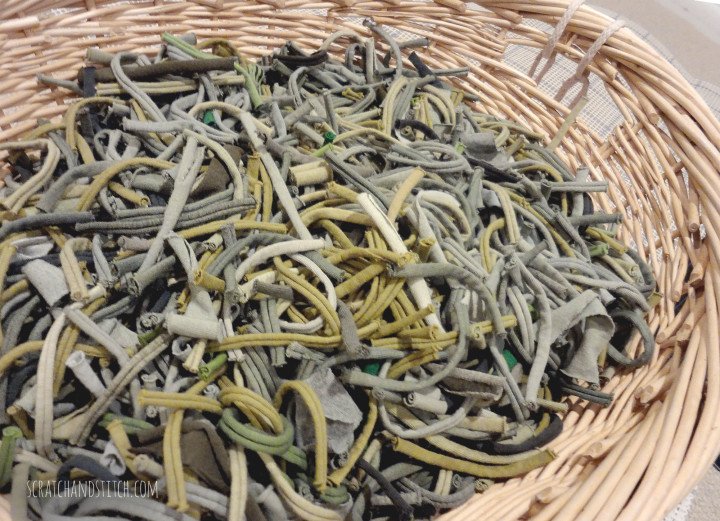
This is me at the beginning, settled on the floor in front of Netflix. This project pairs well with a binge of your favorite series!
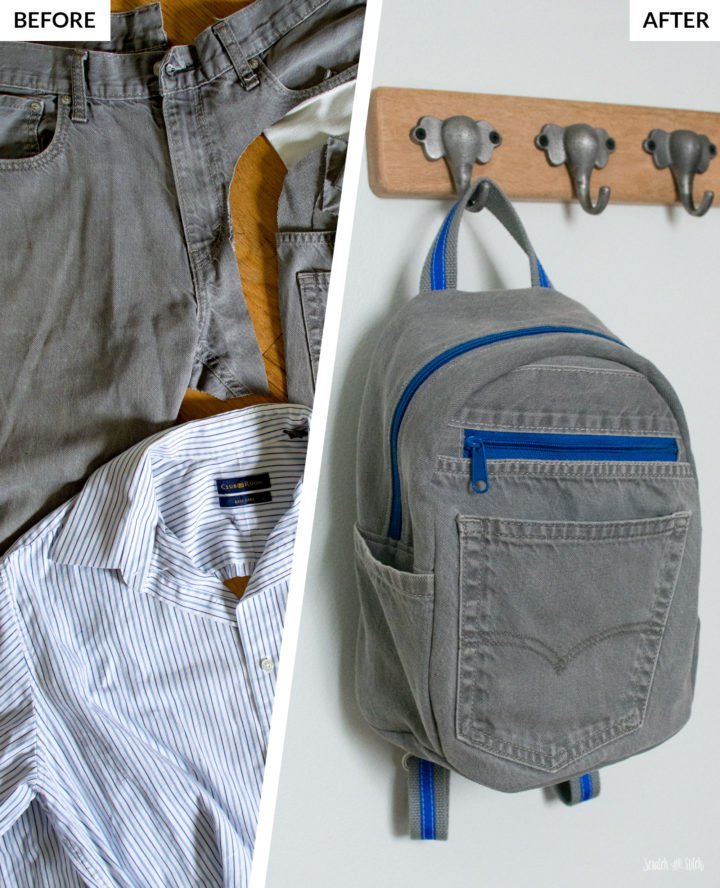
Upcycled Jeans to Backpack
Turn an old pair of jeans and a dress shirt into the perfect sized backpack.
How to Latch-Hook a T-Shirt Rug
The best method for the latch-hook t-shirt rug is to use every-other square. This will be plenty thick and much easier to work with than if you were to use every square of the mesh.
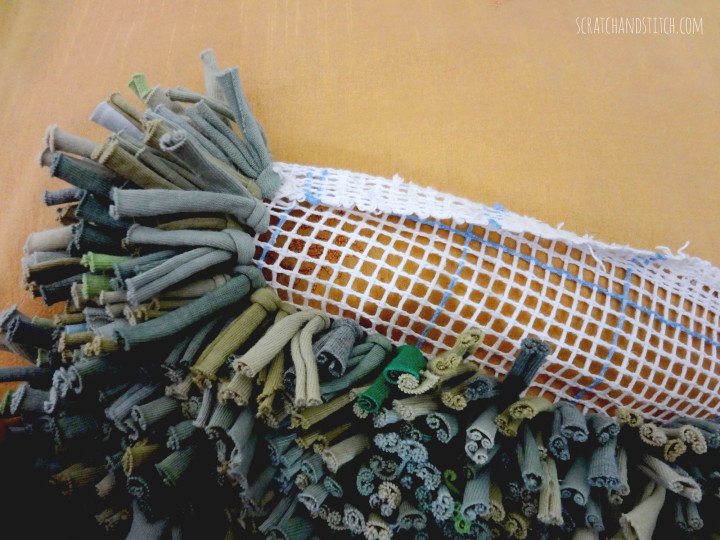
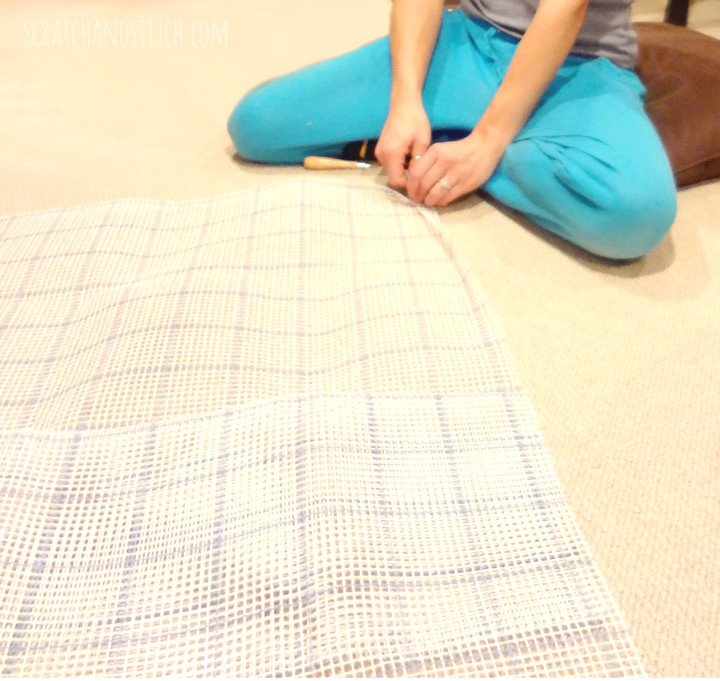
To begin, fold over the mesh canvas about 2″ on all edges to reinforce and give a nice sturdy border to the t-shirt rug.
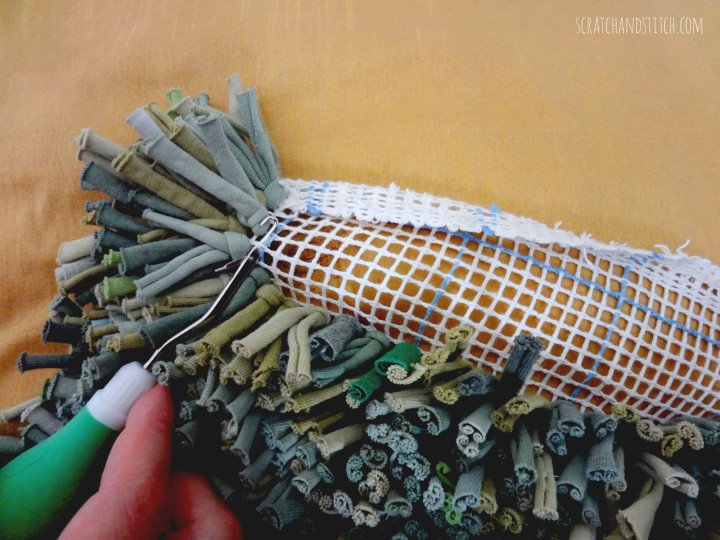
Push your latch-hook tool through a square.
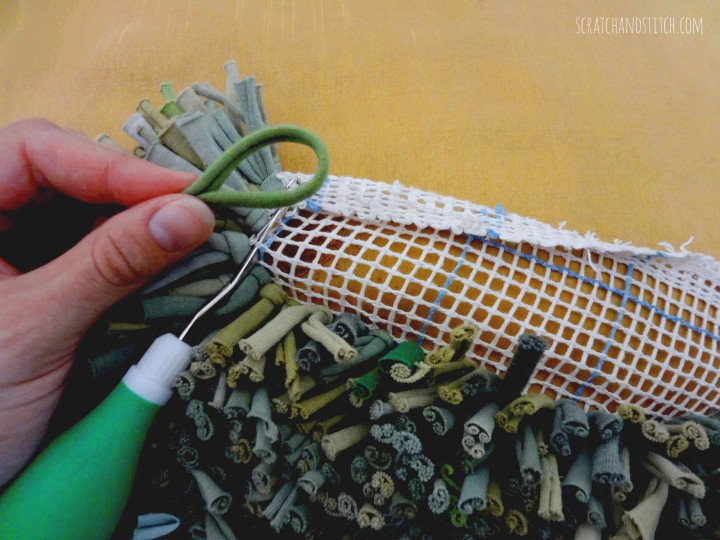
Grab a t-shirt strip and fold it in half.
Loop the t-shirt strip onto the hook end.
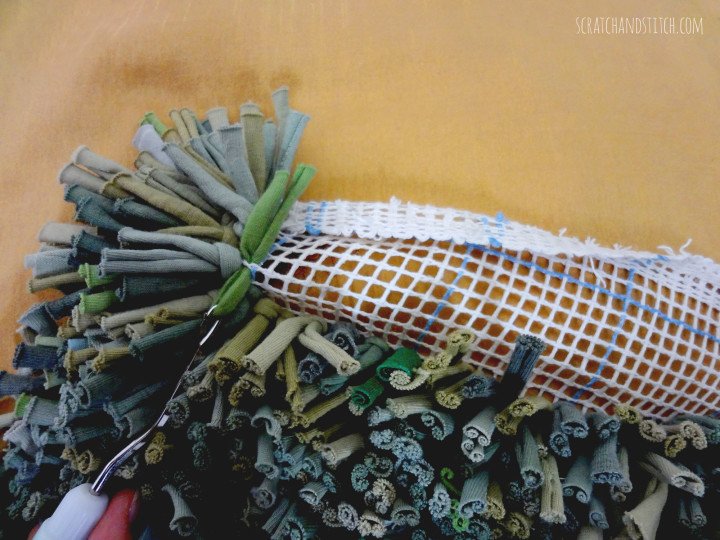
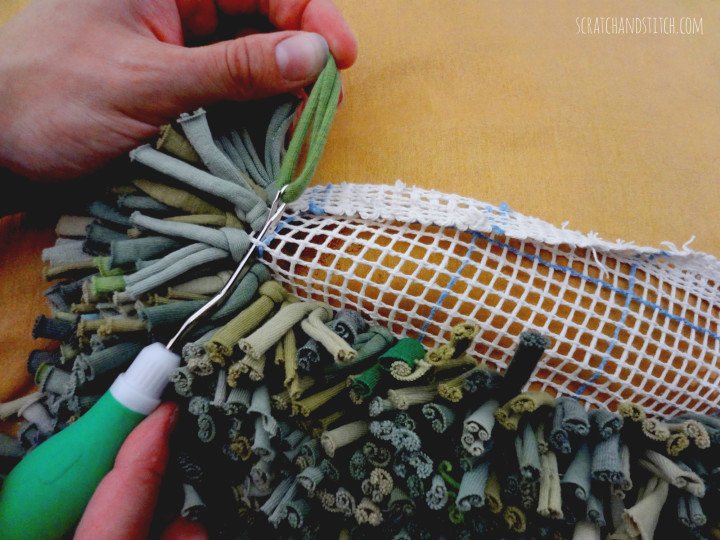
Pull the latch-hook tool back through, so the fabric is about half way through the hole.
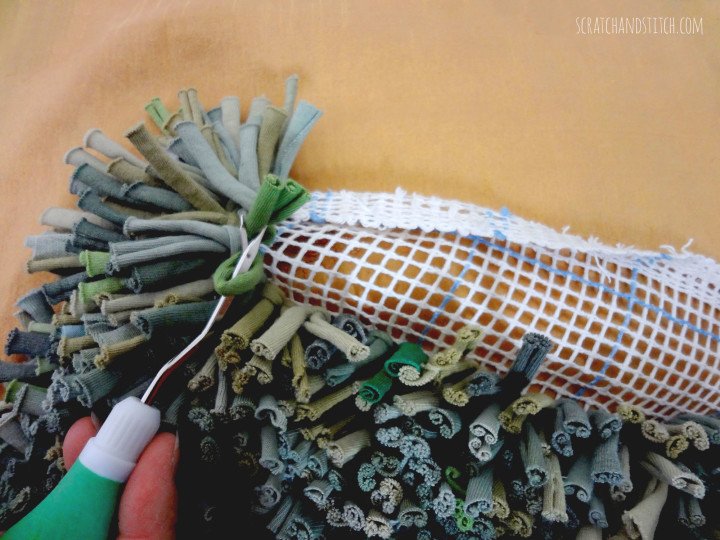
Push the latch-hook tool through the loop of the fabric and hook around the strip ends.
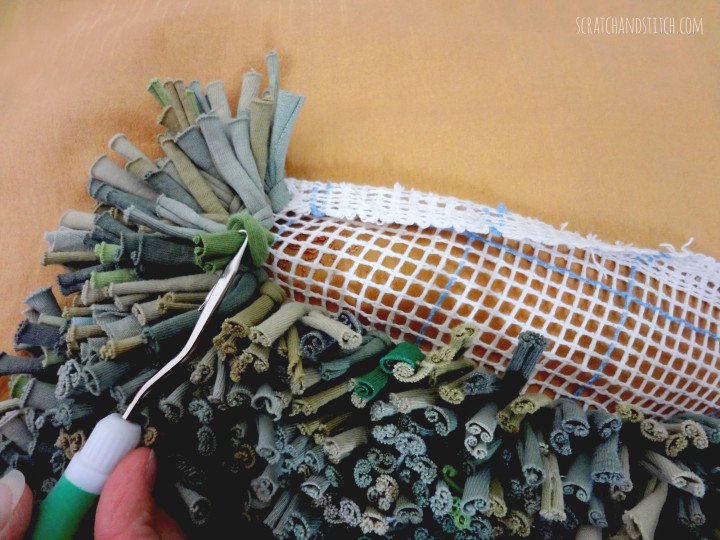
Pull the fabric ends back through the loop.
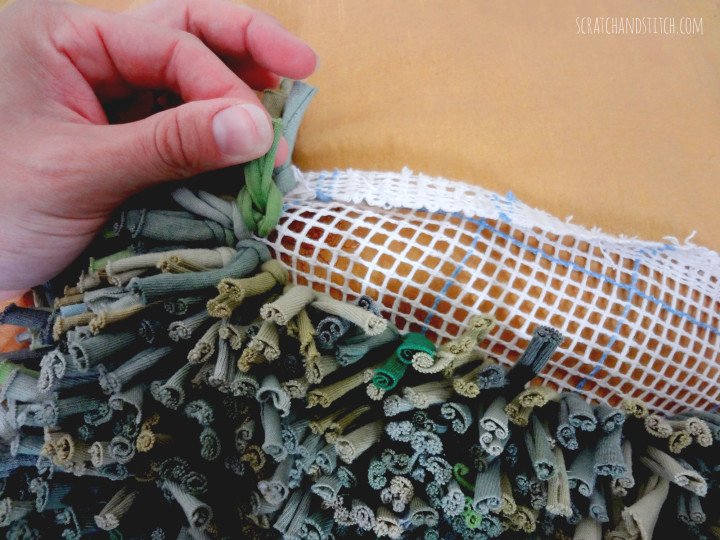
Pull the ends to tighten the loop.
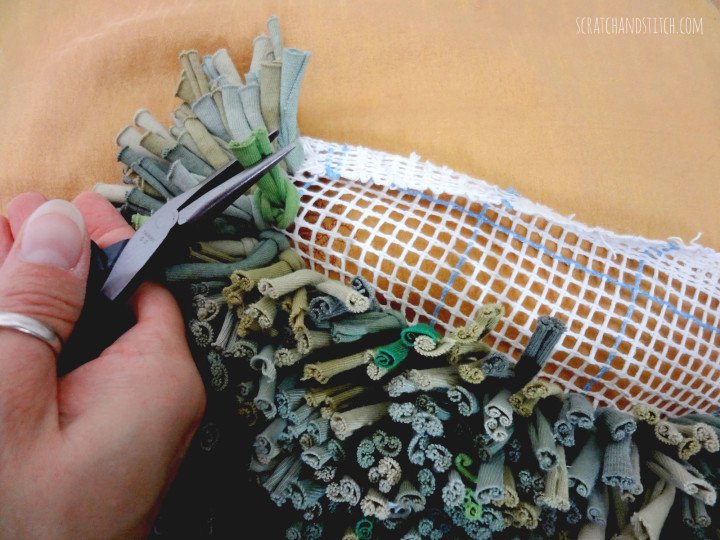
I recommend using a needle-nose pliers to grab the ends and pull tight. This doesn’t need to be too tight, save your hands!
Upcycled Mini Skirt to Tote Bag
A mini skirt is the perfect size for a tote bag. Follow these simple steps to upcycling a skirt into a bag for everyday use.
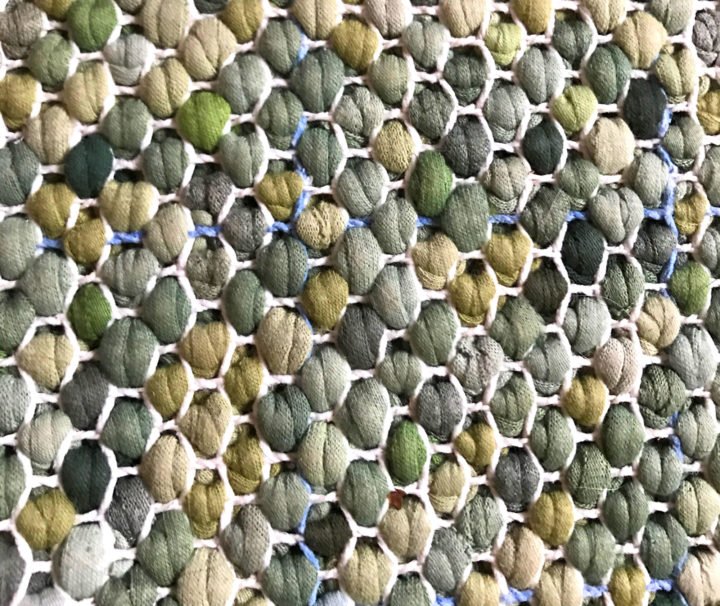
Here is what the backside of the t-shirt rug looks like.
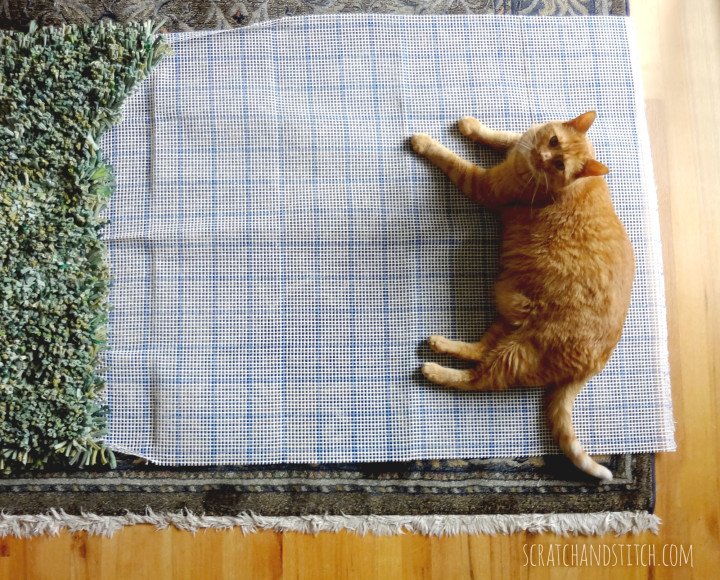
My cat says “Are you done yet?” BTW this picture was taken before Scratch was cured of feline diabetes, so he’s pretty fat here.
Watch the Latch-Hook T-Shirt Rug Video Tutorial
In this video tutorial, I show how to make a latch-hook t-shirt rug.
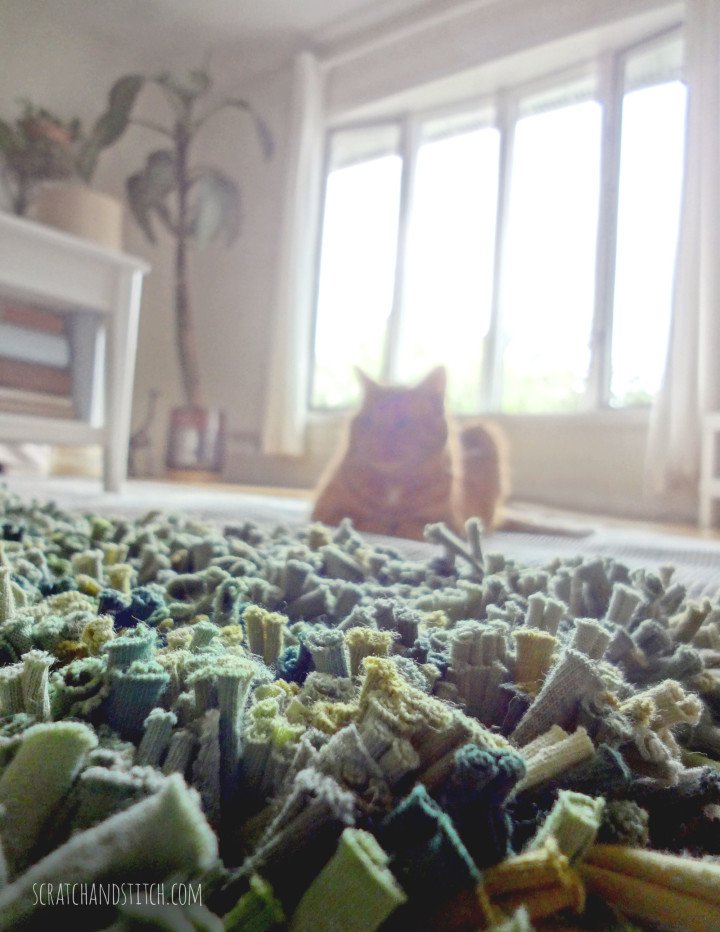
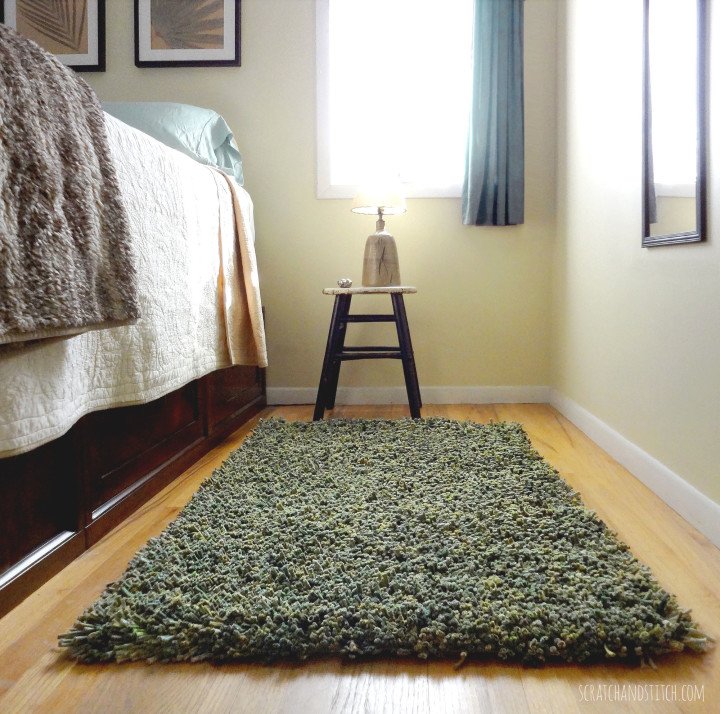
And here’s the final DIY rug! I am in love with the look and feel of this rug. It is also VERY heavy for a rug…15 pounds!
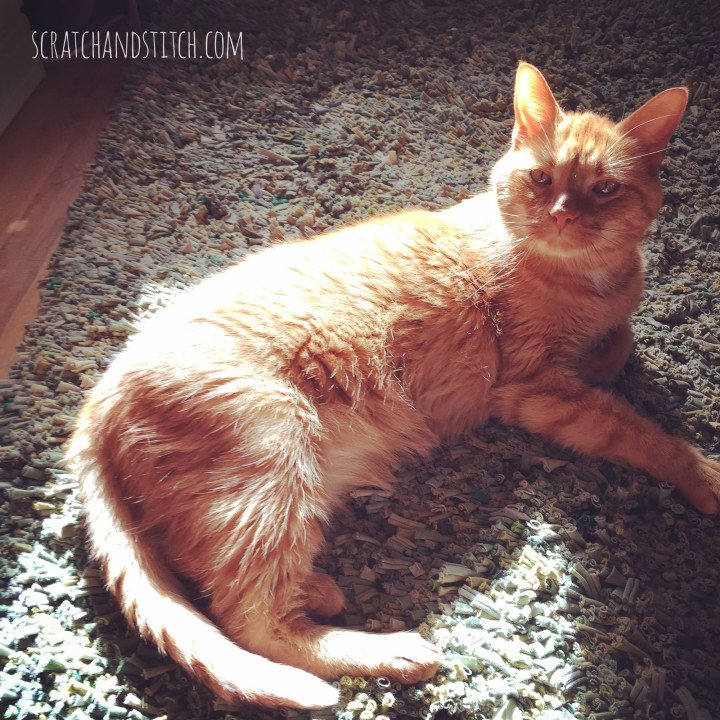
Scratch likes it too.
How to Clean the Latch-Hook T-Shirt Rug
Many people have asked how I clean my t-shirt rug. For spot cleaning, I soak the area and gently scrub with laundry detergent. To clean the whole rug, on a hot summer day I dunk the whole rug in a large tab and soak with a small amount of laundry detergent, then rinse with the garden hose. I then hang it over something sturdy to allow air flow all around it and let it dry.
This rug is heavy on it’s own, but when wet it takes two people to move it around. It takes a couple of dry, hot days to dry completely.
Have you made a DIY rug using upcycled t-shirts? Leave your questions and comments below. And don’t forget to tag @scratchandstitch on Instagram and Facebook with your Scratch and Stitch inspired projects.

I don’t understand how you finish the edges?
Hi Leslie –
I folded over the mesh canvas about 1-2 inches on all edges and just latch-hooked all the way to the edge. I’ve seen others that finish with ribbon or bias tape.
Thank you. Just to be sure, the t-shirts are cut lengthwise or widthwise?
Cut widthwise.
Looks really good! I’m curious why you didn’t dye the tshirts before you cut them? It seems like there would be less strain on the washer with little bits of cuttings clogging it up? Thank you for the tutorial.
That’s a great question and you have me wondering the same thing. 🙃 I know there was some waste from the collars and hems, so maybe that’s why I chose to do it that way. I can’t recall exactly.
This will be interesting to see how mine turns out.
I’ve done latch hook kits in the past.
Hi Karen – Me too :) Send over a picture, I’d love to see it!
I tried the dye but it bled when washed in the machine. I only made a small rug but was disappointed when the rug changed colors after washing. I didn’t know about hosing it at the time. Thanks for the good tutorial though!
Oh no :( Did you dry the fabric in your clothes dryer after dying? The drying is an essential part to set the dye into the fabric. Maybe you could re-dye the whole thing?
Do you wash it after dyeing & then dry or dry after dyeing?
Hi Charity – Dye, wash, dry. This is the process with Rit dye, follow the dyeing instructions on your fabric dye to ensure you get the best result. :)
Hi,
Thank you for the great tutorial! Did you use canvas that is 3.75 holes per inch or 5 holes per inch? I’ve purchased both, but not sure which one to use. I’ve never done anything like this, but your tutorial makes it look fun and rewarding.
It is a very fun project, and definitely rewarding. It holds up really well too! I’m currently standing on mine at my desk. :)
Good question on the canvas. I don’t recall exactly which canvas I used, but I do recommend going with the one with the larger holes.
Love the look! Can’t wait to try!
Beautiful project and thank you for the easy to understand instructions.
Thanks! I appreciate the kind feedback :)
I want to make one of these for my two year old’s room, but I was worried the knots would be uncomfortable to walk on. Do you feel the knots under your feet?
Hi Treneen – The rug is actually very comfortable to walk, stand, and sit on. You don’t feel the individual knots at all. The soft tshirt fabric helps this as well. If you make one, send me pictures! I’d love to see it :)
What if you want to make the rug out of old t shirts skipping the dyeing process? Will it work the same?
Hi Suz – Absolutely! You could have a rainbow of t-shirts for a multi-colored tshirt rug. The dying process is not required to make the rug. If you make one, send me a picture so I can feature it :)
Thank you for this tutorial. You explained everything very clearly (compared to a heck of a lot of supposed tutorials I went to before I, thankfully, came to yours). Thank you again.
hi. I guess I missed it, but how did you turn the soft t shirt cotton into those tight rope like coils?
Hi Vicki – The t-shirts strips will naturally curl when washed and dried. Stretching them will also make them curl.
I have used t shirts for several things and notice that if you stretch it side to side it curls inside out. If you stretch it top to bottom it curls the other way. I suggest testing to see which way the shirt curls before you cut the strips. I have found the color brighter when stretched top to bottom and would cut my strips vertical rather than horizontal.
Hi Barb, thanks for your comment. You’re absolutely right, you want to go for that curl. :)
I have a hook rug that took me years to complete. I love it and it is very heavy. My question is, how do you wash your latch hook rug? I think mine is in desperate need of a wash I am just not sure how to go about doing that.
Hi Felicia –
Mine is so heavy too! I haven’t actually washed it yet though it’s probably due this coming summer. My recommendation on washing is to hose it down outside, pour some soapy water on it, then hose it down to rinse. With how heavy it is, it will need to be draped over something sturdy (like a picnic table or sawhorses). A nice hot, windy day would be best to assist in drying as I’m sure it will take a day or two to air dry.
Please let me know if you try washing and how it goes. :)
Thinking of trying this…want a new rug for dining room. It will be about 7×10. Lots of cutting, etc. I thought about purchasing colored t shirts from hobby lobby…they will all be same size, fabric content and colors will be set. Give me your opinion. Is this a monster project that will take years and turn my hair gray or what? I’ve done several yarn latchhooks years ago.
Hi Stephanie – I admire your ambition :) I don’t want to tell you not to do it because I want to see how it turns out!! Here are my tips:
– Yes, there will be A LOT of cutting. Use an high-quality ergonomic rotary cutter. This is the part that was hardest on my hands, wrists, and arms.
– Your 7×10 rug would be about twice the size of mine so you’d need at least 30,000 strips to complete. If you’re buying t-shirts, I recommend finding some online to save you money. I payed 10¢-50¢ for my t-shirts plus what I got out of my husband’s and dad’s stashes. You may even consider buying yardage of jersey knit fabric (just make sure you’re cutting with the grain to get the proper stretch/curl).
– The lighter-weight the fabric, the better! Since you’re familiar with latch-hooking with yarn, you’re familiar with how easy it is to loop the strips through the squares. Some of the t-shirts I used were heavy-weight resulting in harder to loop strips. This was another challenge on the hands.
– I highly recommend testing a few knots before cutting everything. You may realize that you want to go with thinner or shorter strips.
– Yours would be about twice the weight (maybe 30-70 lbs).
– Fill up your Netflix queue because you’re going to be there for a while!
So all in all, NO you’re hair won’t turn gray from this project and YES it is a monster project. PLEASE send me pictures and updates on how it’s going. :)
Thanks…it sounds fun…just gotta work up my gumption to get started. God bless you! Stephanie
Thrift stores usually have racks and racks of shirts in all different colors that would be cheaper than box store bought ones.
Agreed! Thrift stores are the way to go.
Try using jersey knit sheets for a project that big. :)
That’s a great idea!
Gorgeous rug!!!
I am hoping to make a 4 x 6 bright colored shag rug for my 5 year olds room. I have a couple dozen t’s already cut into strips. I also ave tons of plain non stretchy cotton scraps. Do u think it would still look good & be soft combining the different fabrics?
Yay! Glad to hear you’re undertaking a large rug. As far as the non-stretchy cotton, does it fray? That would be my only concern as you don’t want threads everywhere. I say stretch the t-shirts strips so they curl and lay them out with the other fabric strips and see what it looks like.
And send me a picture! I’d love to see and feature it :)
Hi! I’m thinking of trying this – I’ve done kits before – but… Did you use a regular-sized hook tool? I’ve seen variations of this project elsewhere, and kinda got the idea there’s a larger tool that I should buy/use. Thoughts?
Hi Anne – Yes, the hook I used is the standard size. I’m not sure about using a larger hook, I think that would require larger holes in the mesh canvas.
Send me pictures of your project progress, I would love to see :)
Hi Cathi ~ I love your pattern and your rug came out lovely. I went to a used shop that sells T-shirts for $1/ea. I just bought a smattering of colors that I liked together and that would bring together the colors in my room. That way I can skip the dye process. I plan to make one the same size as the one you made. To practice though, I am making one for a doggie bed for my boy! If they come out nice, I’ll send pictures. In fact if they come out horrible I’ll still send pictures! How do I do that here? Copy and paste or link?
Hi Pam – Yes please send me pictures! :) I can ‘t wait to see. Send me a message through my contact page here and we’ll go from there.
Awesome to hear that you found shirts for $1!! Remember to get a good latch hook tool, it’ll save your hands :)
If I wanted a shorter nap, could I safely cut the strips at 1″ x 3″ instead of 4″?
Hi Pam – Yes, 3″ strips will work too. I wouldn’t go any shorter than that as they may be harder to work with. Your sample doggie bed will help you see what works best for you.
Cathi – I have a good start but can’t be sure if you are hooking every other space both ways or one way. Every other horizontally and vertically? or just every other in one direction?
Hi Pam! Glad to hear you’ve gotten started :) I hooked every other one horizontally across the rows. Then the next row up, I hooked on the opposite square from the previous row. Does that make any sense? Hard to explain here so I’ve added an image above of the backside of the rug. Keep me posted if that helps.
Thanks Cathi. That is not exactly the way I have been going, but my first attempt here is a little rug for my dog and I don’t think he will notice. I’ll send a picture when finished. I am in no way as neat as you are!!
Cathi, the fact that people continue to send you comments long after you’ve posted this rug means you have created this tutorial with great thought and care, with beautiful and informative images. And your rug is just beautiful, like an interpretation of the ocean on a cloudy day. I never write comments but I had to compliment you on your wonderful rug and the tutorial. Ok, now my question: you’ve noted how heavy it is – to lessen the weight, do you think it would still have that lovely thick-enough feel if I hooked every third square? Of course, then the problem would be how to deal with the subsequent rows due to the odd-numbered progression. Or what about cutting the shirt pieces skinnier but maintain every other hooking? I plan on recycling my fam’s old t-shirts because I am all about reusing and upcycling and really looking forward to getting started. Thanks again! Kyong
“Like an interpretation of the ocean on a cloudy day.” I like that :)
You bring up a good point on going every third square, this would change the every-other pattern so I wouldn’t go that route. Thinner strips are an option though I’m not sure there would be a significant weight reduction.
This brings up the question, does the heavy weight really make a difference? I’ve been standing on this rug for just over 2 years and rarely lift it in comparison to how much I enjoy it. When I do need to move it, I simply roll it up and slide it around.
Hope this helps you in getting started on your rug! Please send me pics of your progress, I’d love to see it :)
I love this! Do you think jersey sheets would work? Thanks!
Absolutely! Just make sure that the strips are the cut correctly with the grain so you get that nice curl. Do a test cut and you’ll see exactly what I mean. And send me progress pics!!
I love your rug! Could you please show a picture of your hook? I make toothbrush rugs and know how important the tool is!!
You’re right! A right tool makes the job easier. I started this project with a cheap latch hook and soon after went out and bought a better one. I recommend using an ergonomic or comfort grip latch hook tool. I used one like this one.
Any advise on joining two (or more) canvas sheets for an extra large rug (e.g. 8′ x 10′ or 10′ x 12′)? I saw that for the edges you just folded over an inch or two and continued hooking over that area. I’m thinking about using the same strategy but with overlapping canvas seams. Any thoughts or suggestions?
Oh my! You’re brave to tackle that size!!!! :) I would just overlap rows and latch hook as usual. I think 5-10 rows for a rug that size would be a good idea as it will be very heavy and I don’t want it to come apart in the middle when you pick it up. Send me pictures of your final, I would love to see and share it.
Thanks! Will do!
Hello, Cathi! I love your rug! I enjoyed hook rug kits as a child. I have been teaching myself to sew quilts and make tie blankets. What do you think of using flannels for this rug project?
Hi AJ – This rug is just as enjoyable (if not more) than those kits from childhood. :) My favorite part about the t-shirts is that curl that happens to the strips. Any jersey fabric will curl like that, flannel does not. With flannel, I would be concerned about the amount of fraying and dust that occurs. I do not recommend using flannel however you could do a sample to test it out. Send me pics and feedback, I would love to see.
Great instructions. I could actually invision the process. Thanks.
could you dye the t-shirts first, then cut them? I was just thinking it would be easier than handling a bunch of little pieces.
Absolutely!
Thank you for such detailed instructions!! Thjs helps tremendously! I’m using some shirts from my recently deceased (would have been) father in-law to make my rug. Thjs way the dogs Coco & Abby will still have his ‘scent’ around. RIP Don….
That’s a great way to honor him. :) I’d love to see pics.
Hi Cathi…may I ask how long did it take for you to finish this project?
Oh gosh, I don’t even know. I had to take a few months off because the repetitive pulling was hurting my hands and wrist. I do know that I watched all 5 seasons of Breaking Bad while I worked on it. :)
Hi,
Thanks for the tutorial! I am so excited to start. Is there different instructions for corners of an irregularly shaped rug?
Best,
M
I would say that the method would be the same, no matter the shape. :)
Hello! What mesh size canvas did you use?
Hi Keri – I used a 36″ X 60″ latch hook canvas.
Very cool project. I was wondering if you could use cotton material? Like quilting quarters. My mother-in-law gave me a whole box. Would they work?
Thank you.
Hi Renee –
Great question! Cotton will fray, leaving you with debris. However, if you want to test it, cut some strips and put them through the washing machine (use a laundry bag). This may give you a good idea of the final result.
Another option with the cotton you got, would be to make fabric “twine,” which you can then make into a rug. There’s an awesome tutorial (not mine and I haven’t tried it yet, but it’s on my list) here.
I’d love to see what you come up with :)
Thank you for the tuto, great idea! I featured it in my “J=Jersey” post ;)
Thank you :)
Does the latch canvas come in different sizes or is it just one size?
Hi! As far as the overall size, yes you can get them in multiple sizes. You can even cut them to the size (or shape) you want. There are also multiple sizes for the grid squares as well. Are you getting ready to make a t-shirt rug?
I started to make one a few years ago. I was struggling with the square size. I didn’t think to skip squares. And I also thought the canvas might come in another size. Changing both should help and I can pull it out again and give it another try. Thanks for the tips.
I think that’s a great idea. :) Sometimes projects need to take a break for a bit.
Hi
I’ve only just got into t shirt yarn and I’ve cut it into one great big long piece about 1/2″ wide. Then I’ve pulled and rolled it up so it curls. I don’t think I can use that yarn can I because in your demonstration you have nice flat small pieces?
I would be grateful for your thoughts on this please?
Lynne
Hi Lynne – I would definitely use the t-shirt yarn you have. To me, it’s that curl that makes a t-shirt rug so plush and unique. Have a look at the end result pics, you’ll see the curl there.
Cathy: I really want to try this, but was confused about the mention of weighing down the fabric scraps with a scale in a plastic bag. Is that in the washer? I’m having a hard time visualizing it. Do you have a picture? Are the scraps spread around? Does the scale cover all of them?
Love the rug and the instructions are great – once I understand the weighing down point.
Thanks so much!
Hi Linda – It’s such a great rug. It’s the rug I stand on while at my desk. :)
The weighing in a plastic bag is just a tip for how to measure the weight of fabric to calculate how much fabric dye is needed. Instructions on Rit Dye tells how much dye is needed according to the weight of fabric, so I weighed all my cut strips in a plastic bag and hung from a luggage scale. Does that make sense? It’s not essential to the making of the rug, just a tip for dyeing.
Your cutting directions say to cut 1”x 4” T-shirt strips but looking at your cutting mat your photos show 2” wide strips.
Wow! Good eye. :) Of all the years this post has been on my site, no one has ever pointed that out. 1″ x 4″ is correct.
Just about to start. Do I start at the bottom of the canvas and then work my way up. Or could I start at the top? I thought it would be easier to have the bit I’ve not yet worked rolled up.
Hi Angela – You can start anywhere really. Yes, having the extra rolled up while you work will help. Take and send progress pics! I would love to see your work. :)
I made two rugs with this technique many years ago. I didn’t use t-shirts but light weight fleece. I was given a big box full of scrap fleece and had just finished a commercial Latch hook rug so that’s where I got the idea. My stepmom received one rug and used it as a lap cover. It was super warm.
Fleece would be so cozy! You’ve inspired me to collect all of my fleece scraps to make another rug. :)