Use up some fabric scraps to create beautiful fabric Christmas trees. They are perfect to use as ornaments or gift toppers. I’ve created this free sewing pattern to make trees in multiple sizes.
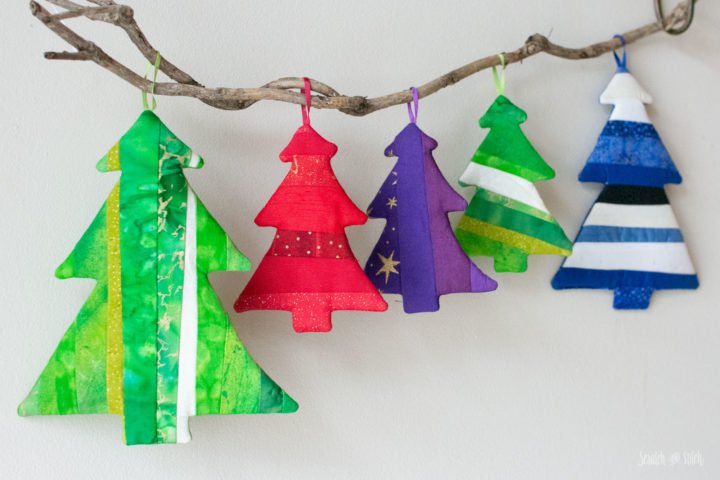
‘Tis the season to create a new Christmas tree for my BFF to add to her ever-growing collection. In the past, I’ve made her these Wire Christmas Trees, a standing Stuffed Christmas Tree, folded magazine Christmas trees, and the Stuffed Christmas Tree. This year I’ve created DIY Christmas ornaments in the form of fabric Christmas trees to give her.

This past summer my aunt generously gave me almost her entire fabric stash. We’re talking bins and bins of beautiful and unique fabrics from years of collecting. My aunt is a very talented fiber artist who has inspired me my entire life and her style inspired these DIY Christmas ornaments.
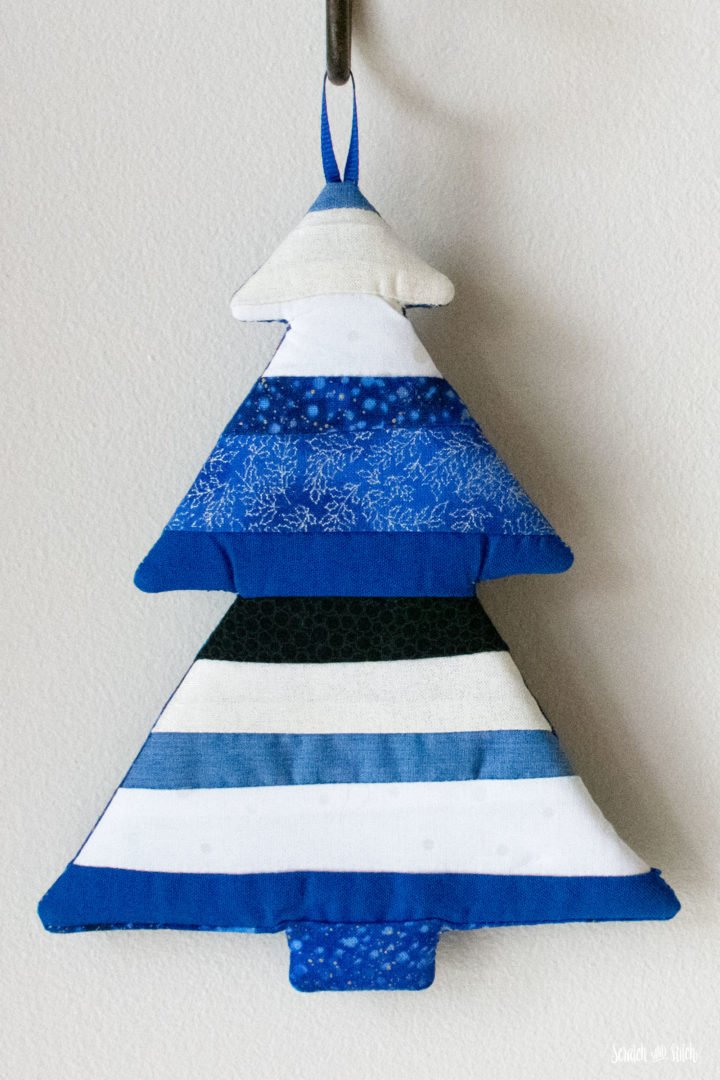
I’ve been playing with the fabric I was given in several recent projects and these fabric Christmas trees are perfect for the variety of colors and textures of fabrics.
DIY Christmas Ornaments
These DIY Christmas ornaments are very easy to make and customize. This project is great to use up scrap fabric and those bits of quilt project scraps that you just couldn’t toss.

I’ve included three sizes in the pattern however you can shrink or enlarge to your preferred size. The large size is good for a wall hanging or a placemat. The medium and small sizes are good for ornaments and gift toppers.
Materials
- fabric Christmas ornament sewing pattern (download below)
- fabric (this is a great time to use up some of those fabric scraps)
- quilt batting (I recommend using ByAnnie’s Soft & Stable for a more stable tree)
- ribbon for hanging
- coordinating thread
- basic sewing tools
Free Christmas Ornament Sewing Pattern
Pattern includes three sizes (small, medium, large). Print at 100% scale. The large size will print on two sheets.
Enter your email to get the free pattern in your inbox.
By submitting your email address you will be added to the Scratch and Stitch email newsletter. You can opt-out at any time :)
DIY Christmas Ornament: How to Make the Fabric Christmas Tree
Print and cut out the pattern (download above). Decide which size you’ll be making or make all three sizes :) The largest size will need to be taped together.

Cut strips of fabric with varying widths. For best results make sure the minimum width is no less than 1 1/4″ and the maximum width is 2″. The strips can be cut a consistent width from end-to-end or cut the strips wider on one end.
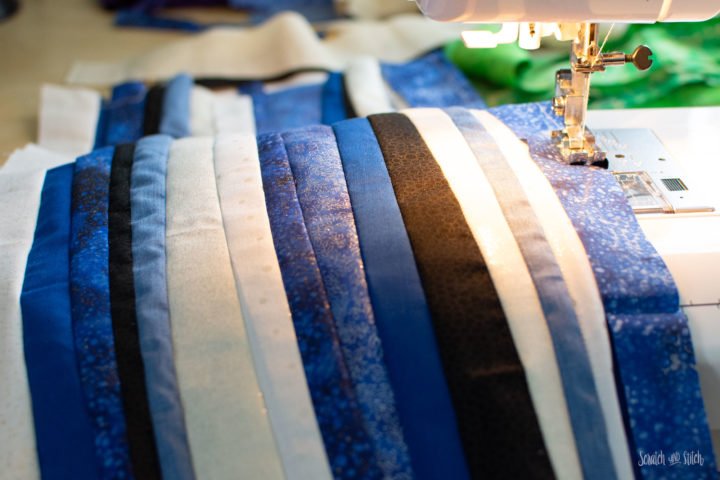
Sew the strips together with an easy 1/4″ seam. I’m calling this the “stripped” fabric.
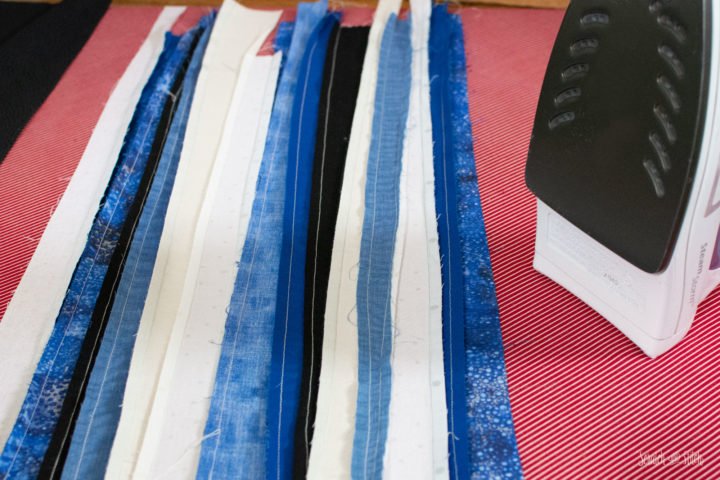
Once you have enough strips sewn together to cover the tree size you’ll be cutting, press the seams. You can press all of the seams to the inside, all seams to one side, or vary which way they’re pressed based on what lays flat the best. The last option is how I choose to press my seams.
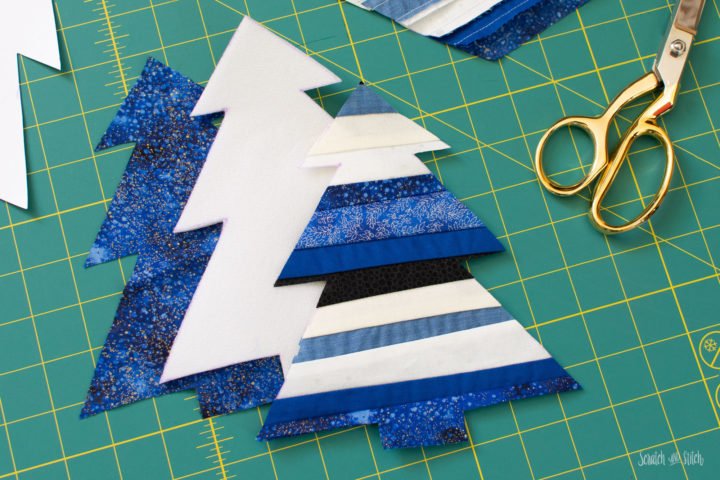
Trace and cut the Christmas tree pattern onto backing fabric, batting (or Soft & Stable), and newly sewn “stripped” fabric.
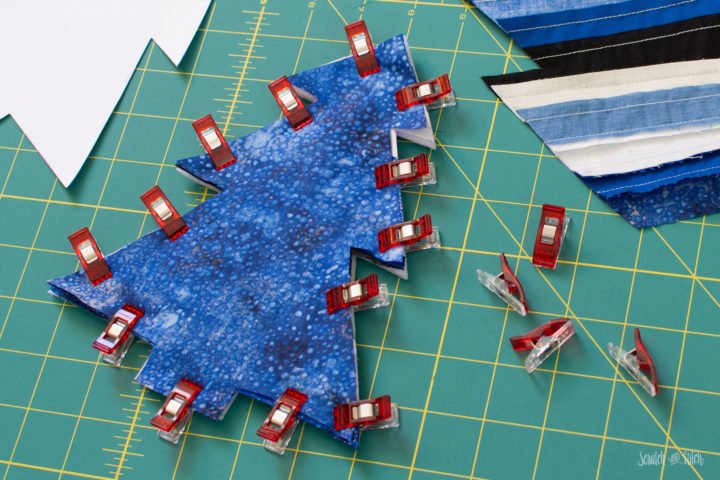
Sandwich the layers starting with the batting, then “stripped” fabric, looped ribbon for hanging, then the backing fabric with right sides facing the “stripped” fabric. Pin the ribbon in place. Pin or use wonder clips to hold the layers together making sure to leave a space for turning later.
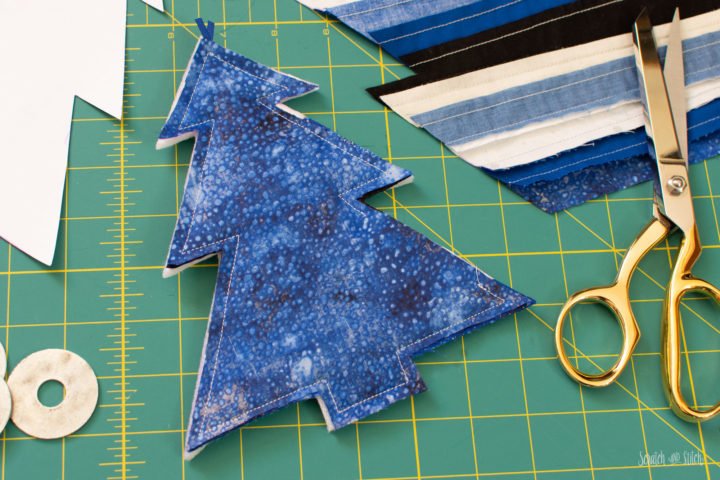
Sew around the edges with a 1/4″ seam making sure to leave a space for turning.

Trim the seam allowances and corners to reduce bulk. Clip the interior corners as well.
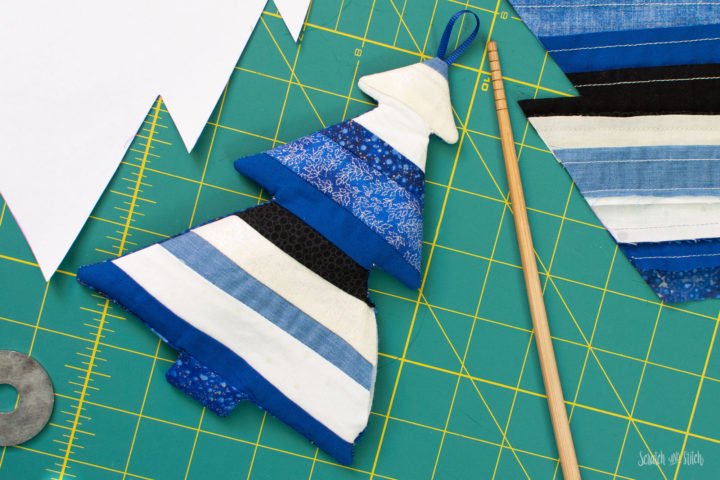
Carefully turn right-side out. Use a chopstick or similar item to push out the corners.
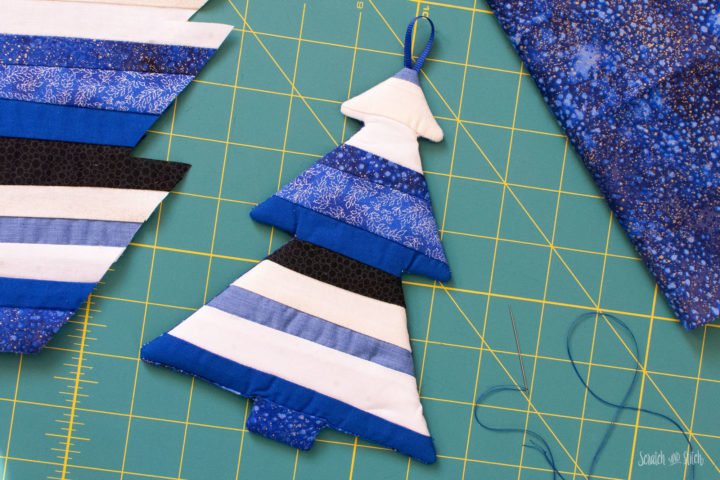
Fold in the seam allowance at the opening. Pin and press to get a nice flat edge. Close the opening with a slip stitch/ladder stitch. Optionally press again to set the seams.
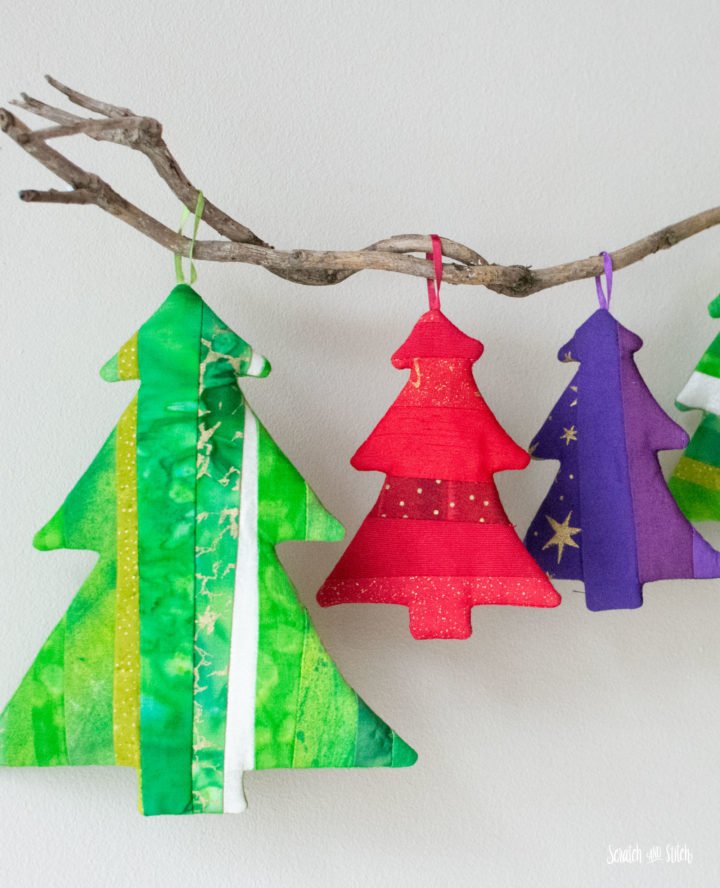
These DIY Christmas ornaments are a great way to add color to your Christmas decor. I love the way they look hanging in a group and especially putting them on gift packages.
Are you making handmade gifts this holiday season?


Great idea. Thanks. NT FL