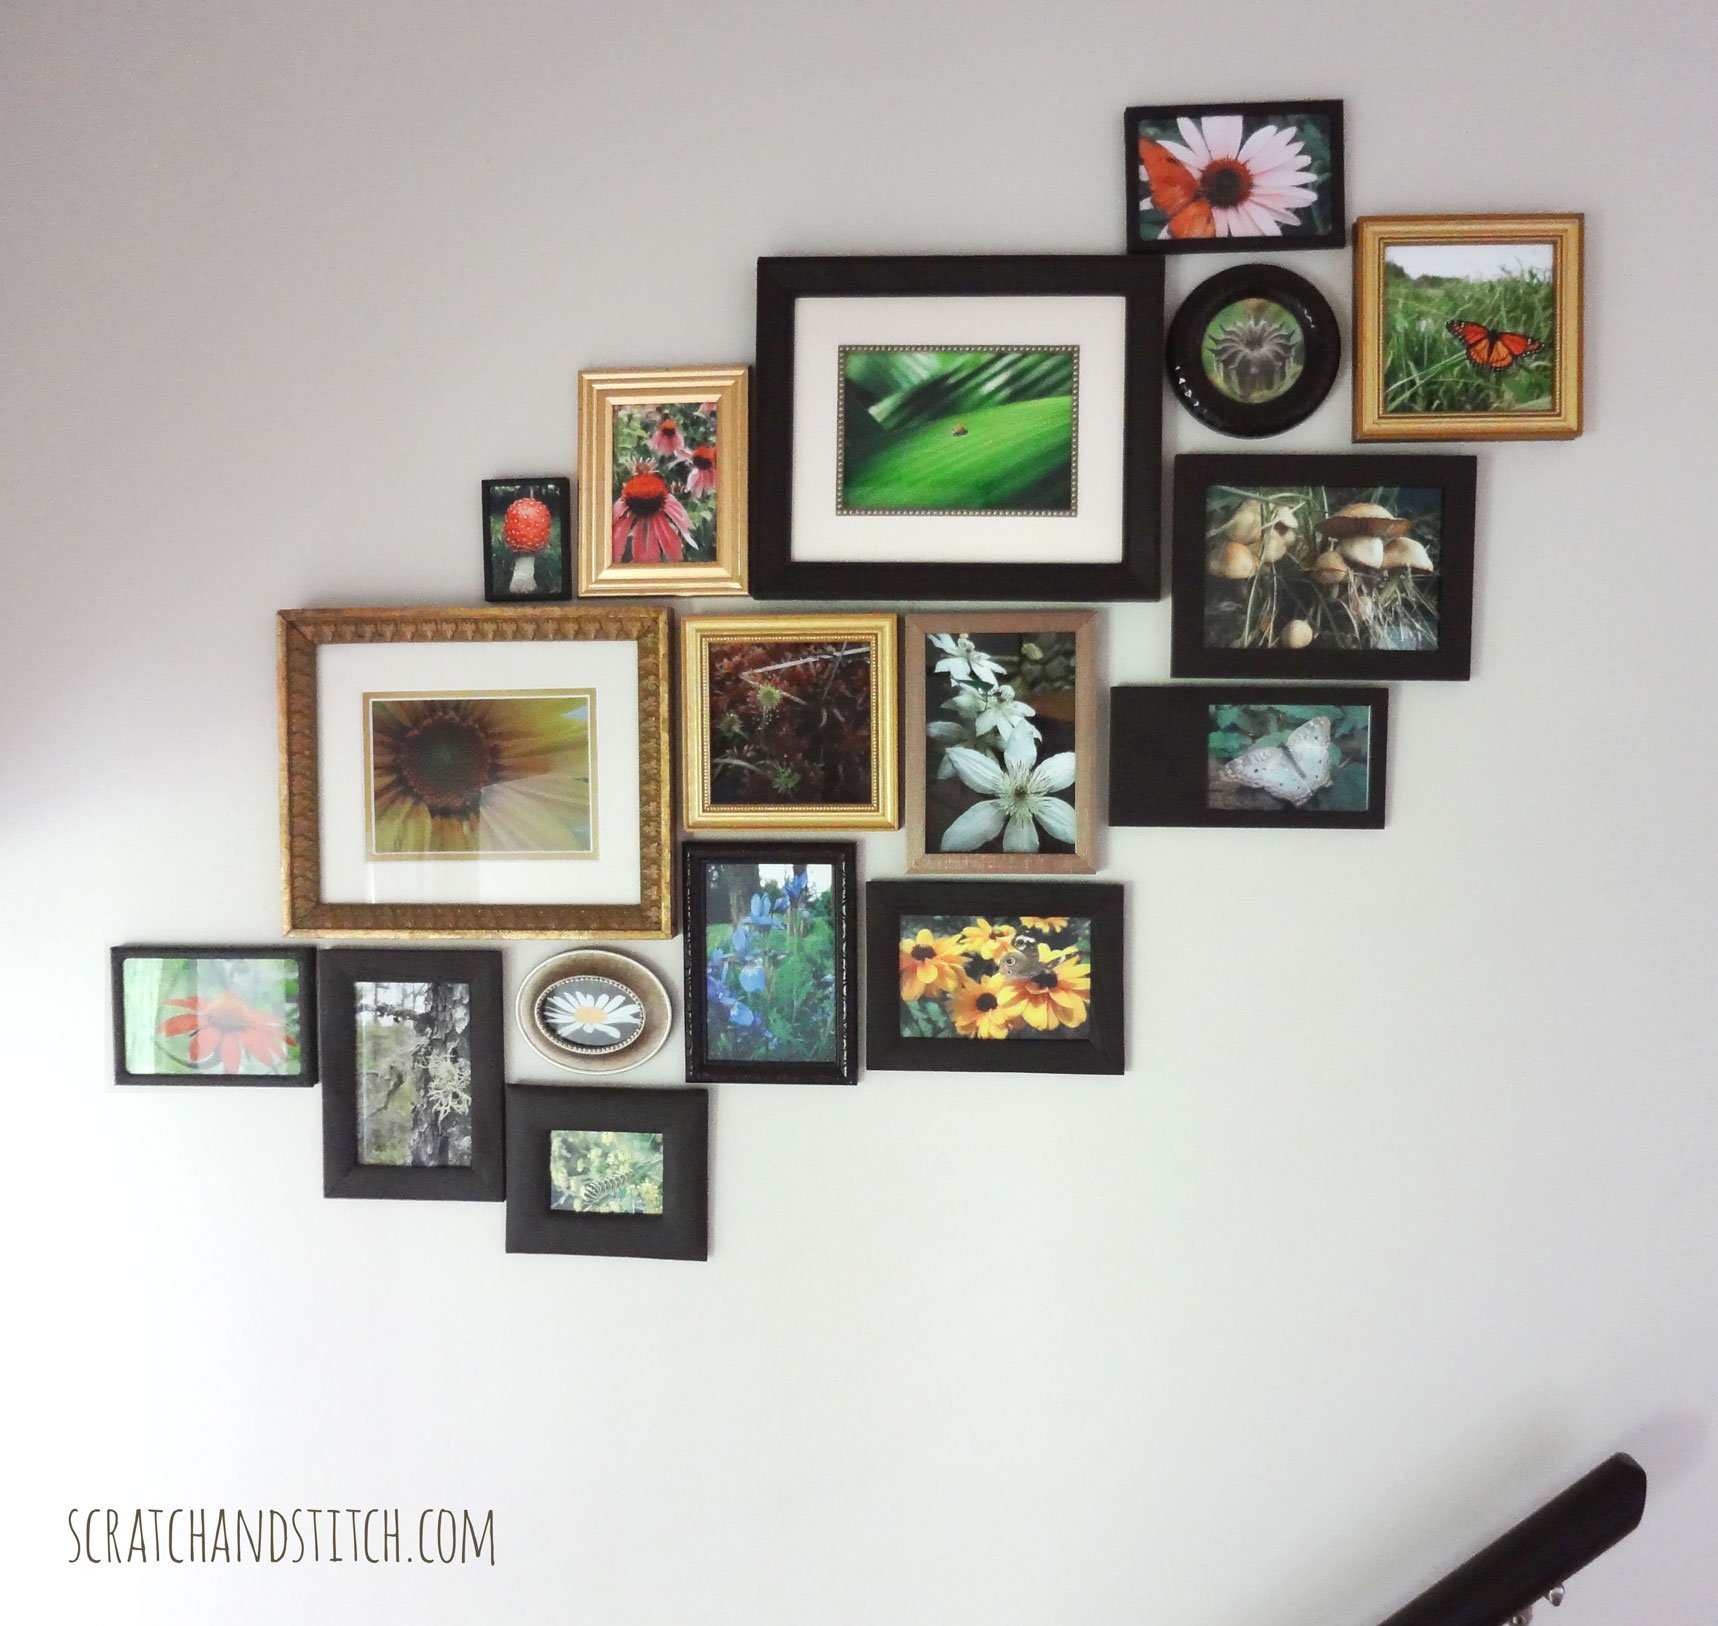
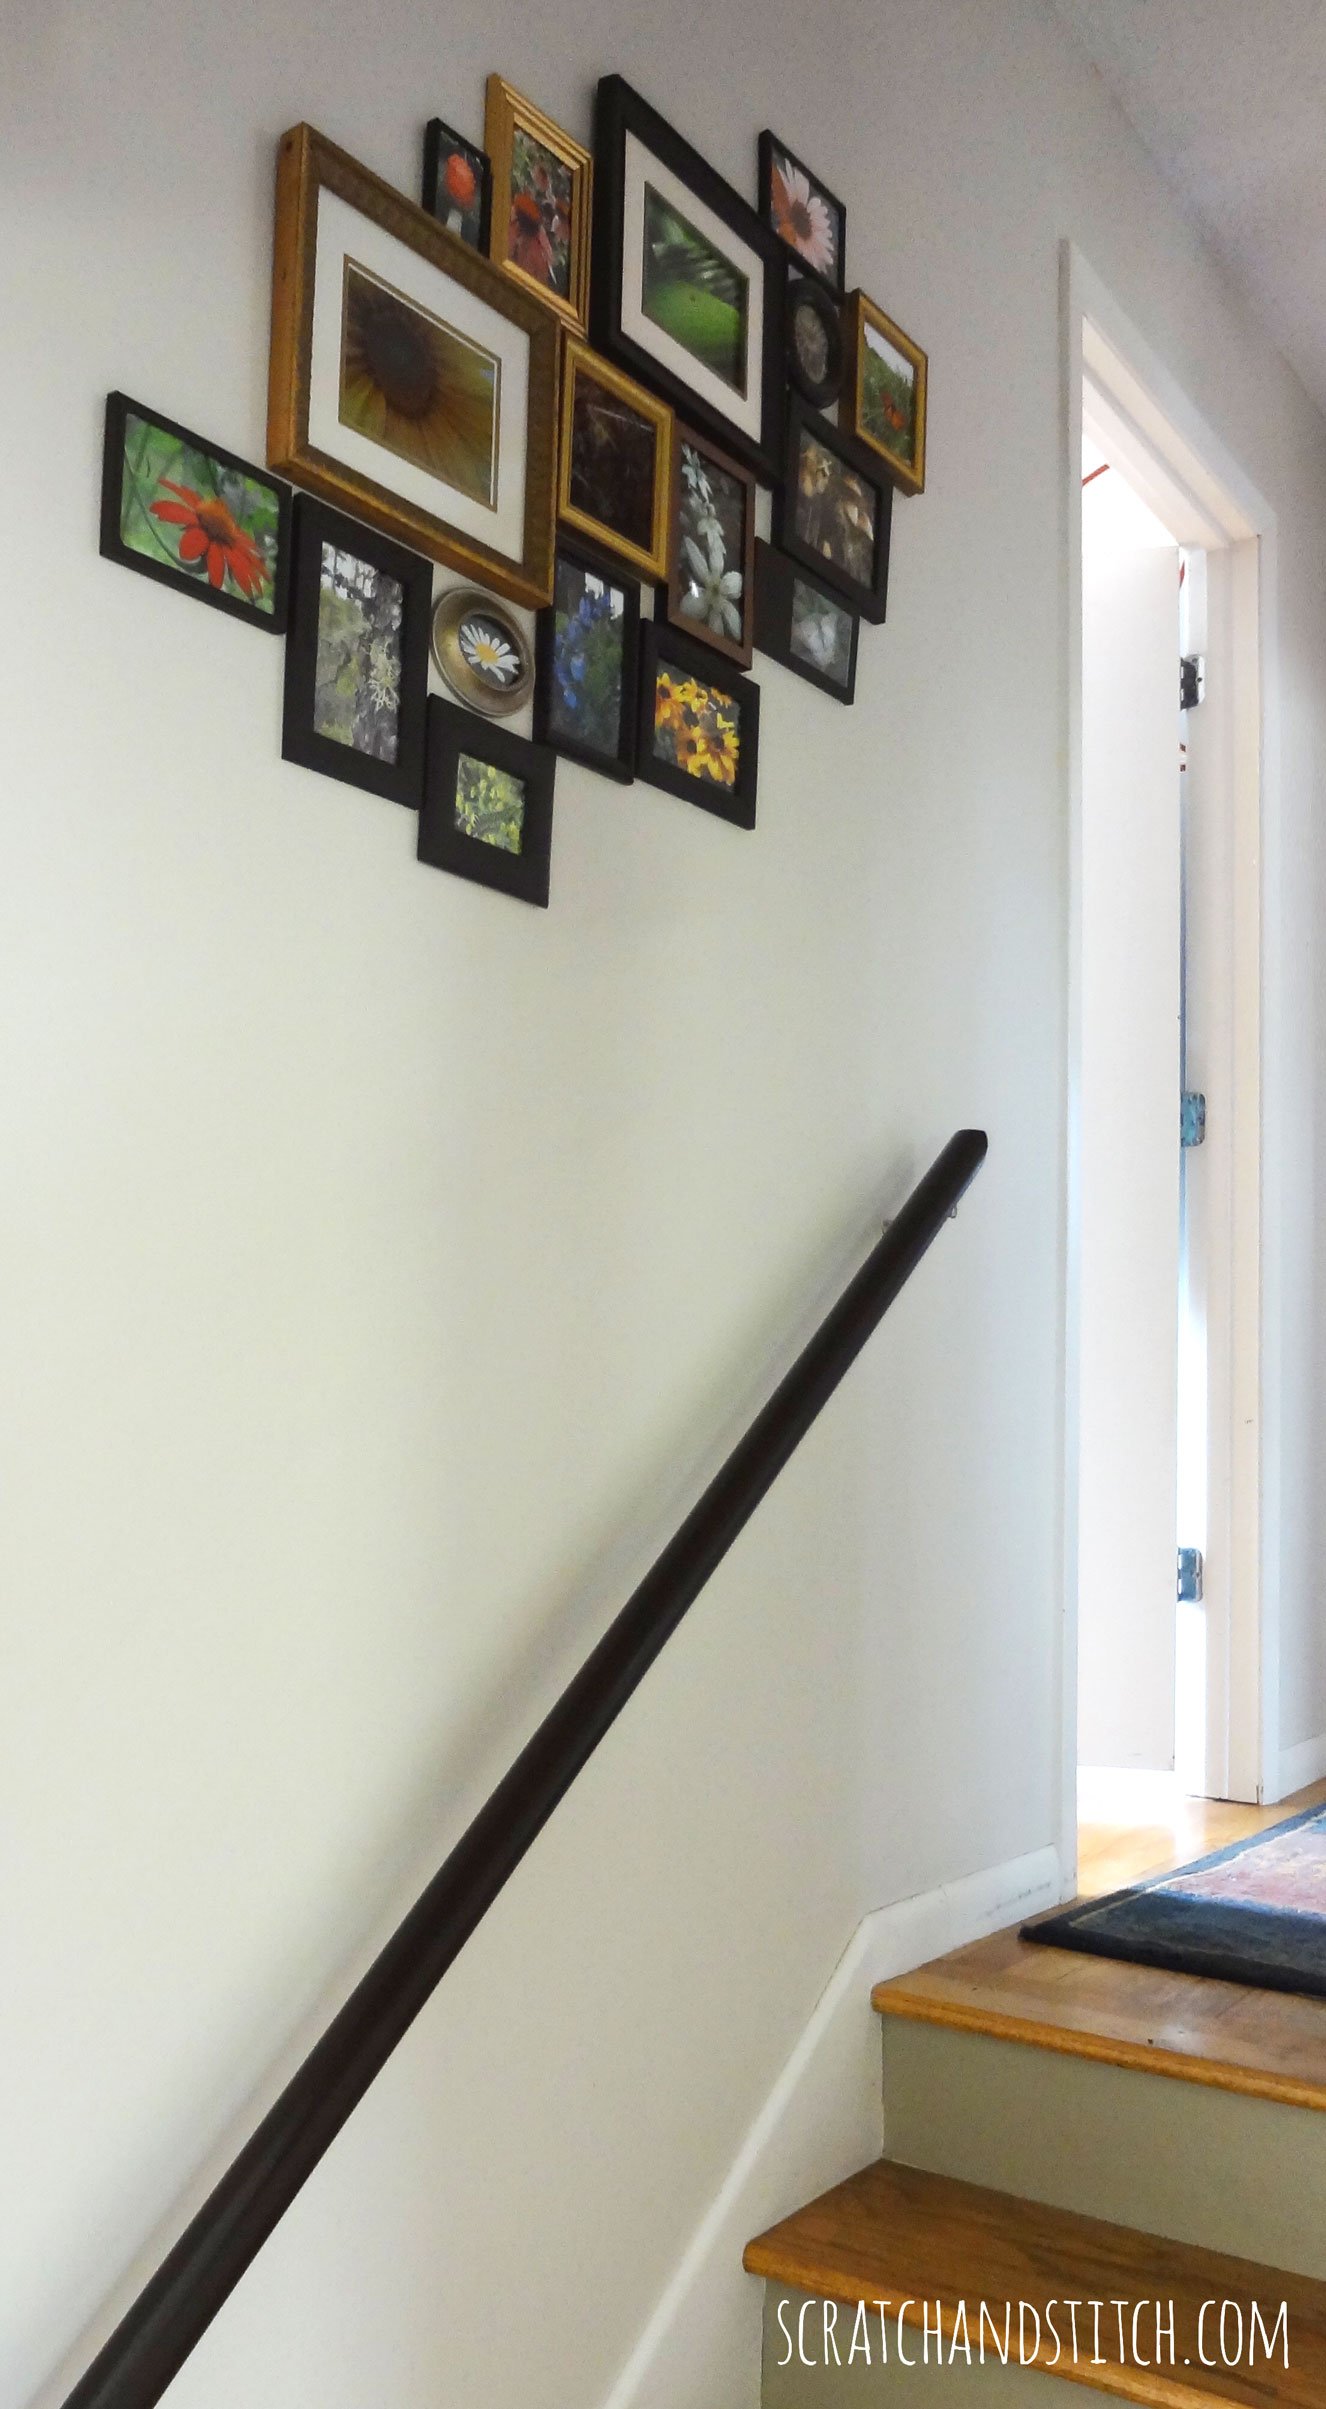
Gallery walls are a great way to display your favorite pictures or art while allowing you to customize the shape and amount of wall space to use. I created this stairway gallery wall to display nature photos that my husband and I captured. Using photo frames in several shapes and sizes and painted for a cohesive look, I was able to add some visual interest to a high-traffic area in our home.
Materials & Tools
- photo frames in various shapes and sizes, color or material doesn’t matter
- spray paint (one or more colors)
- tape measure
- pencil
- scissors
- large paper (wrapping paper works well!) or a large piece of cardboard
- tape
- self-leveling picture hangers
- small nails
- photos or artwork
How to Create a Stairway Gallery Wall
Sizing & Placement
Measure the estimated amount of space and shape the entire gallery will use. With a pencil, mark on the wall where you want the bottom of the gallery to be as well as the left and right sides. Measure up from the stairs to the mark where the bottom will be. Decide how high up on your wall you want the stairway gallery to be. Write down all of these measurements.
Create a Pattern
This pattern is to create a basic size and shape of your stairway gallery wall.

Cut a large piece of paper or cardboard wide enough to match the approximate final width of the gallery. Starting at the bottom corner that’s on the same side as the lowest step, make a mark. Measure over to the other side and make another mark, this is the approximate width of the final gallery.
The next step is the create the angle on your pattern to match the angle of the stairway. This is tricky to explain but this is how I did it. Using the edge of a table, the floor and the wall, or the edge of a rug, layout your pattern and measure from your edge (wall, rug, table) the amount of distance from the stairs to the bottom of the gallery wall. Do this on both bottom corners to determine the angle of your stairway. There are also some nifty calculators online to help determine this angle for you. You’re on your own with those, I did the rug edge method.
Now that you have your angle, you can measure and write down the height of the gallery.
30 DIY Mirrors & Frames
Customize a mirror to match your style! Here are over 30 great ideas to get you started.
Fitting the frames together
Now that you have a basic shape to work with, start laying out your frames on your paper. Once you have finalized the placement of the frames, trace around the edges and cut out.
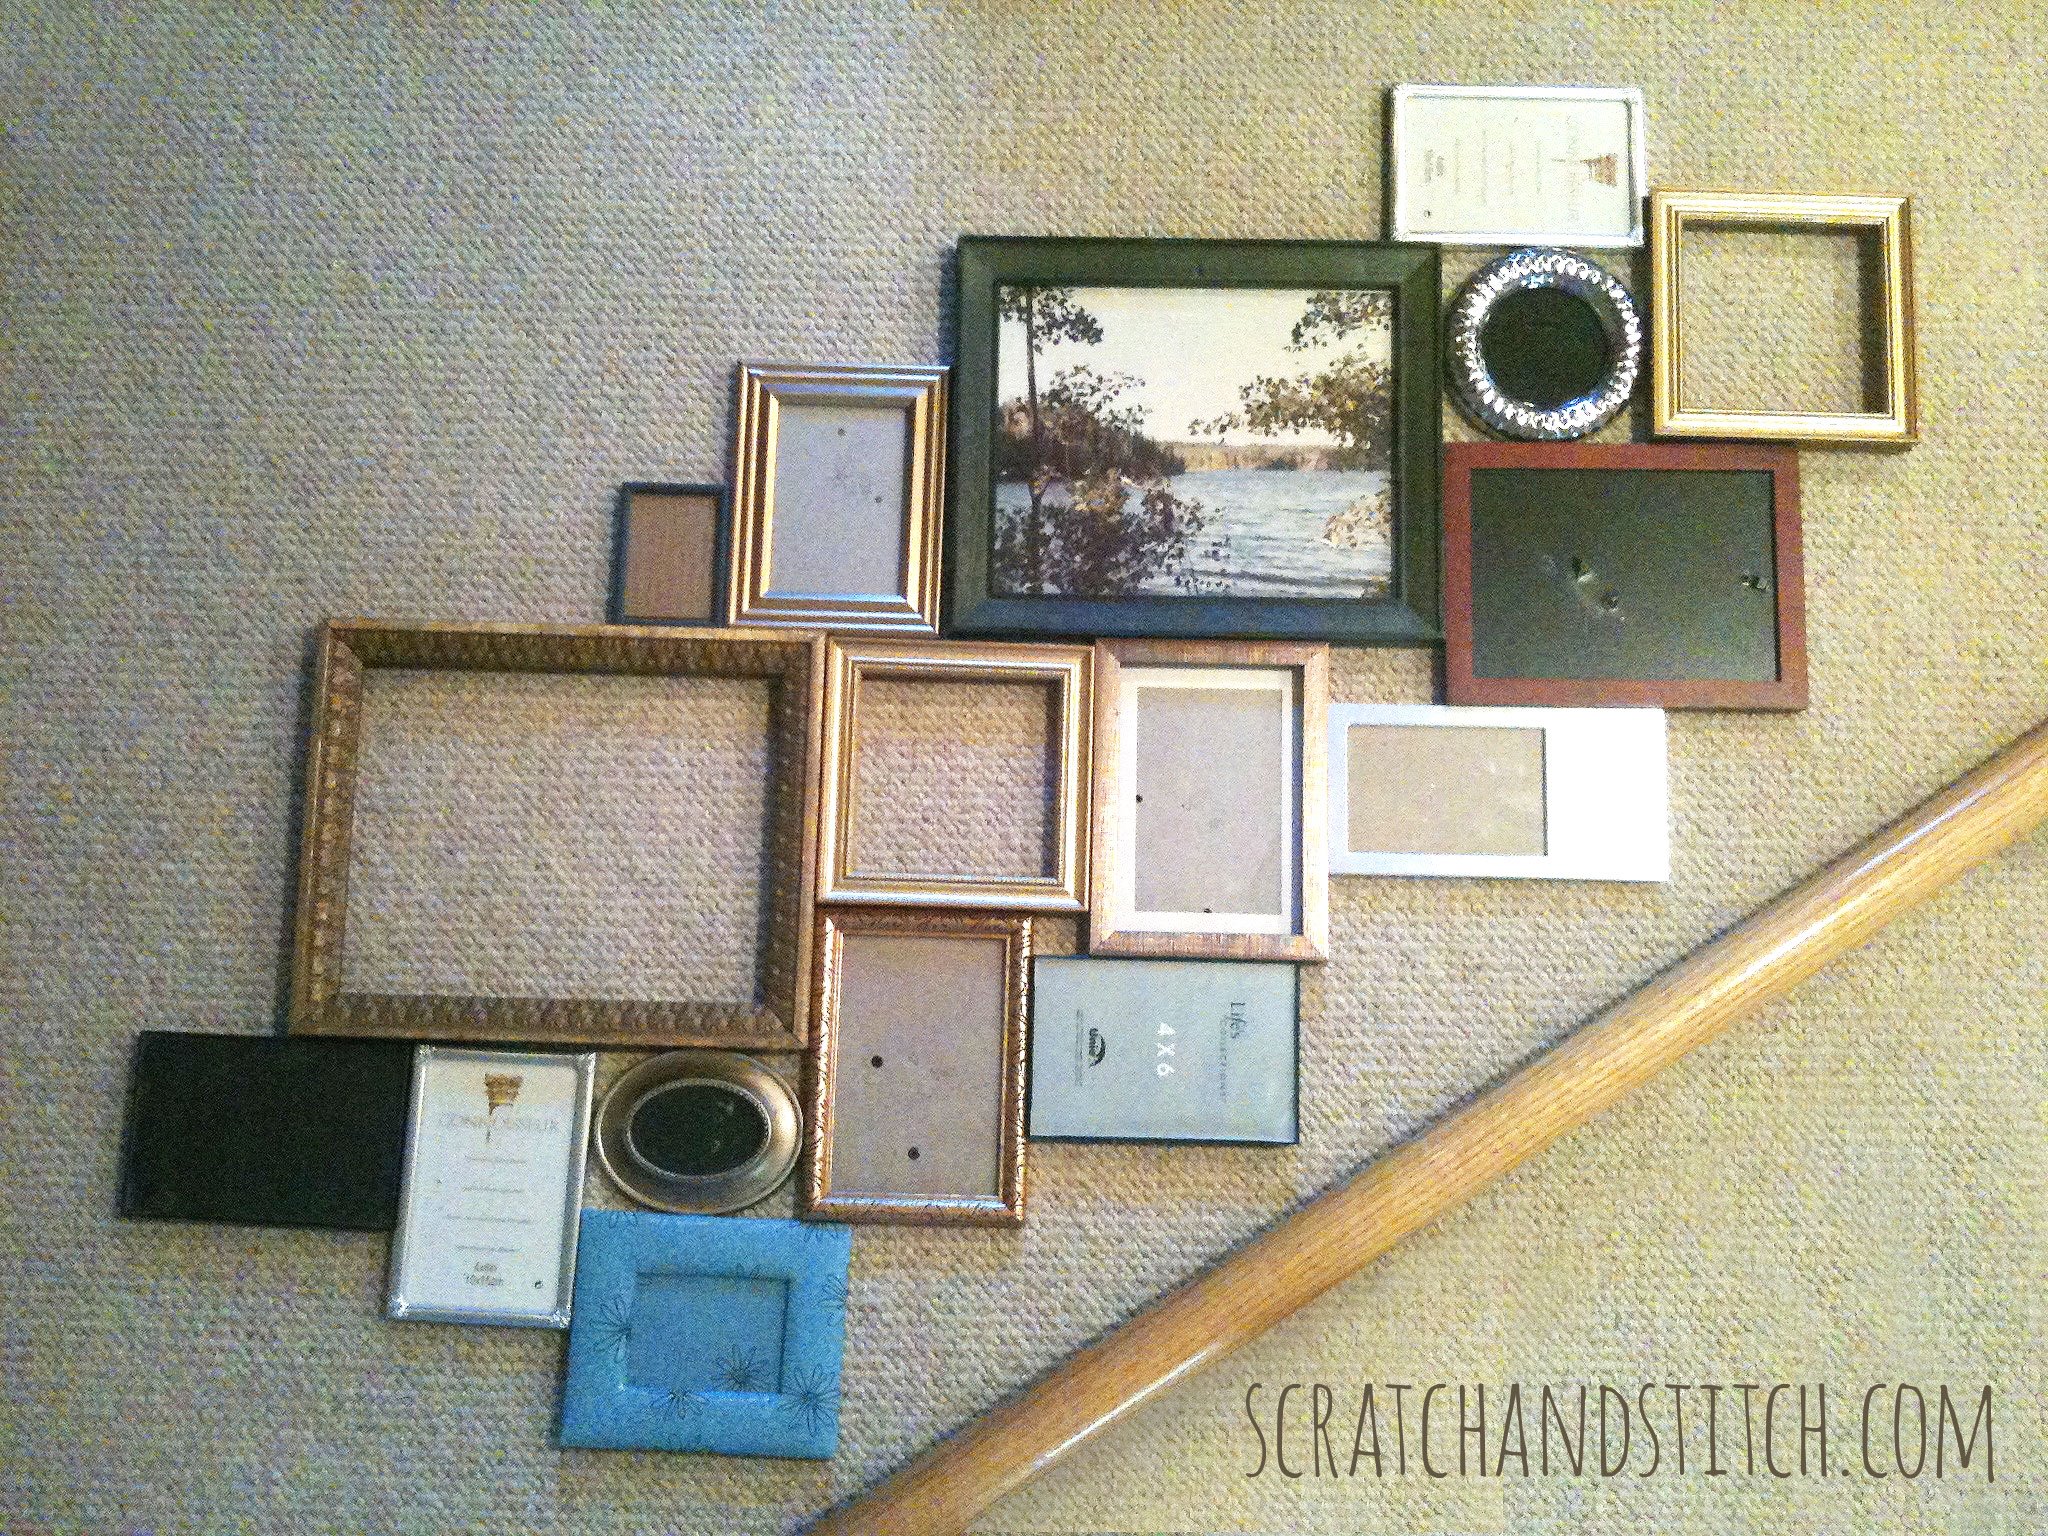
Tape your paper pattern on your stairway wall where you marked. Now you should be able to see how much space the stairway gallery wall will use. Make adjustments as need.
Prepare for hanging
Before painting your frames (to avoid dings and scratches), prepare your frames and wall for hanging. Remove glass from the frames and set aside in a safe place. Remove any easels or extra parts that will not be used. Attach self-leveling hangers to backs with glue, nails, or staples if needed.
Working from top to bottom, begin adding nails into the wall and hang your frames as you go to get the spacing right.
Paint
Spray paint your frames. Make sure to use a primer first so your paint will stick.
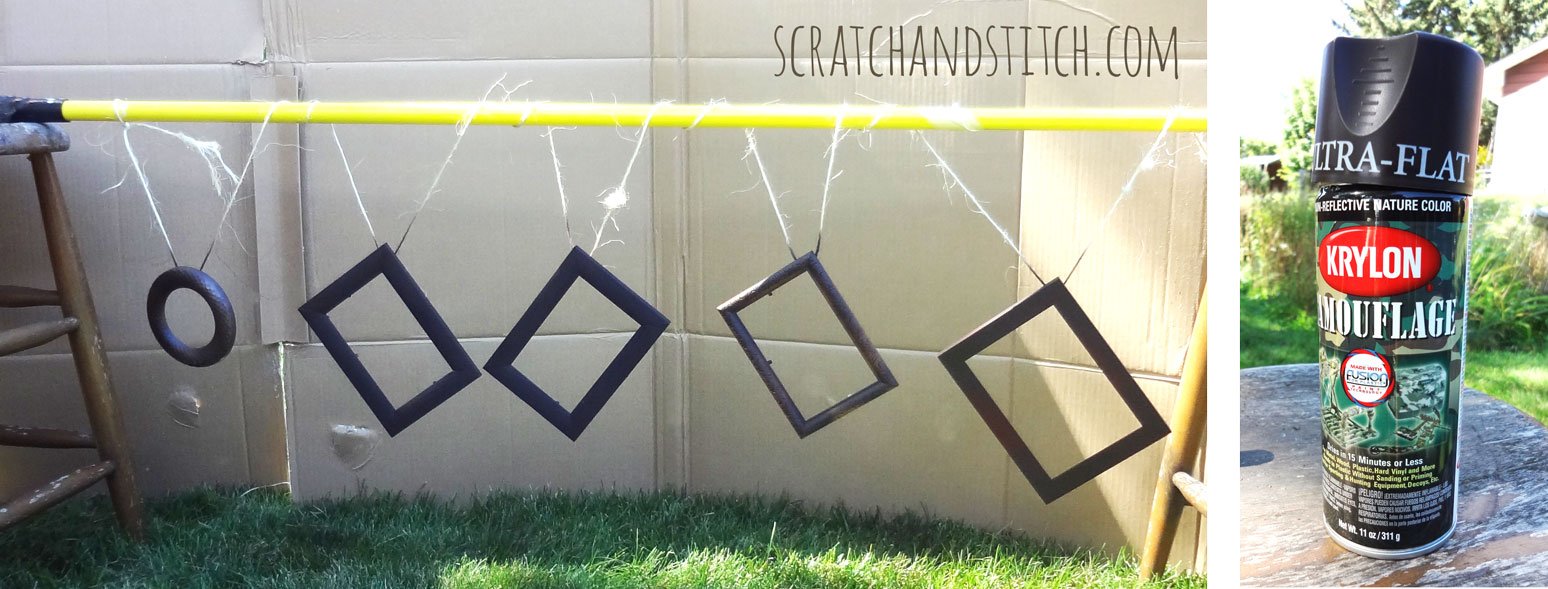
I left all the gold frames as they were and painted the others in Krylon Camouflage Brown Fusion Plastic Spray Paint. This gave a nice contrast to the metallic frames.
DIY Wood Headboard
Create a custom headboard for any size bed with this easy technique.
Add photos and artwork
Once the paint has dried and you’ve decided what will be in your frames, clean your glass and place into the frames with the photos or artwork.
Hang your frames to complete this stairway gallery wall. Once you’ve hung your frames, you may want to use ticky-tack to keep the frames stable.
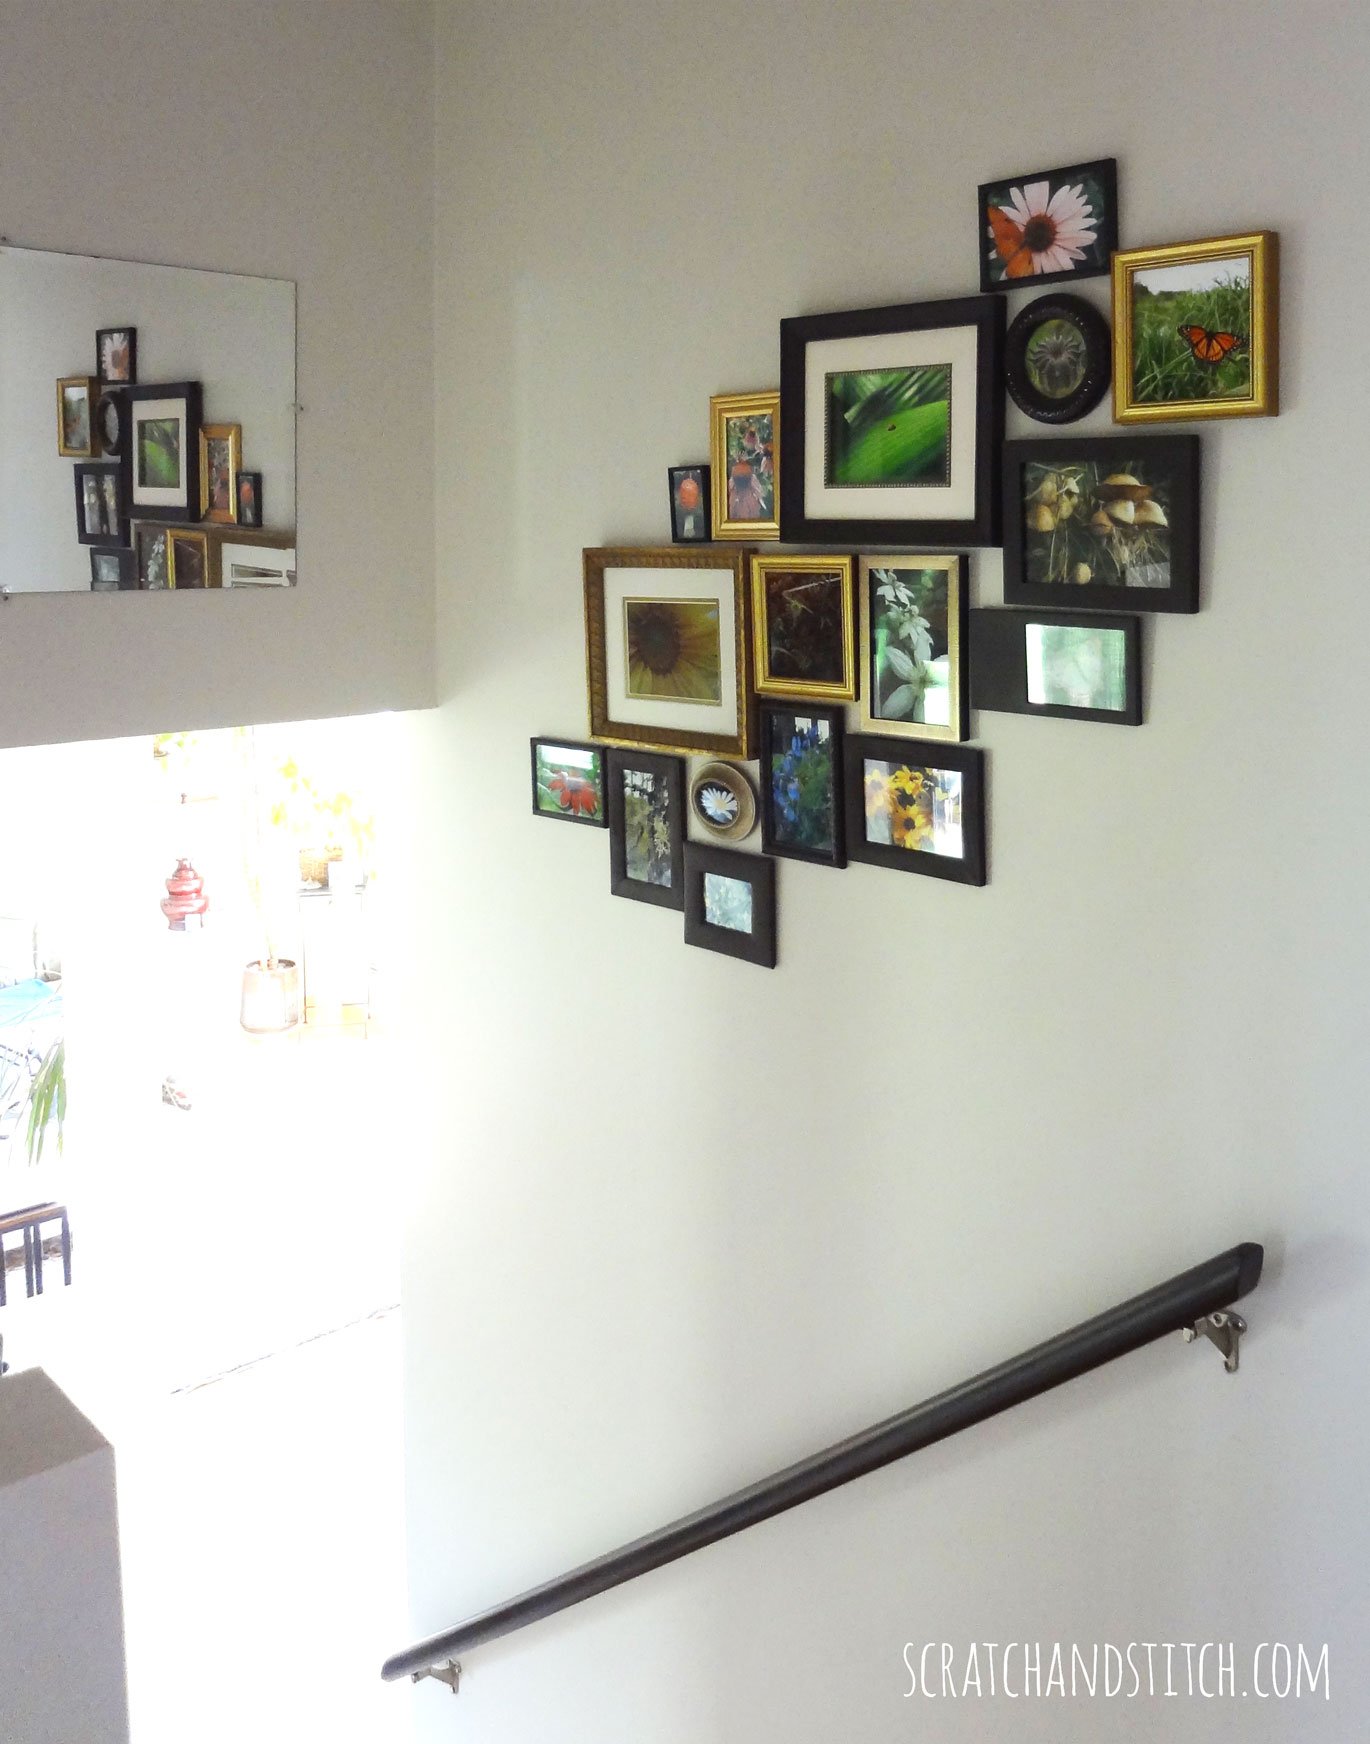
I had planned this project for several years while collecting many frames and photos. We’re loving our new stairway gallery wall.
Once you’ve completed yours, send me a pic and a link to your blog. I’d love to see it! :)
Leave a Reply