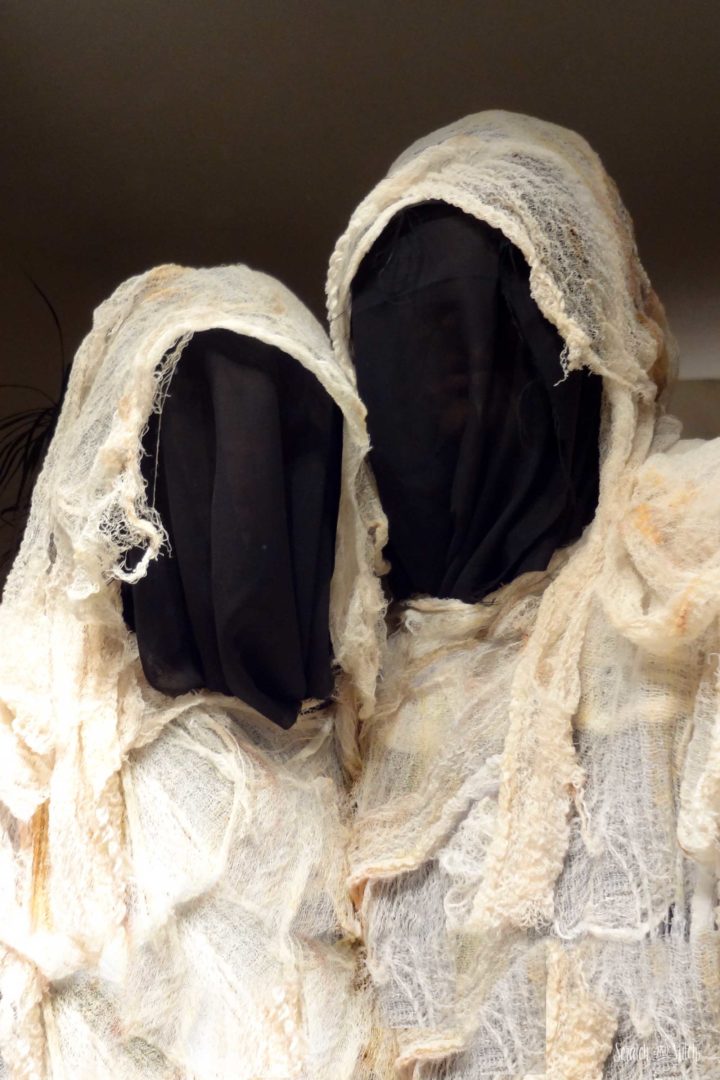
This year we went classic for Halloween…as ghosts! We wanted to make a simple DIY ghost costume that would be comfortable to wear and quick to put together. These creepy cheesecloth ghost costumes were scary-easy to make and ended up being one of our favorite DIY Halloween costumes yet.
How to Make a Creepy Cheesecloth Ghost Costume
Both kids and adults will like dressing up in this eerie ghost costume. The costume works well for indoor or outdoor Halloween events. It’s so simple to make, that it makes a great last-minute costume idea. Even better would be a group of ghost costumes.
Materials
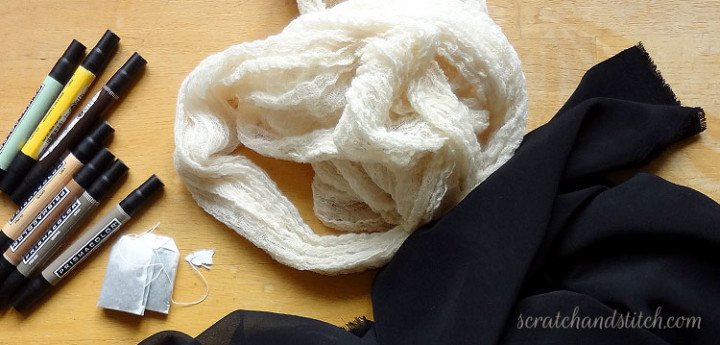
- cheesecloth (6–12 yards for adults, 3–4 yards for children)
- tea
- markers (yellow, gray, brown, tan)
- solid black fabric
- sheer black fabric
- baseball hat or visor
- safety pins
- black clothing
Create the Ghost Costume Hood and Face Mask
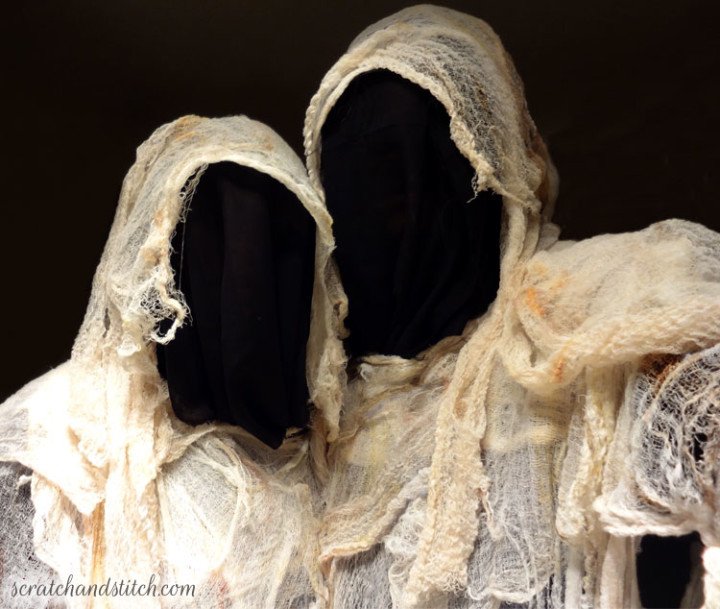
Cut enough sheer fabric to cover the whole face from ear to ear, over the forehead, and down to the chest. Using safety pins, attach the sheer black fabric to the hat forehead and on both sides near the ears.
Use the plain black fabric to create a hood over the rest of the head and down over the back of the neck. Safety pin the fabric onto the hat or visor. Pull the sides of the fabric together under the chin together to create a V, and pin together.
Make the Cheesecloth Look Old and Nasty
This step is optional, though we think it makes this ghost costume even better. Plus, it makes the cheesecloth smell nice. :)
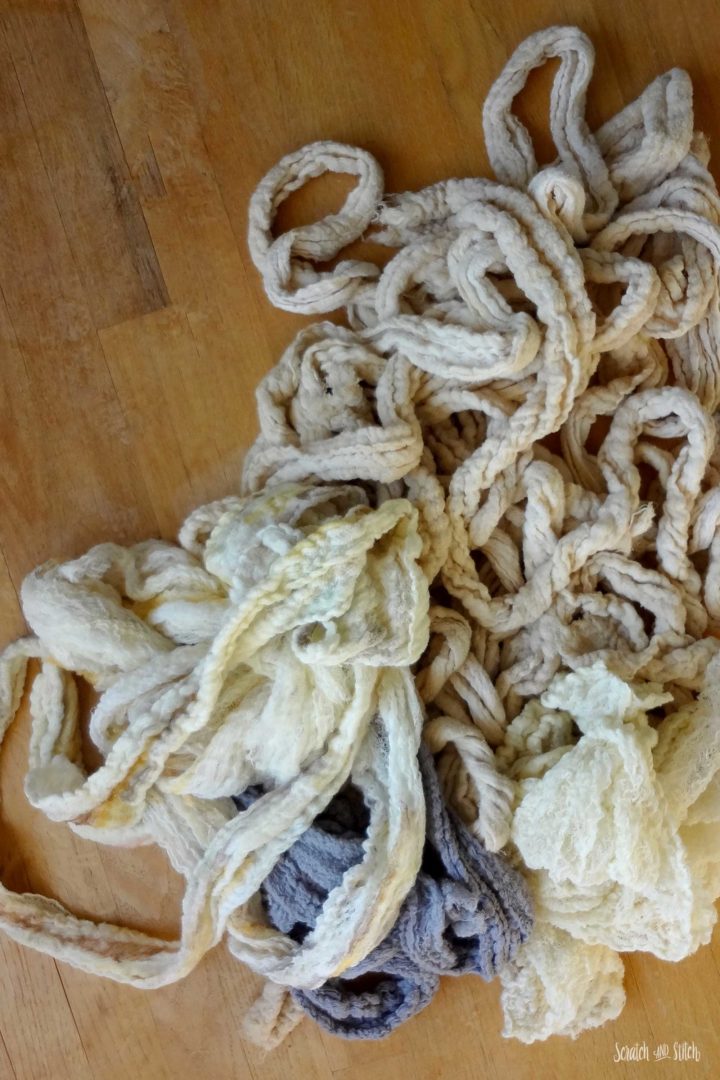
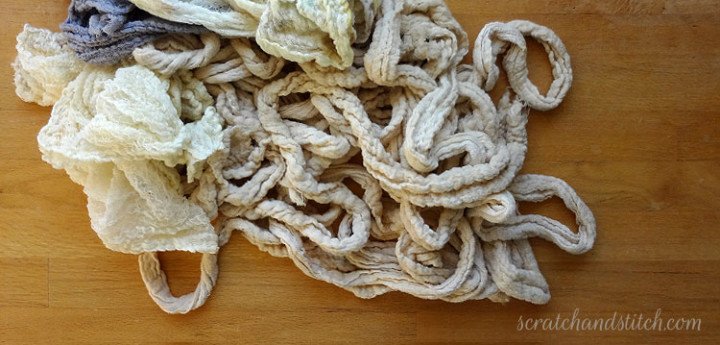
Bring a large pot of water to a boil. Add several tea bags and steep for 15-20 minutes. Remove the pot from the heat and squeeze the remaining liquid from tea bags into the pot. Discard tea bags. Submerge the folded cheesecloth into the water and let sit for 20-30 minutes, or until the desired color is achieved (keep in mind that the cheesecloth will lighten some once it dries). Do this in several batches to achieve different tints of color. Remove the cheesecloth and wring out the liquid. Place cheesecloth into the clothes dryer until dry. The dryer will set the tea stain into the fabric.
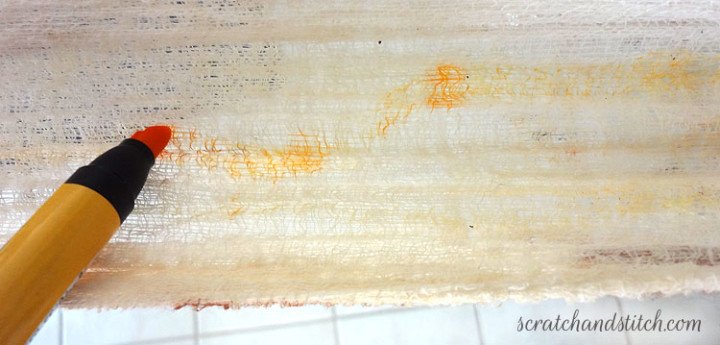
With the cheesecloth still folded together, tie one end to something sturdy and stretch it out to work with. Using several colors of marker (yellows, browns, grays), make random marks across the fabric. Once colored to your liking, unfold the cheesecloth.
Turn the Cheesecloth into the Ghost Costume
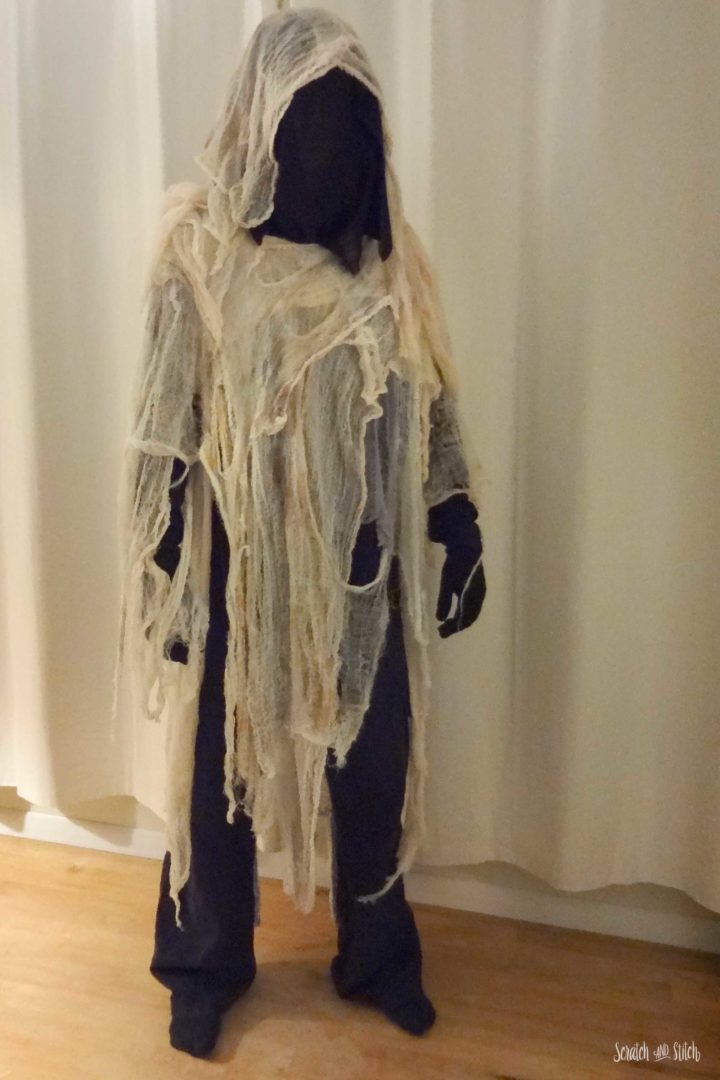
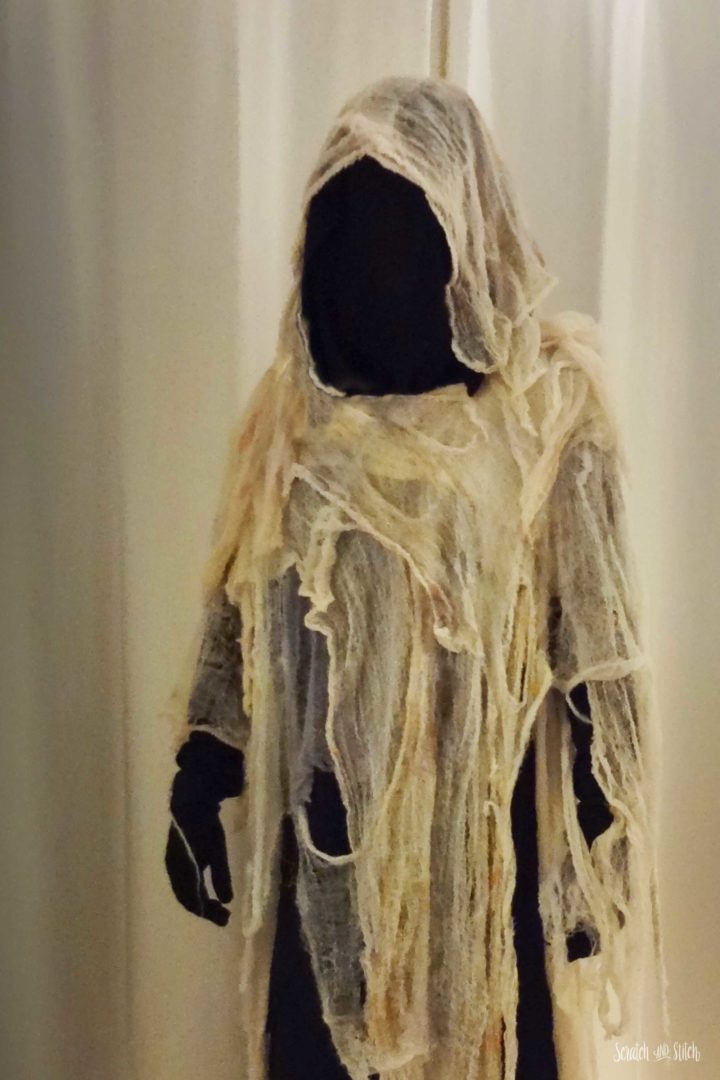
The goal is to randomly layer cheesecloth over the head and shoulders so it fits like a shawl. Ripping and tearing the cheesecloth will not only make it look old, but it will also help it stay in place while wearing.
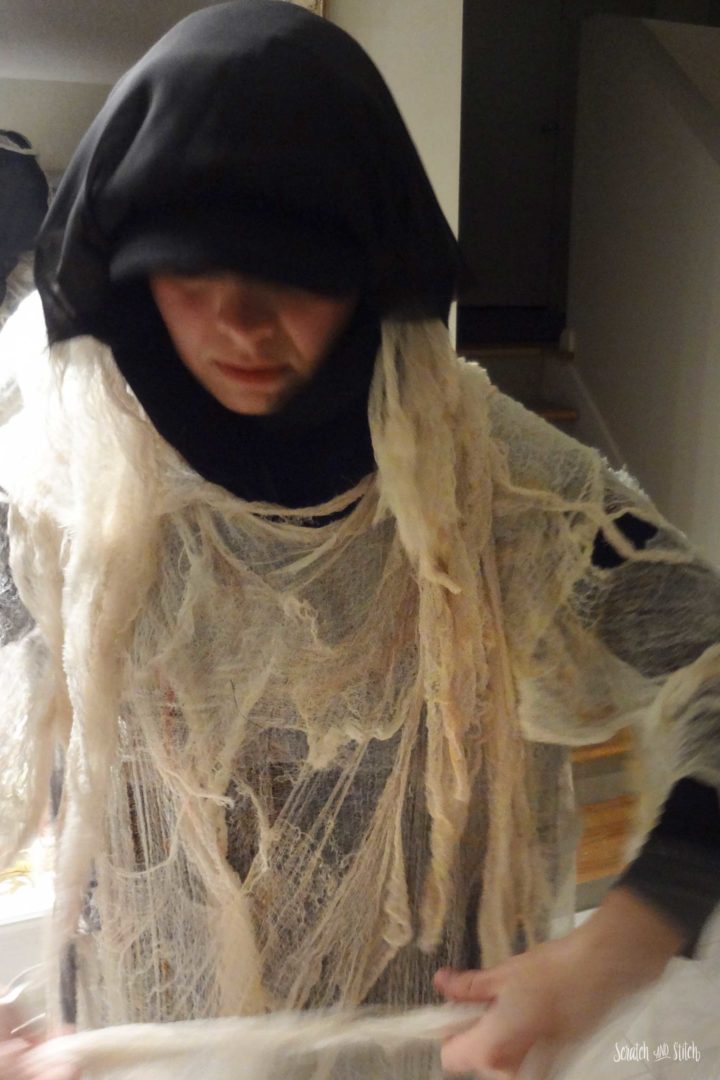
Start by tearing a neck-hole in the middle of a piece of cheesecloth then drape over the head and body. Repeat. Tear some armholes, so the fabric hangs under the arms at the side of the body.
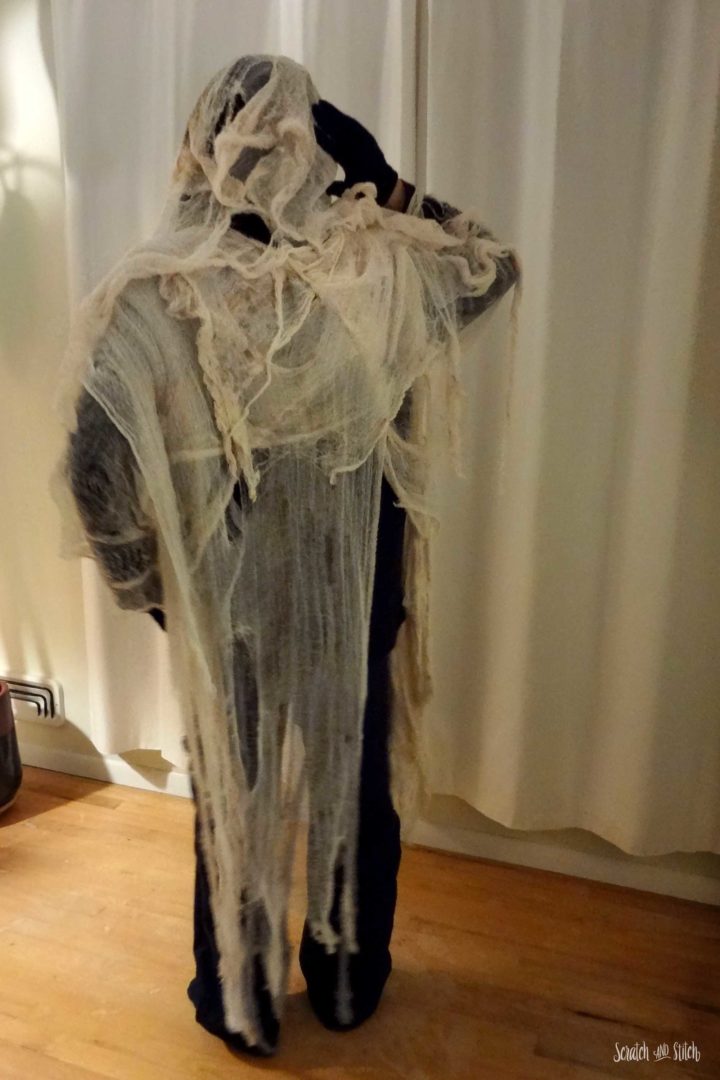
Continue this same process until you like the way your creepy ghost costume look. Drape a piece or two over the head like a hood and use safety pins to hold in place. Once all of the pieces are hanging from the body, rip more random holes and strips to get that rugged, old look. You can also knot the cheesecloth pieces together if you need it to hold together better.
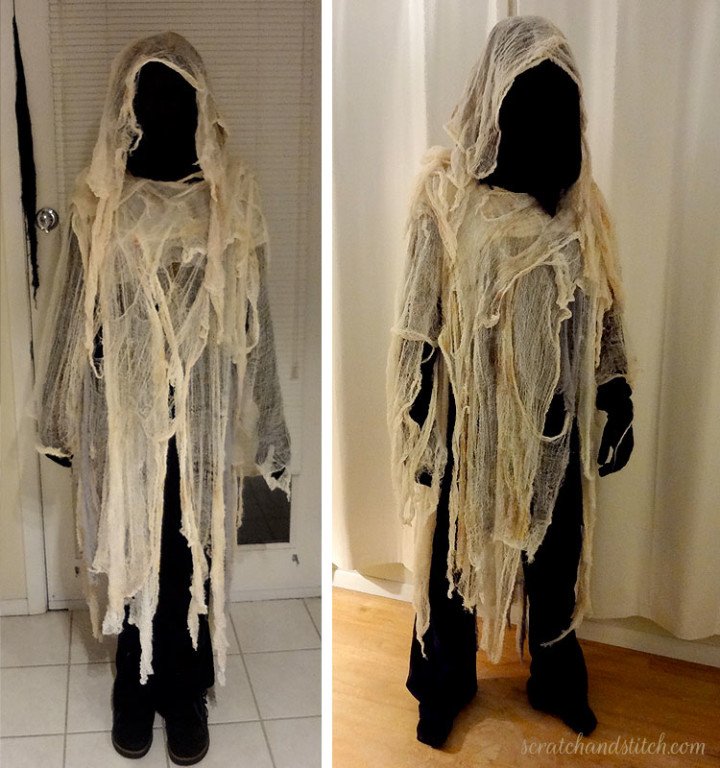
Dress in all black clothing under the cheesecloth and tuck the sheer face covering fabric into the collar of the costume.
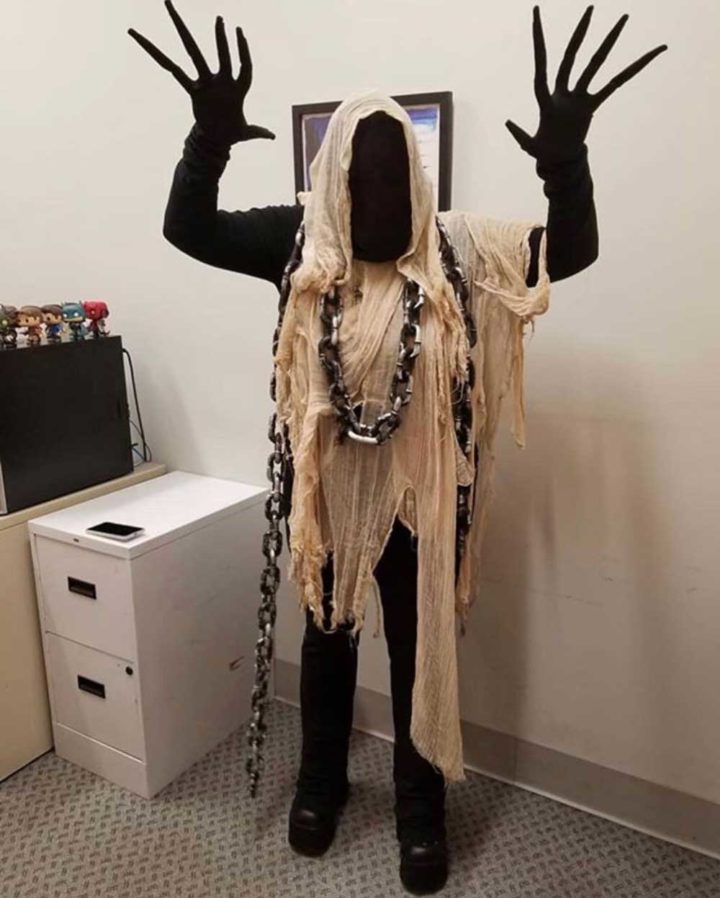
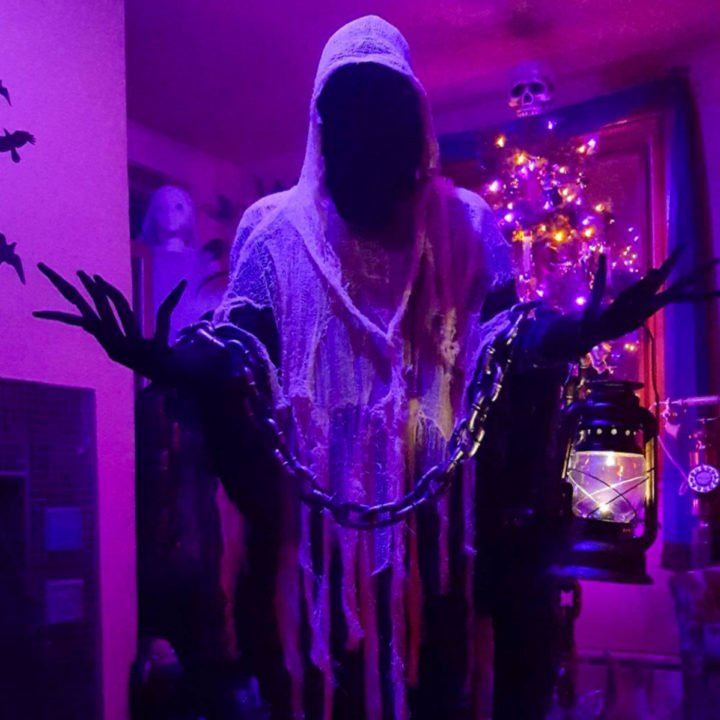
Make your ghost costume unique by adding fake spiders, lights, skeleton hands, or fake chains. See below for some creative ways fans of this ghost costume have made it stand out.
Check out some of our other past handmade costumes here.
DIY Spiderweb Wreath
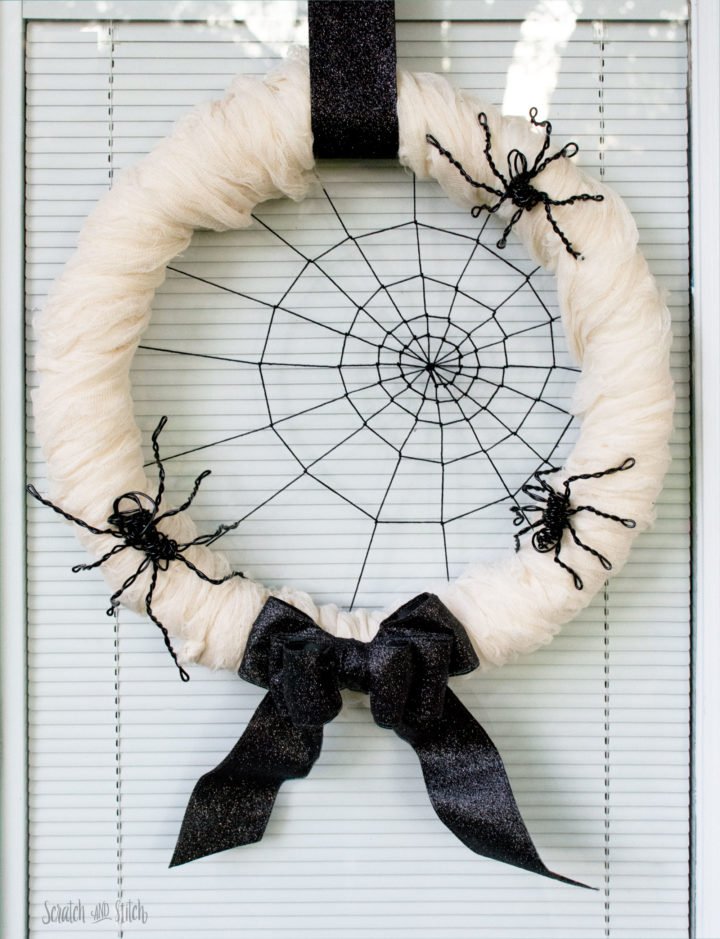
Got leftover cheesecloth? Make a Halloween wreath wrapped in cheesecloth with a spiderweb and wire spirders.
Cheesecloth Ghost Costume Fans
It gives me goosebumps when I hear that our cheesecloth ghost costumes inspired someone. Here are some photos submitted by fans or found online. Please send me your Scratch and Stitch inspired ghost costumes too!
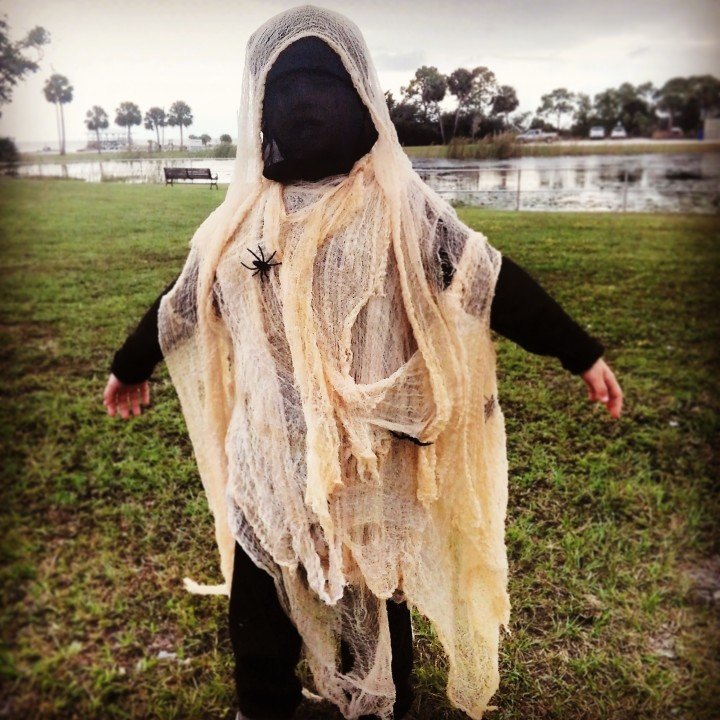
Six-year-old Layton from Florida wanted to be a ghost for Halloween this year. His mom put together his costume based on my tutorial. I love the creepy spider addition!
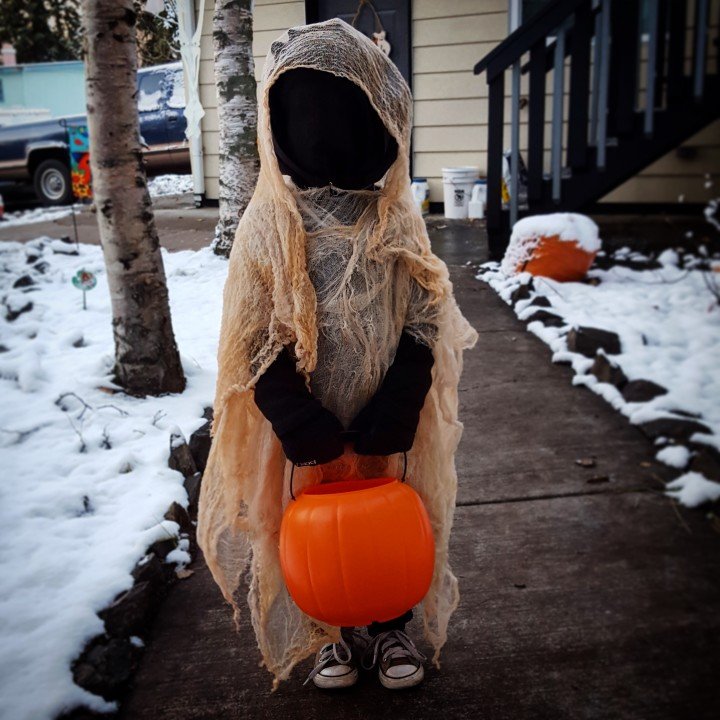
This three-year-old from Alaska is looking scary as can be. His mom mentioned that it’s the perfect costume for cold weather trick-or-treating because he could get all bundled up under the cheesecloth. I love it!!
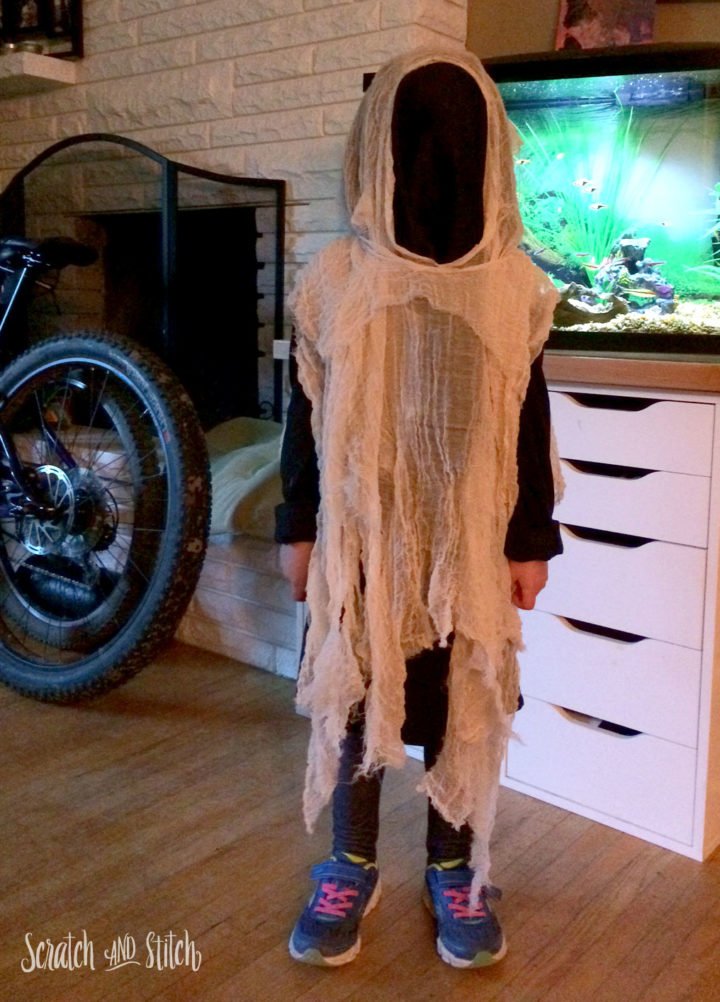
Six-year-old Mikaela from London, Ontario, wanted to be a ghost costume for Halloween 2016. Her mom found the Cheesecloth Ghost Costume tutorial and made her little ghoul a DIY Halloween costume!
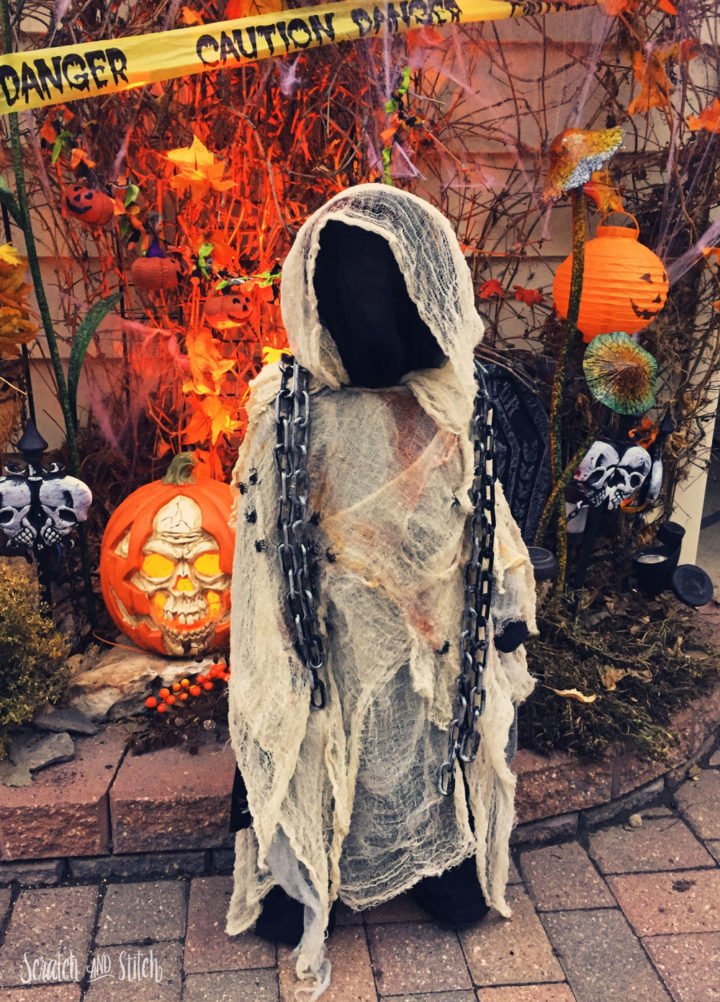
This three-year-old was the talk of the town in the DIY Cheesecloth Ghost Costume. I love the addition of spiders and chains!
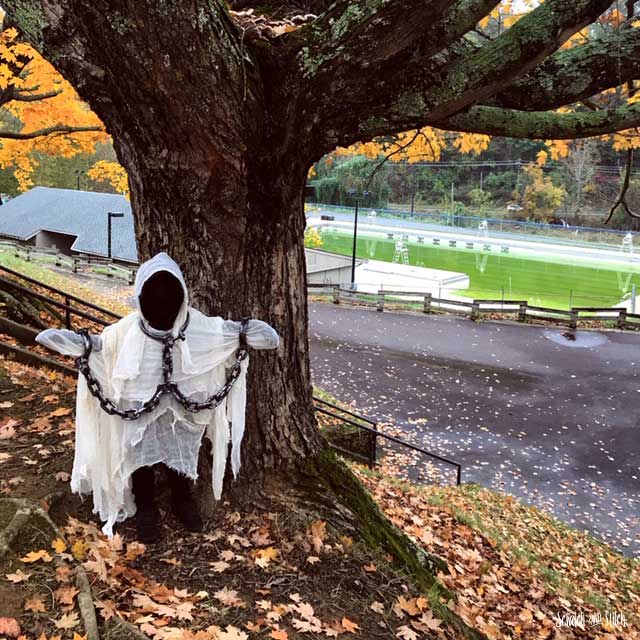
Four-year-old Wilder from Asheville, North Carolina, is looking good in his DIY Ghost Costume.
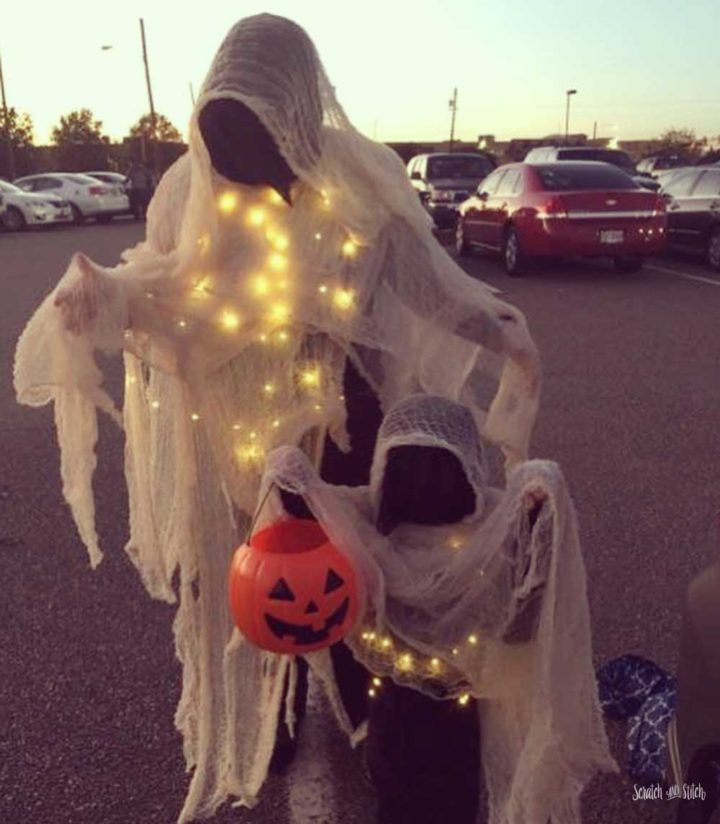
Mom and three-year-old son had fun being spooky in their family ghost costumes. They added fairy lights under the cheesecloth for an extra glow.
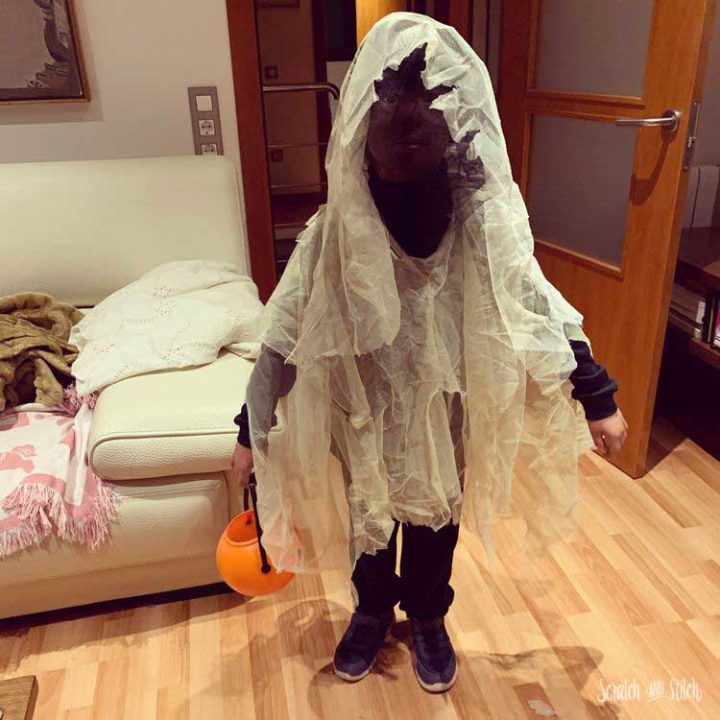
This toddler is ready to take on Halloween in his handmade ghost costume.
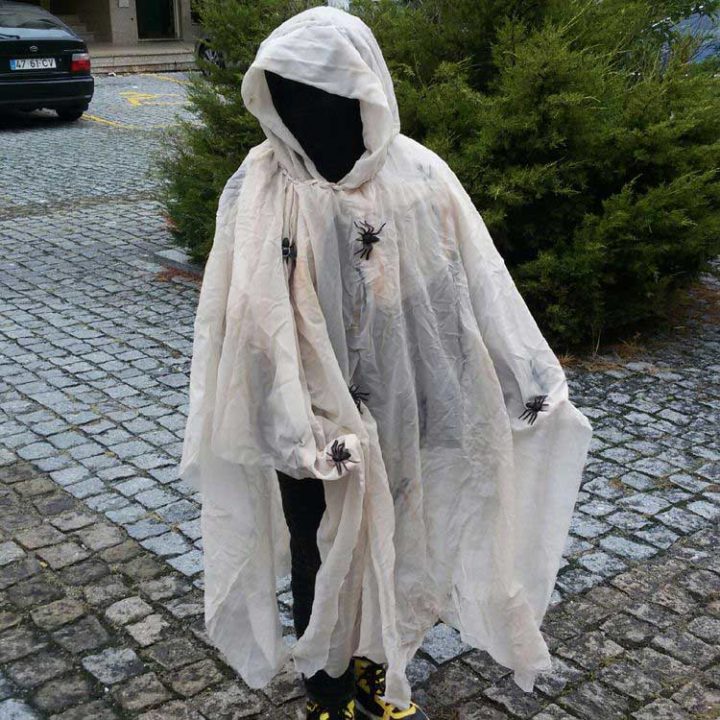
I love the spiders added to this ghost costume.
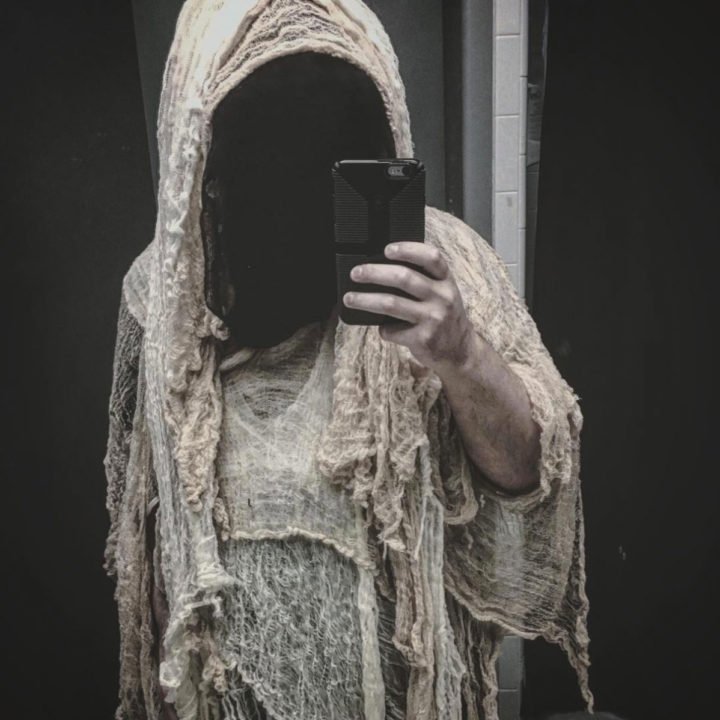
Ghost selfie!
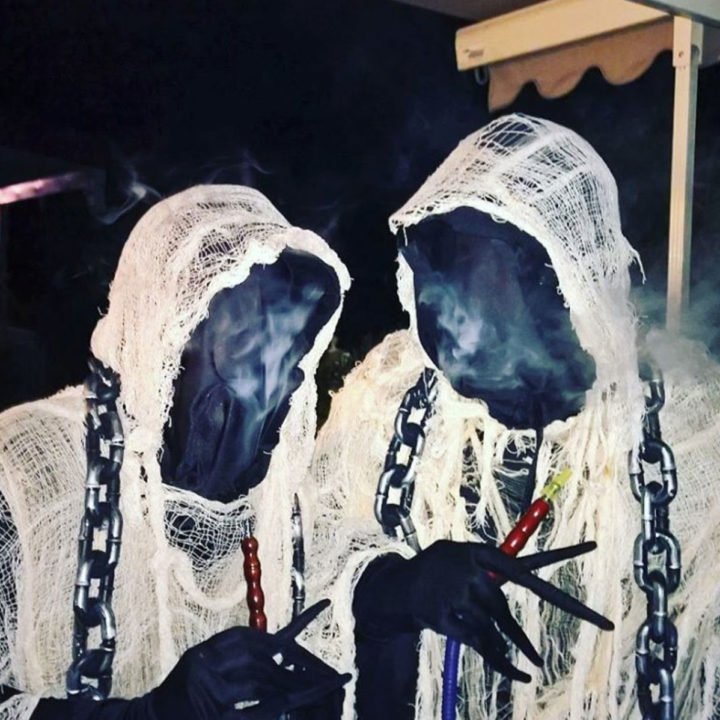
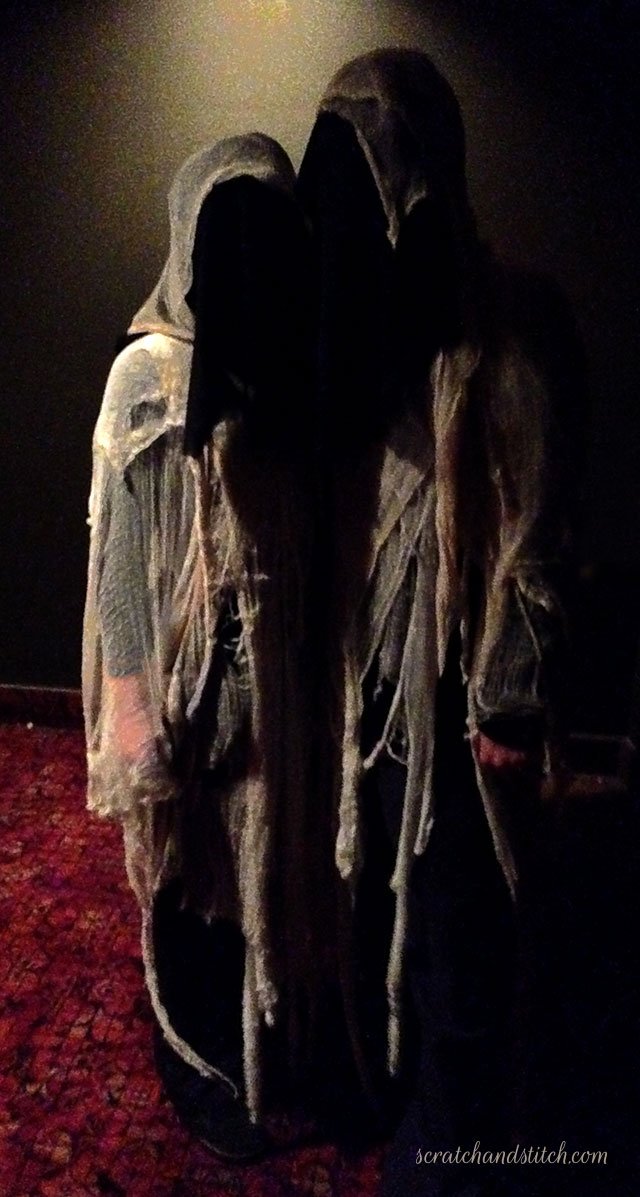
These two are looking good in their cheesecloth ghosts costumes!
Did you make the cheesecloth ghost costume? Send me a pic or tag me on Instagram and Facebook @scratchandstitch. I’d love to see your costume.

I am soooo happy to have found this. My son wanted to be a ghost and I didn’t want to do the sheet thing. Thank you for coming up with this scary awesome take on the haunted spirit. :)
Thanks! Please send over a picture of how it turns out. I’d love to see it. :)
How many yards of cheesecloth do I need for one outfit?
Hi Sai – I’d say you could use anywhere from 6-12 yards of cheesecloth for one ghost costume. I’d love to see a picture of your creation. :)
Thank you, and I’ll try to get one for you
This post is a lifesaver for us. My 3 year old son only wanted to be a ghost this year. Needless to say we searched every halloween store in town and couldn’t find anything for him. He is also a little guy so sizing is difficult as well. He just loves this scary ghost costume and we are so excited to go get all of the stuff to make it! Thanks for this really awesome and creative idea!!!
Yay! So happy to hear this. I would love to see a picture of how it turns out. Happy Halloween to you and your little ghost :)
Hello again!
I wanted to ask you about how much cheesecloth did you use for your kiddos?
Mine is 3 and is about 39in tall. Also if you could tell me where you had luck finding cheesecloth It’d be greatly appreciated!
Hi again :)
We used about 6-12 yards for adult costumes so I’d say about 3 or 4 yards would be enough for your little guy. You can get cheesecloth at a fabric store like JoAnn Fabrics. It’s probably cheaper to have them cut it for you rather than buy in a package. Send me a pic!
I found mine at Walmart. It was like $5.00 for a package with 6 yards in it. I bought some black plastic spiders to hot glue to the cheesecloth too.
Walmart! I never think of Walmart. Good idea. Thanks for sharing. :)
Hi:) I love this costume! My 6 yr old son wants to be a ghost for Halloween and I refused to do the ghetto sheet thing! I’ve looked everywhere for good ideas and had my mind set on one and actually got all the stuff to make it and then I found this one! It’s WAY more awesome and alot easier to make. I’m in the process of staining the cheesecloth right now. The only problem I’m having is if he’ll wear the fabric in his face. I’m hoping he will but I might have to use black face paint instead….we’ll see. I’m a little nervous about putting the costume together since I figured I’ll have to wait until Halloween day to put the cheesecloth on him BC if I do it now I’ll probably never figure out how to put it back together. It looks pretty easy and hard to mess up so I think we’ll be okay. I’ll send you some pics of how it turns out. Wish me luck:)
Hi Katy! Glad to hear that you like the cheesecloth ghost, it’s so easy to make and comfortable to wear. Face paint sounds like a good idea if he doesn’t like his face covered. I’d love to see some pictures!
Hi Cathi! Just wanted to let you know the costume turned out GREAT!!! He wore the fabric in his face and everything…..well, for a little while anyway…..we live in Florida and it was still 85 degrees when we started trick or treating so I couldn’t really blame him for not wearing it the whole time. He looked really good and got lots of compliments:) All thanks to you and your awesome creation! Thank you SO much for sharing the pics and directions. I have a picture I’d like to send you but can’t figure out how to do it(I’m a little electronically slow. Lol!). If you have an email address I can send it to or if there’s a better way to send it, just let me know and I’ll get it to ya. Thanks again!!!
Hi Katy – Totally makes my day knowing that I could inspire some creativity, especially for my favorite holiday! I just sent you an email to send pics to. Can’t wait to see how it turned out. :)
Sent you a couple pics yesterday:) Let me know if you got them! Thank you!
We successfully made the ghost costume! It turned out great and he just loved it. Especially the scary no face part! Thank you SO much for the great idea and taking the time to post the directions. I do have a great photo to post but I’m not sure how to get it on here.
Oh this is so exciting and I can’t wait to see the pictures.
SO cool! and spooky. (cheeeese! give me alllll your cheeeeese! lol) your projects are very inspirational.
Hi Cathi, My 5 1/2 year old is so excited to be a ghost this year (last year he was a Ghostbuster, so it’s funny that he so adamantly wants to change teams this year! Haha). Anyway, I was wondering what type of hat you pin the fabric to. Is it a winter-type hat or a baseball type hat, or a different type of hat? Could I pin it to the hood of a hooded sweatshirt, or wouldn’t that be secure enough? We live in Michigan, so our Halloweens are usually pretty chilly, so I was leaning towards a winter-type hat! Thanks so much, and I hope you are still able to see comments on your old posts and reply by the time I need to make this costume!
Hi Lindsey – Love that he made the switch from Ghostbuster to ghost. lol
We used baseball caps. This makes it so the black fabric doesn’t sit right on the face making it a bit more comfortable to wear. You could always layer a knit hat or hoodie under to keep warm. We’re in Minnesota so I know what you mean by chilly Halloweens (or it could be 80°).
Send me a picture! I’d love to see it :)
Thank you so much for your quick response and input, Cathi! I think that’s a great point to not have the fabric sit right on his face; that makes a lot of sense! I am excited to make it for him, and if it turns out cute/creepy, I will definitely send you a picture:)
You’re so creative! I saw your bee & beekeeper tutorial also–everything from scratch–super impressed!! I never could’ve figured that out lol
Just wanted to say that and I enjoyed your other posts too! Keep up the awesome creativeness!!
Thank you and thanks for reading! :)
Hi Cathi,
Wanted to ask you about the “several batches” comment for achieving the desired color/tones. Does this mean repeat the whole boiling and steeping process with new water and tea bags?
Thanks!
Oh, or does it mean with separate pieces of cloth? Thanks again!
Hi Katie –
Excellent question! :) Each individual batch of cheesecloth will achieve a different tone depending on the amount of tea vs water. You can slightly modify the color by using more or less tea. You can reuse the same “tea water” and either add more tea bags to make a darker color or dilute the water for a lighter color.
Another option is to add all of the cheesecloth to the tea water and let it sit so the tea stains the cheesecloth. Then after several minutes remove a few pieces and let the remaining pieces continue to take on the tea stain.
Let me know if that makes sense. And send me a picture of your costume, I’d love to see it!
I followed your instructions here and created spooky ghost costumes for my son and I this year… What a hit! We got so many compliments and we loved being spooky! Thanks for the fabulous idea.
So glad to hear :) Please send me a picture of the two of you, so excited to see how they turned out. cathi@scratchandstitch.com
How do they see
Hi Liz – The fabric that covers the face should be a see-through black fabric. When the fabric is laid over the brim of a hat or visor (so it doesn’t touch the face) it very easy to see. :)
Hi Cathi! Just stumbled over your DIY costume, and now I am working on it. Wasn’t that easy to find cheese cloth, actually, first I had to find out what it’s called in German. Found some at a Farmers online shop, they cover plants with that stuff. I colored it with coffee, uhm, the waste of it after you brewed. One night and it looks fine. Like 200years rotten. My cat already helped me destroying the fabric and make holes with her paws. Tomorrow I will go on finishing it with UV light colors for some ecto plasma effect, ad chains, spiders, insects and a rope.
Hi! I love that you used old coffee and your cat to get the old and creepy effect. Send me a photo! I can’t wait to see it :)
Possibly a dumb question but any idea what ‘grade’ cheesecloth or will they know @ Joann’s? I ordered some online and it looks like linen! It says it’s grade 90 ‘very fine mesh’ so that seems wrong!
Hi Kristin – I would say go with the opposite of fine. And pick the cheap stuff. (I just answered your email too). Send pics!!
I just wanted to thank you because I used this costume this year and people loved it. First prize at the work contest as well. I tagged a photo of it to your instagram. Your instructions were so helpful! (As well with the photos of other variants with spiders and chains).
My personal addition was 4.5″ platform shoes – added a bit more menace to my 5’5″ frame!
Yay! I’m so glad you made this it turned out awesome!! The reactions from others is one of the best parts about this costume. Congrats on first place 😁 Can I share your costume here and on IG/FB?
Absolutely!!
What lengths and how many pieces of cheesecloth did you use for an adult? Sorry not creative so i need help step by step if I’m going to be the oldest ghost (lol)
Hi Allan – I would use 6-12 yards for an adult costume should do it.
Send me pics of your costume! :)
Doing this for my 4 year old this year. I’ll try to remember to send you pics!
Yes! Please do. :)
I was wondering. I got a diferent kind of fabric it is still dirty looking but it is not cheesecloth it still rips in that messy kind of way and it is not heavy.And I am using a black shirt instead of black fabric…Hope it works
Yes! The goal is dirty and old so it sounds like it would work to me. Send pics :)
Do you cut the cheesecloth into pieces before tearing the holes to put it on? Or keep it as one long piece and fold back and forth? And how do the cheesecloth pieces stay on the hood? Thanks!
Hi Maira – Cut (or rip) the head hole only. Then pull, rip, and tear the cheesecloth to get the desired look. Draping over the head in layers will help it stay in place. You can also tie areas together to help hold it where you want (like under the arms). I hope that helps!
Send me pics of your final ghost, I would love to see how it turned out. :)
This was perfect, my 5 year old couldn’t have been happier with the way his costume turned out and with it being so cold tonight we were able to hid extra layers underneath to stay nice and toasty! Thank you so much for the guidance, everyone loved our little spector.
I love hearing stories like this! As a Minnesotan, I know the importance of making a costume that’s ready for all temps. This costume has been such a hit with kids and those who see it out-and-about. Thank you for sharing! :)
I have never gotten such amazing feedback on a costume! I didn’t even have time to colour the cheesecloth! I dressed in black, and took 3 packs of cheesecloth, a black hat, and some black material to work and assembled it in the bathroom that morning. I was a hit! My hands sold it. I used old black gloves, 10 straws and electrical tape to make long pointy fingers. Thanks for the idea!
Oh this is so wonderful to hear! This easy costume is always such a hit for makers and viewers. I would love to see pics!! :)