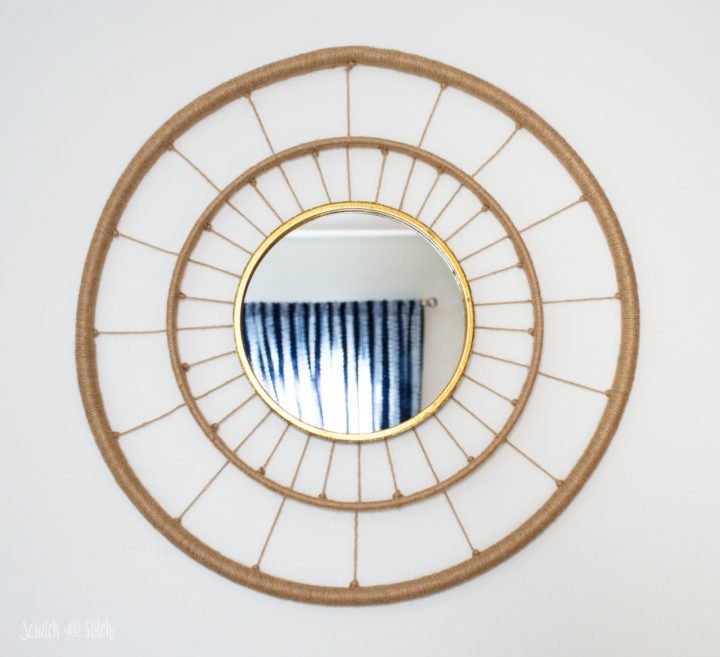
The sunburst mirror trend has been going on strong for a while now. There are a ton of ready-made options to buy as well as DIY ideas online. I came across this on Instagram that inspired the DIY Sunburst Mirror for our baby nursery decor. It’s perfect as the nursery already features a moon and stars.
I wanted a large round piece that fit the eclectic, boho feel of the nursery but wasn’t overwhelming in style. This DIY Sunburst Mirror fits all of those ideas plus is super easy to make. And bonus: our baby boy loves to look at it.
How to make a DIY Sunburst Mirror
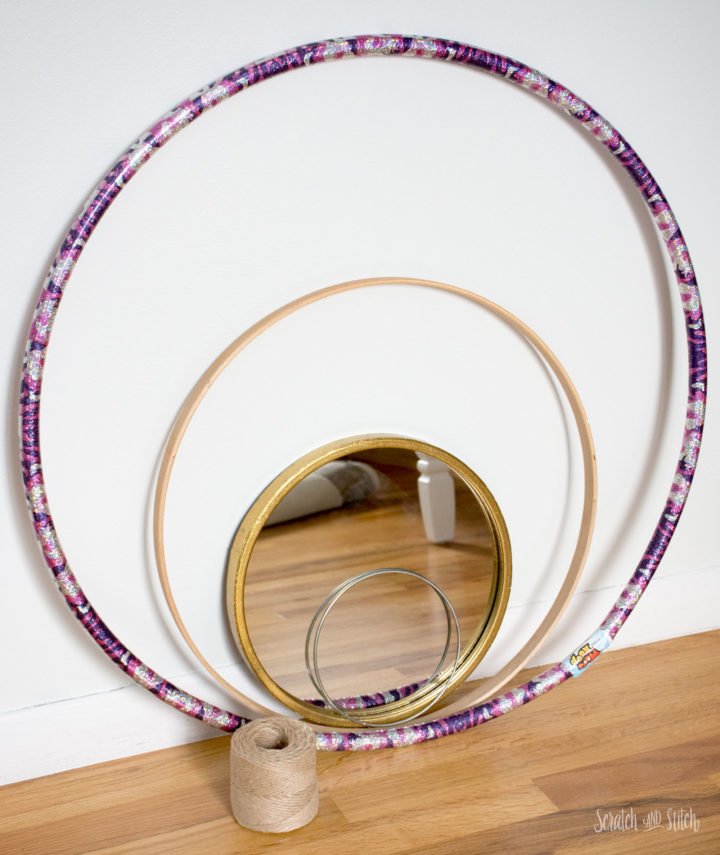
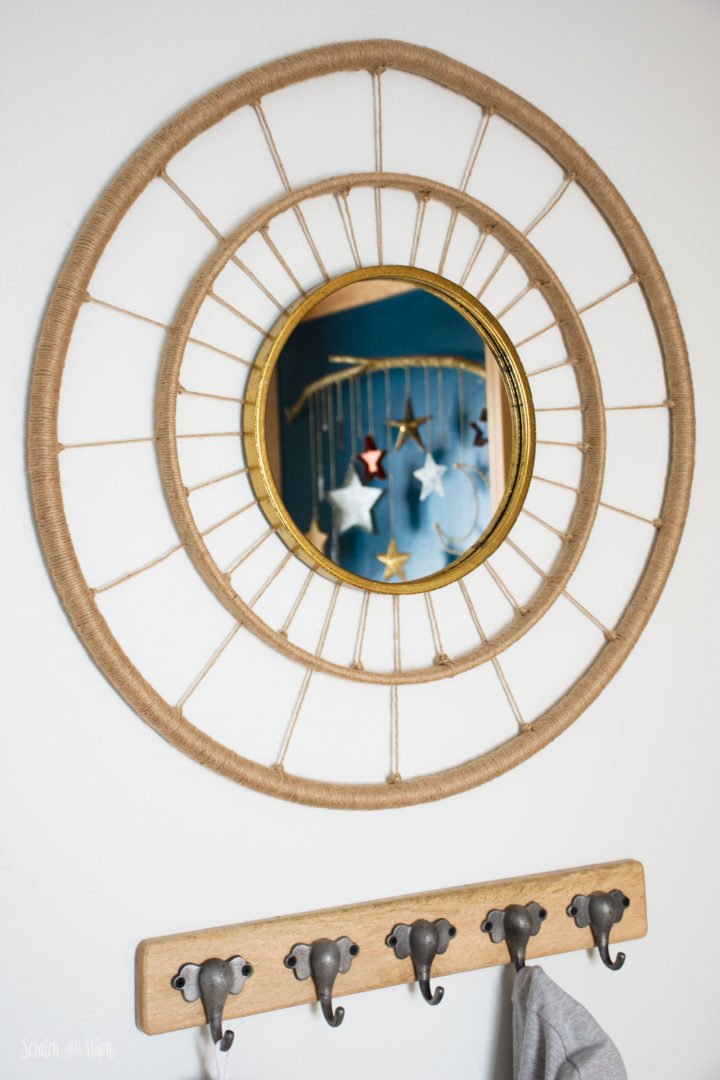
This DIY Sunburst Mirror is completely customizable to fit your space and desired look. It uses three different size hoops wrapped with twine and a mirror in the center.
**The hoops are one piece and the mirror portion hangs separately on the wall over the hoops.
Materials
- hula hoop – I used a small children’s hula hoop that’s approx 34″ wide.
- embroidery hoop – I used a large 14″ embroidery hoop and only used the inner hoop, the outer loop will be used later for a wreath.
- smaller hoop – I happened to have this metal hoop in my craft stash, another smaller embroidery hoop would work well.
- round mirror – I found this 12″ gold framed mirror at Hobby Lobby.
- jute twine – I used this twine, the same twine that was used in my DIY Pendant Light.
- masking or painter’s tape
Directions
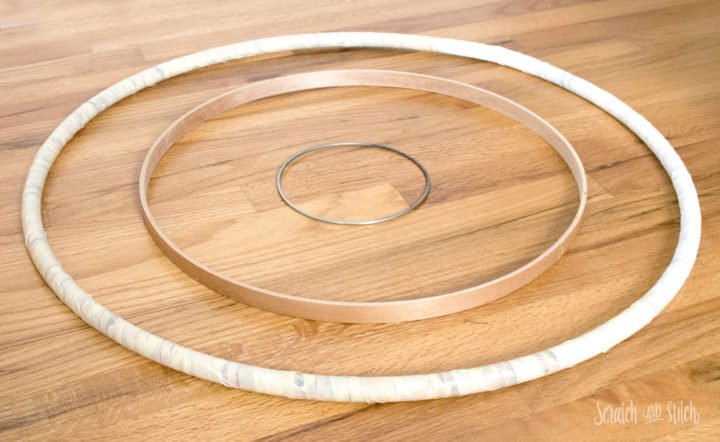
Evenly spacing the three hoops is the hardest part of the whole project, I promise! Once all the hoops are in place, the wrapping starts and you’ll be smooth sailing.
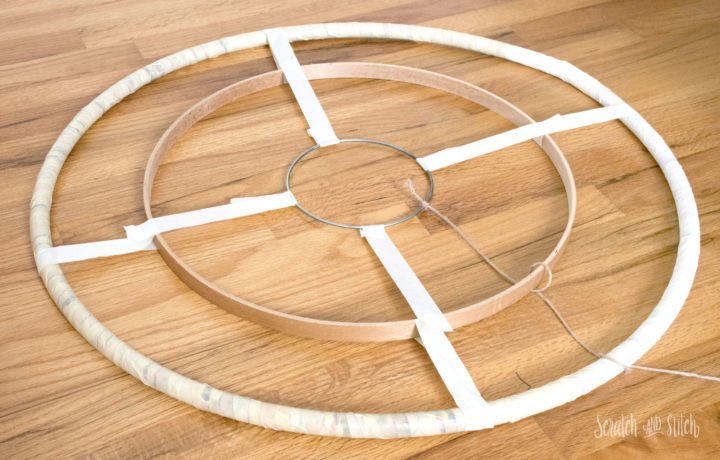
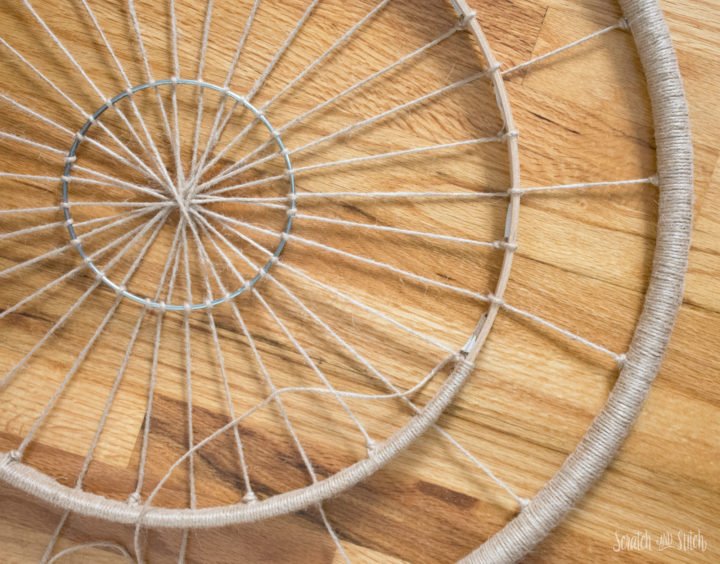
Begin by centering the three hoops inside of each other. I used masking tape to temporarily hold them together.
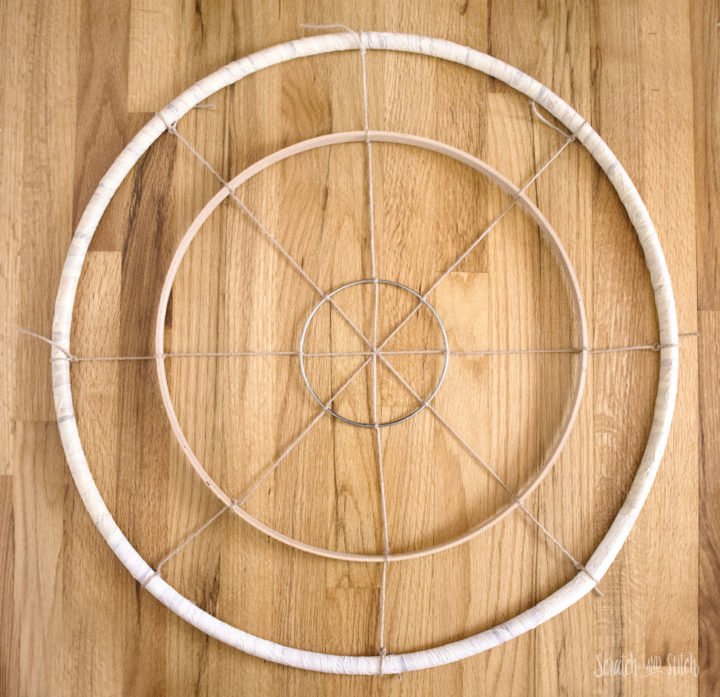
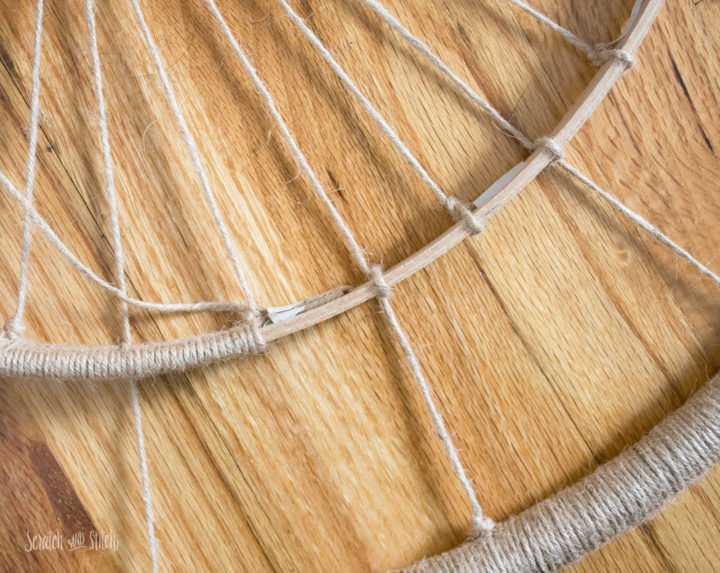
Next, tie twine from one side of the largest hoop to the other, looping around the middle and inner hoops as you go. This should create a straight line through the center of the hoops.
Repeat the same steps as above until you have six “rays.” You can then remove the masking tape and your hoops should stay in place.
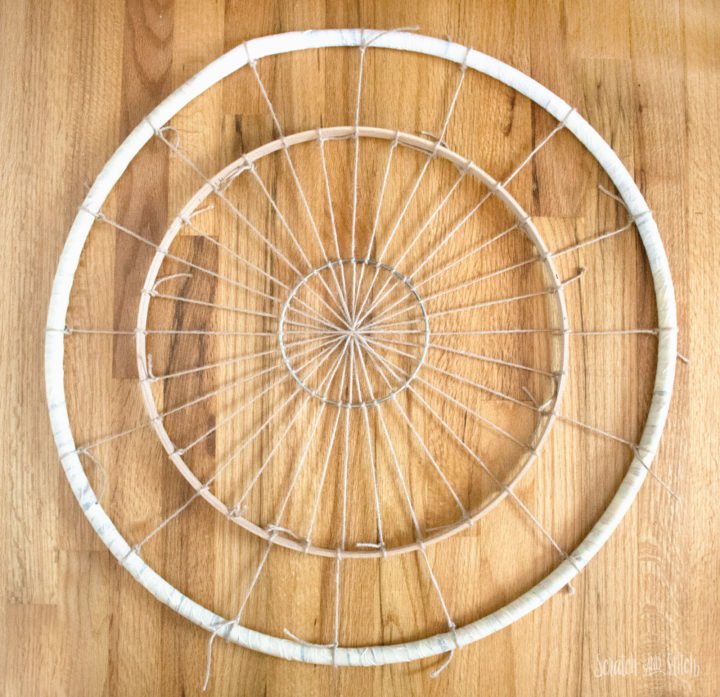
Keep adding rays to your sunburst across the largest hoop. I have 16 sun rays on my outer hoop.
With the middle hoop, repeat the same steps of tying and looping over the center hoop in between the original rays.
Add more or less rays to your DIY sunburst mirror until you like the look.
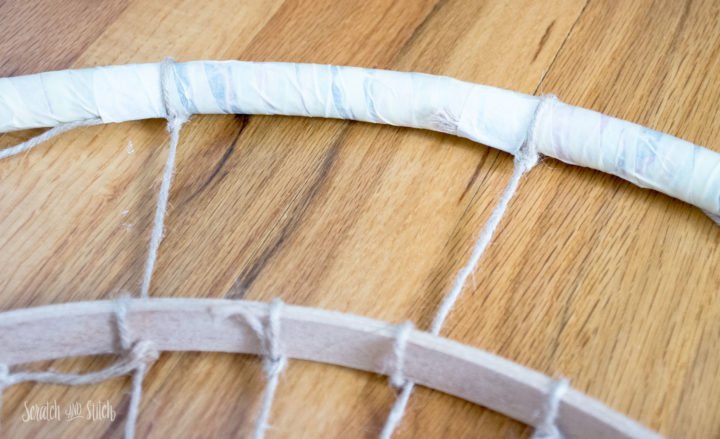
Once all of the rays are generally in place they should still be able to slide a bit so you can make slight adjustments. Find the correct placement of each ray, press the loose twine ends to the side of the knots and tape in place. This will hold your knots in place and will hide the twine ends.
Start wrapping!
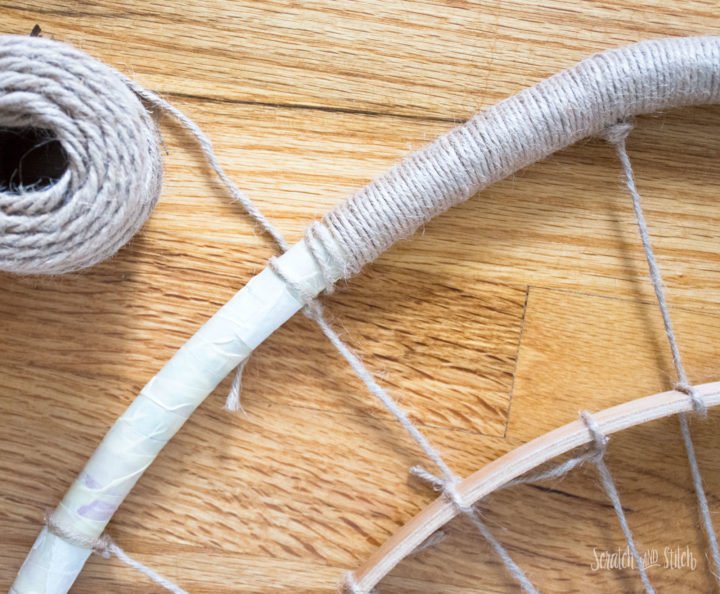
Starting with the largest hoop, tie the jute twine onto a ray where it meets the hoop. Tape your loose twine to one side and being wrapping the twine around the hoop.
As you continue wrapping and hit another ray, wrap the twine twice around the knot and keep wrapping all the way around the hoop.
Begin wrapping the middle hoop in the same way as you did the large hoop. I chose to warp around the knotted rays and just keep wrapping past the looped rays.
To finish of the final wrapping of the sunburst mirror, knot around a ray. Optionally, use a dab of glue on the twine ends to hide them on the back of the hoops.
Installing the DIY Sunburst Mirror
First, securely hang your mirror on a wall. Find where the sunburst hoops should hang centered with your mirror. Remove the mirror and hang the sunburst hoops. I used these 3M Command mini hooks to hang the sunburst hoop from the center hoop onto the wall.
Did you follow my tutorial and make your own DIY Sunburst Mirror? Leave a comment below with your tips or questions. Thanks for reading and make sure to join my newsletter!
Hey! I’m SO happy I stumbled on your blog! You just retweeted one of my DIY posts from my blog and after scrolling your projects, I had to introduce myself. This project is uh-mazing and I’m absolutely going to try it out. I’ve even kept a hula hoop in my garage because I wanted to make something awesome with it. Thanks so much for the idea!
Hi Lisa – Thanks for coming over and having a looksie! Send me a picture when you make yours. :)