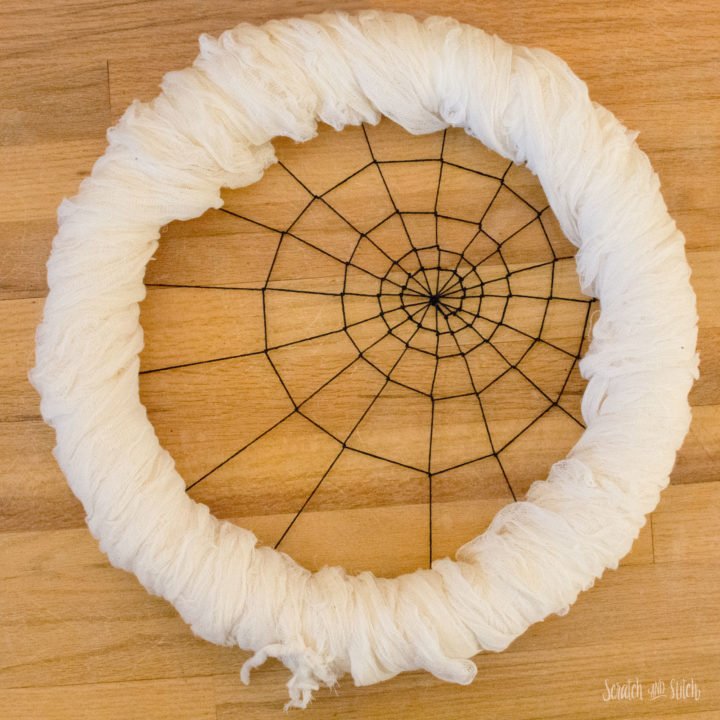
Looking for some new Halloween decor to spruce up your fall curb appeal? Try this DIY Halloween Spiderweb Wreath with Wire Spiders using just a few materials. It’s a little spooky with ghostly cheesecloth and a little glam with black glitter ribbon. Plus, it’s easy-to-make and looks great hanging on your front door!
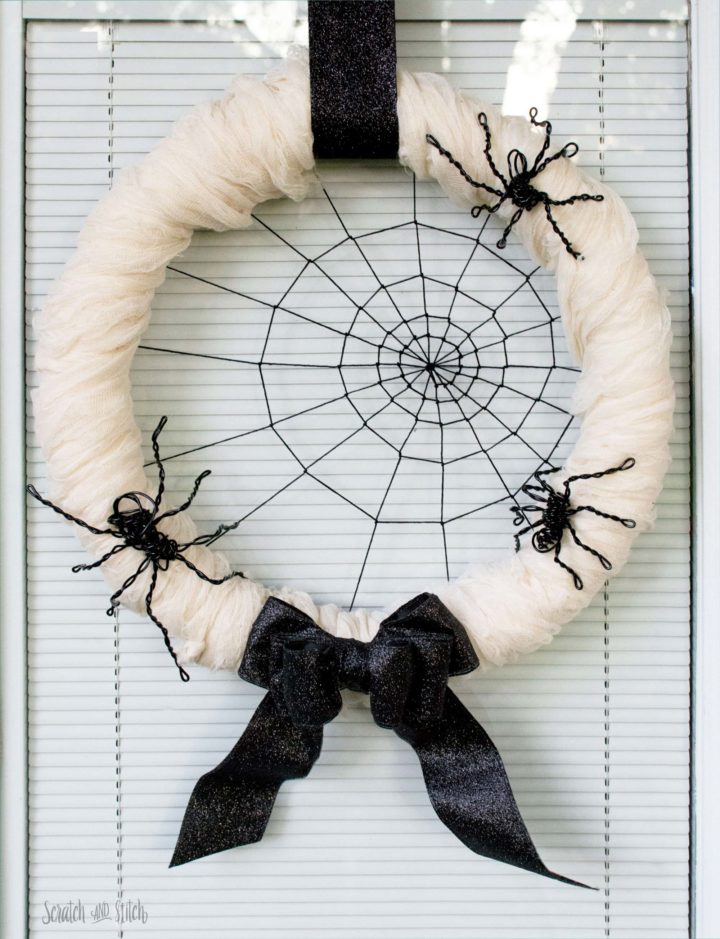
How to make the DIY Spiderweb Halloween Wreath
In this tutorial you will learn what materials you’ll need to make this spiderweb wreath.
- Gather the materials to make this handmade Halloween craft from the materials list below.
- Loosely wrap the wreath form in cheesecloth.
- Use pins and cord to build the spiderweb.
- Form spiders using black wire and pin them to the wreath.
- Add a black ribbon bow and hanging loop.
Materials Needed for a DIY Spiderweb Wreath
- 18″ wreath form
- I recommend using a 18″ foam wreath form or straw wreath form (keep it in the plastic) for this DIY wreath. Both of these types of wreath forms are great for pushing pins into and will hold up year after year.
- 6 yards of cheesecloth
- I like to use unbleached cheesecloth for DIY Halloween crafts, because it looks a little creepier.
- black wire
- I really like using floral wire for crafts and recommend 18 gauge wire for these wire spider. Floral wire bends and forms easily, plus it’s a kid-friendly wire option.
- black cord, string, or yarn
- Use something that’s got some thickness to it so it can be seen from father away.
- long pins
- Longer pins (like corsage pins) work great for this DIY Halloween project because they will push further into the wreath form and hold well. They will not be visible from the front of the wreath.
- wide black wire edge ribbon
- Using a wire edge ribbon helps form a big bow. A glittery ribbon is optional, but recommended! :)

30+ DIY Halloween Decorations
Try making some handmade Halloween decor using upcycled materials. Whether your Halloween is spooky, family-friendly, or fall harvest style, there is something here that you can make to spruce up your DIY Halloween decorations.
Step-by-Step Guide to Making a Halloween Spiderweb Wreath
Follow along below to make this spiderweb Halloween decoration.
Wrap the Wreath Form with Cheesecloth
Unfold the cheesecloth and gently wrap it around the entire wreath form. Keep it lose for a ghostly look! You can tie the ends together or pin to the wreath form so the cheesecloth will stay in place. Twist, turn, and pull the cheesecloth to get the desired look.
How to Make a Spiderweb
The spiderweb will be attached to the back side of the wreath form using long pins and black cord. Choose which side of the cheesecloth wrapped wreath form will be the front, then flip it over to start building the spiderweb.
Tie a knot in the end of the cord and stick a pin through the knot. Stick the pin into the wreath form to get started.
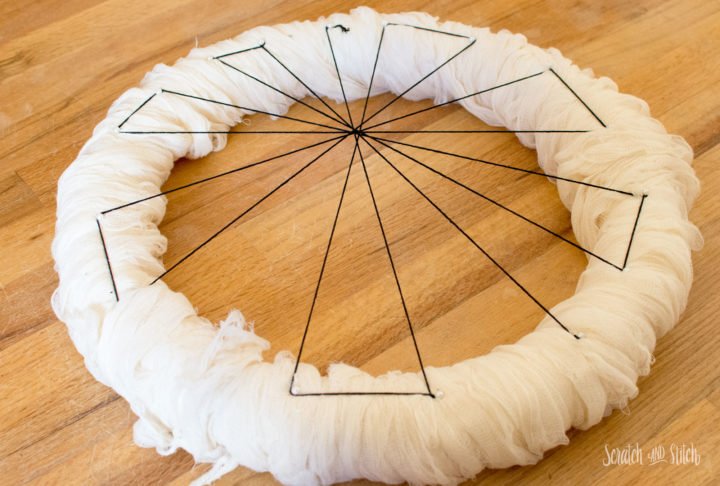
Pull the cord across the wreath form, stick in another pin and wrap the cord around the pin. Pull the cord across the wreath form again, crossing the two spokes where you want the center of the spiderweb to be. The center of the spiderweb can be directly in the middle of the wreath or slightly off-center. I chose to have my spiderweb off-center. Stick in another pin and wrap the cord around.
Continue adding spiderweb spokes. Don’t worry if the spokes do not align perfectly, they will come together in another step. At the final spoke, make a knot in the cord and stick a pin through the knot and into the wreath form.
RELATED: You need to make this DIY Mini Halloween Village with Birdhouses, Paint, and some Halloween Trinkets
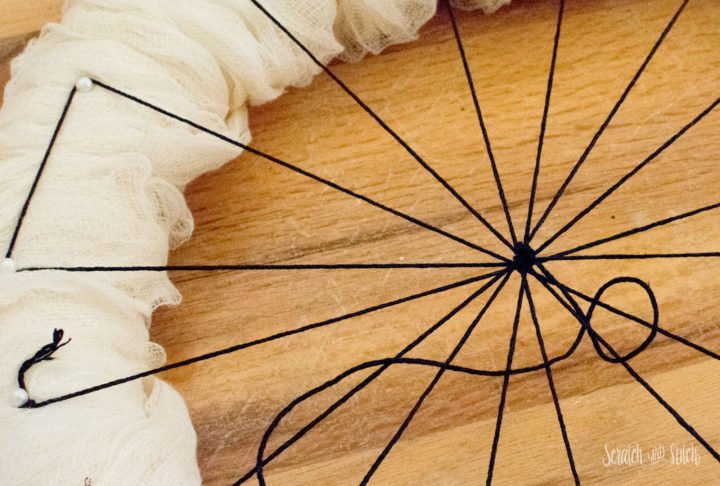
Starting in the center of the spokes, wrap another length of cord around where the spokes cross, this will bring all the spokes tightly together.
Follow one spoke out about a 1/2″ and tie a knot around the spoke to start the spiderweb spiral. Pull the cord over to the next spoke and wrap around once. Continue to the next spoke pulling tight as you go. Continue around the spiderweb spokes to create a spiral.
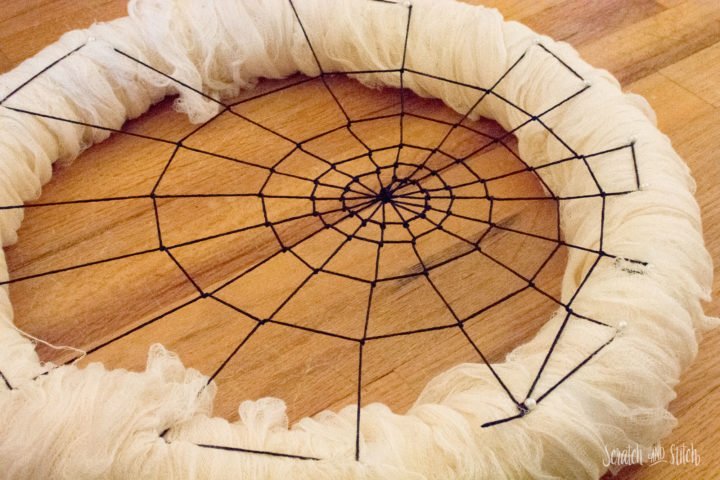
Once you’re happy with your spiderweb wreath spiral, tie a knot in the cord and stick a pin through it to the wreath form.
How to make Black Wire Spiders for the Halloween Spiderweb Wreath
I highly recommend using floral wire for this project. Floral wire is very supple, easy to form, and doesn’t break when bent too much.
For these wire spiders, I enlisted my husband’s advisory. He often draws spiders on webs in the corner of sketchbooks pages, so I figured he’d get it right first try.
RELATED: Are you loving these DIY Halloween Spider ideas? Here’s a list of more DIY Halloween Decorations featuring Spiderwebs and Spiders.
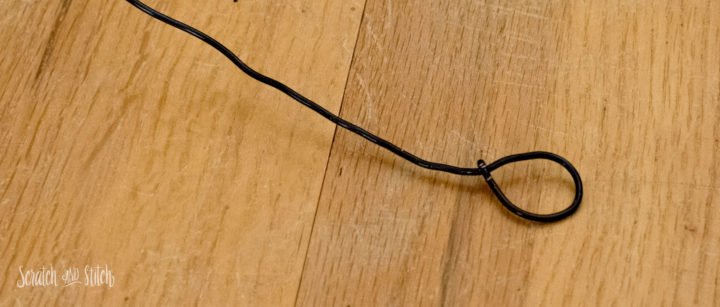
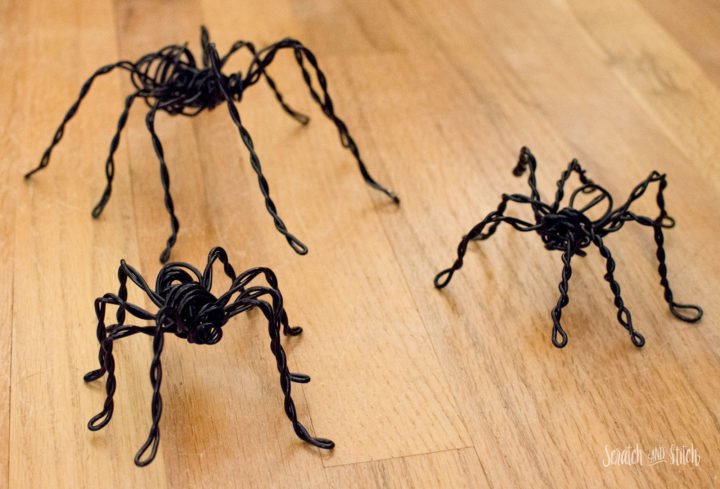
Start the spider by making a loop in the end of the floral wire. This will be the beginning of the spider’s abdomen.
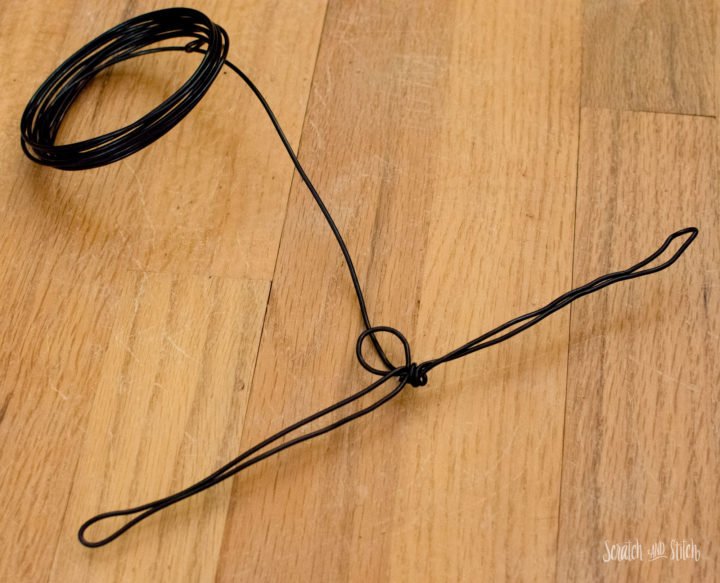
Next create the first two legs by looping straight out from the abdomen. These should be plenty long as they will have a couple bends and will quickly shorten. The longer the legs, the creepier the spider (in my opinion).
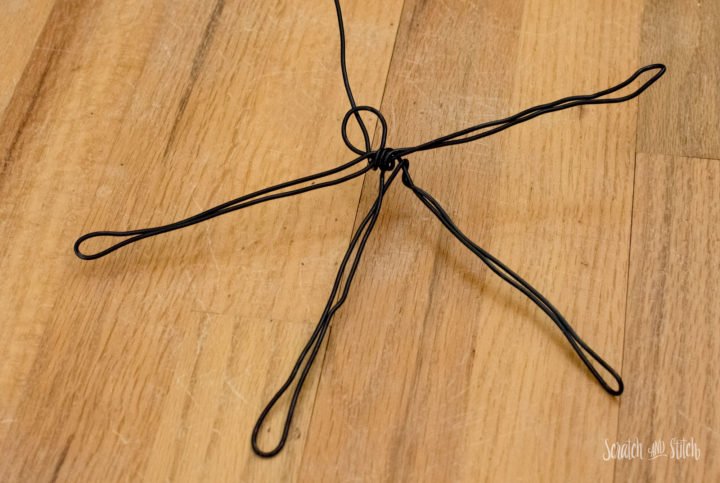
Repeat to add four more spider legs.
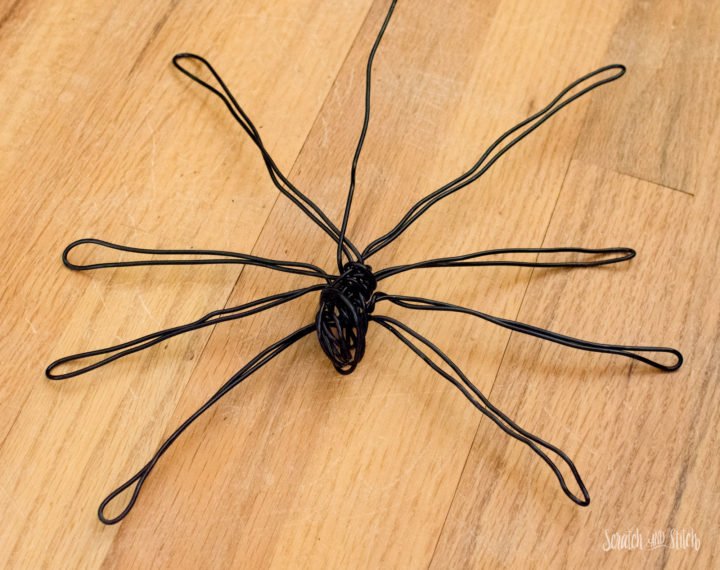
With eight legs sticking straight out from the spider’s abdomen, now we can start to build up some dimension to the body by randomly wrapping the wire around the body.
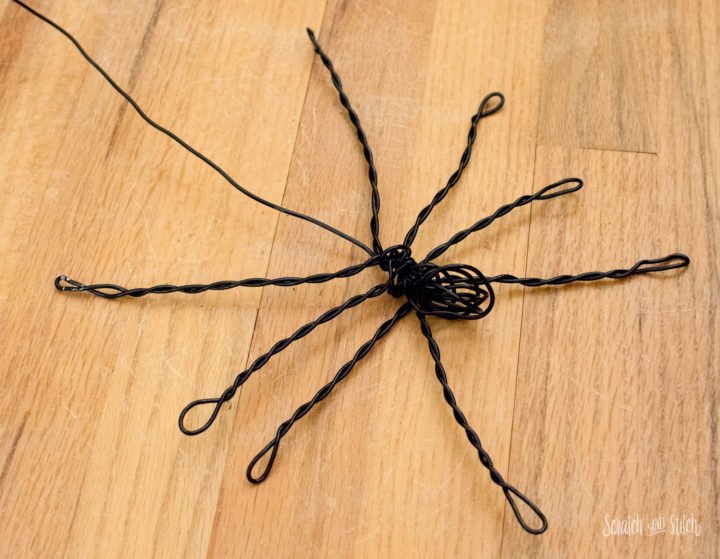
Twist each of the eight legs, leaving the ends with little loop feet. For more even, easier twisting use a pliers.
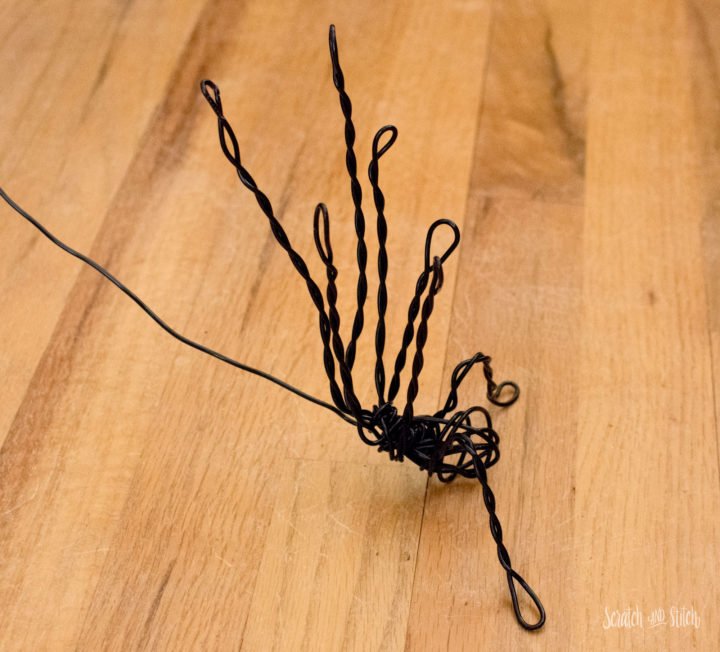
Now that all eight spider legs and body are in place, fold the legs straight up from the body. If there is extra wire, trim off and fold any sharp ends into the body.
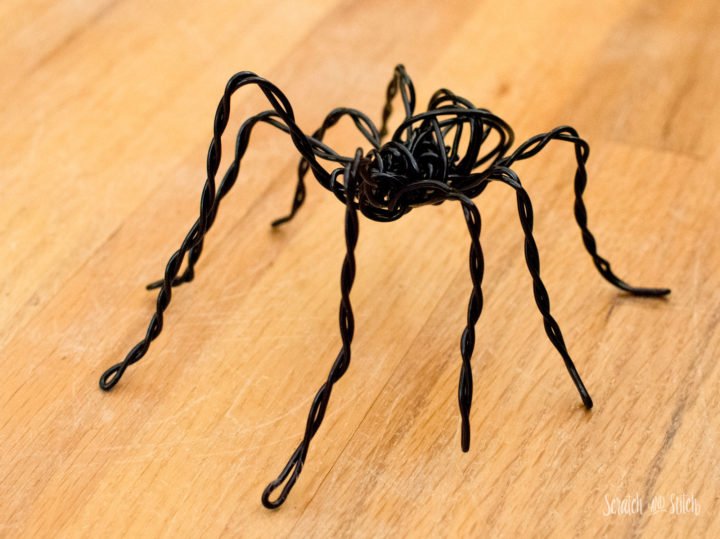
Begin to fold each leg downward, then add another slight bend for the spider’s feet.
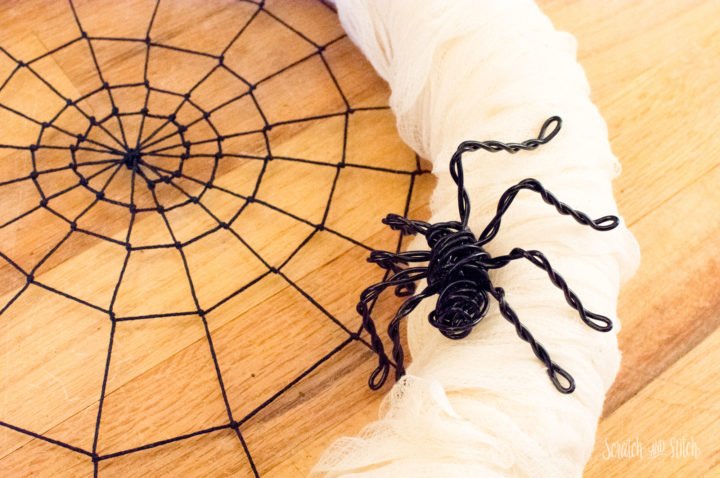
Use pins to attach the spiders to the cheesecloth wrapped wreath form.

Our DIY Family Halloween Costumes
through the years
From baby to school-age, this is how our family does Halloween! Tutorials and materials lists included for each DIY costume concept.
How to Make a Bow for a Halloween Wreath
I used the same bow-making method used in my Pinecone Santa Wreath. It’s easy to make, click here for instructions.
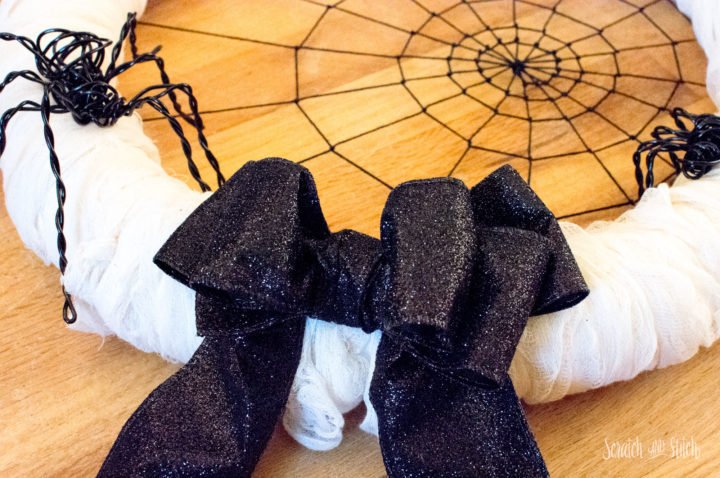
You can tie the bow onto the wreath form or use pins to hold it in place. Using wire-edged ribbon is the best way to keep this type of bow looking good, especially after being in storage for a year.
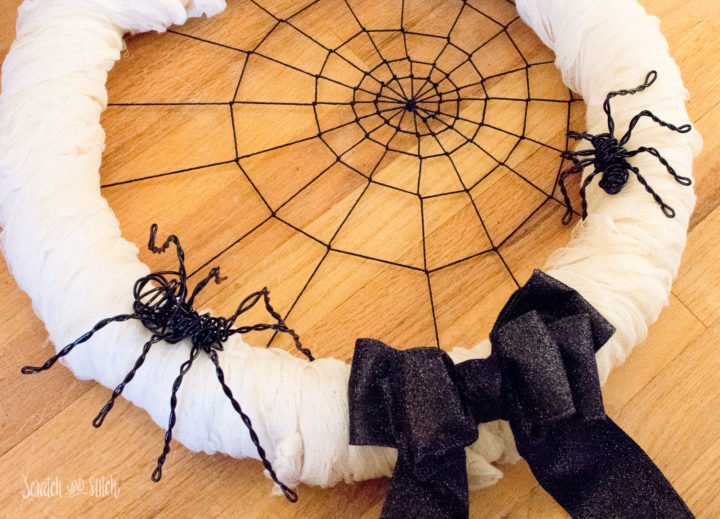
Use another piece of black ribbon to hang your DIY Spiderweb Halloween Wreath onto your door. A wreath hanger is a great option for hanging wreaths too!
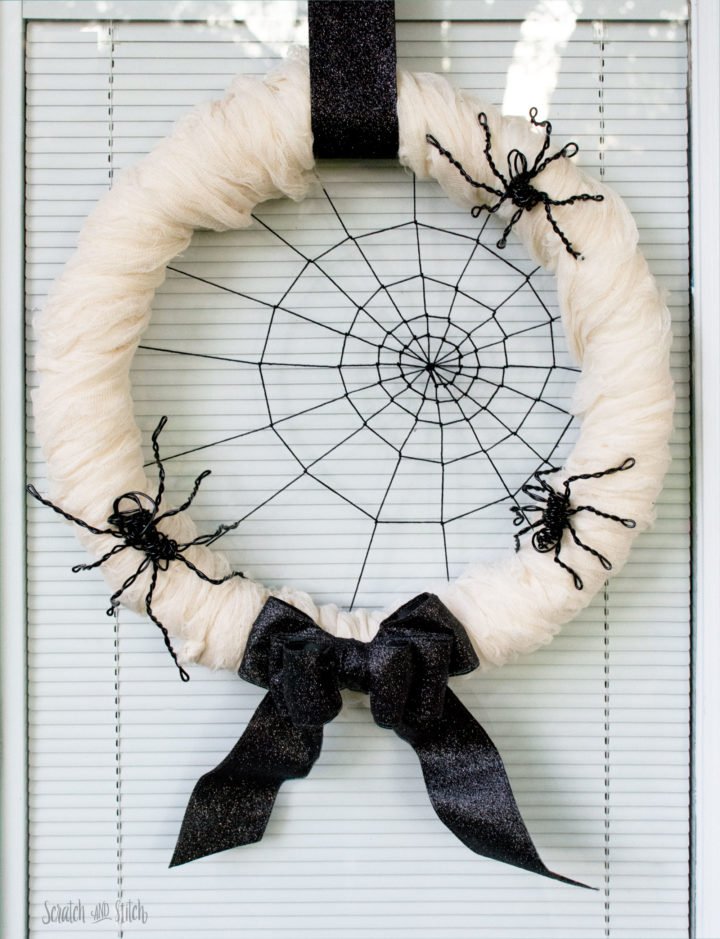
I’m loving how simple this DIY Spiderweb Halloween Wreath was to make and how it turned out.
UPDATE: After almost 10 years, hangs on my front door during the Halloween season and it still looks great!
Were you inspired to make a DIY Halloween Wreath? I’d love to see your version. Tag @scratchandstitch on your socials or send pictures!


LOVE this! I am obsessed with wreaths lol this one looks fun to make too. I think the web might be a little tricky … just reading it I can’t picture how to do it, but I’m guessing once I actually sit down with it and follow along I will get it. I like the black glitter bow too. And the spiders!! OMG I had no idea but it looks pretty easy.. I may buy some cuz I can see it taking me a long time lolololol…how much wire did u use for each spider? Just eyeball it? It’s too late to make one this week but I’m getting inspired for next year haha
Thanks Kimmy! I also have a wreath obsession and this is one of my favorites. I used black floral wire from the Dollar Store for the spiders, I believe it was 5′ or 6′. When you make yours, send me a picture! I’d love to see it :)