With the viral popularity of oversized Halloween decorations the last few years that have resulted in them being wholly SOLD OUT (ahem, I’m talking to you, Skelly), I thought it necessary to create my own extra large outdoor Halloween decorations. With that, the DIY Giant Halloween Spider Decoration was born.
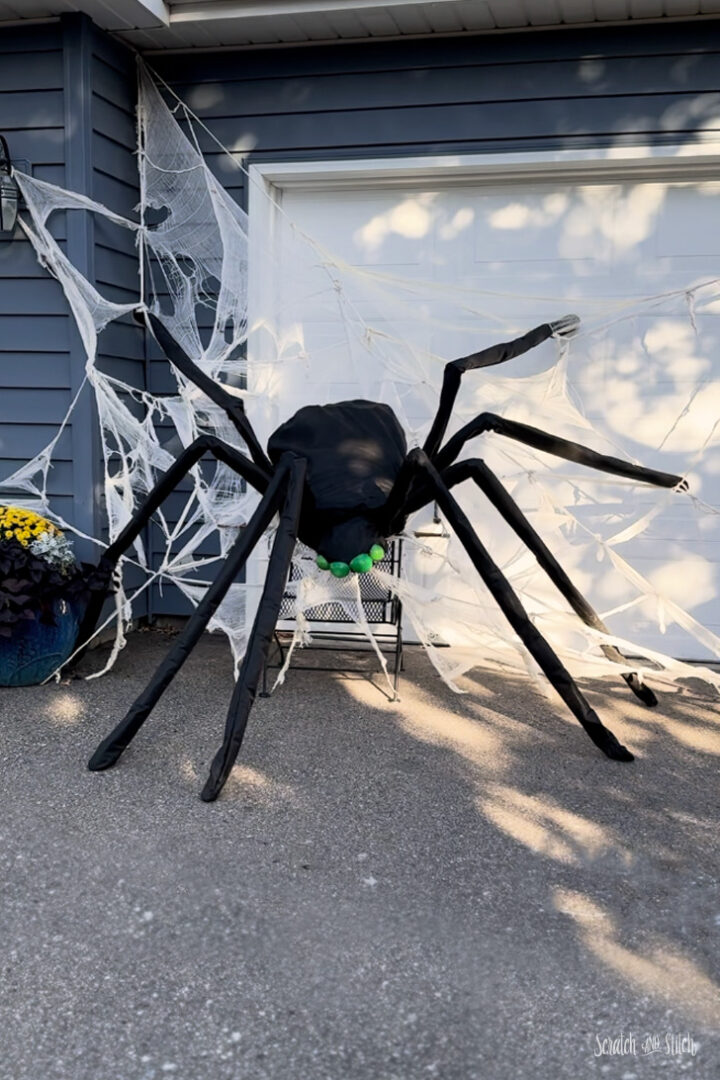
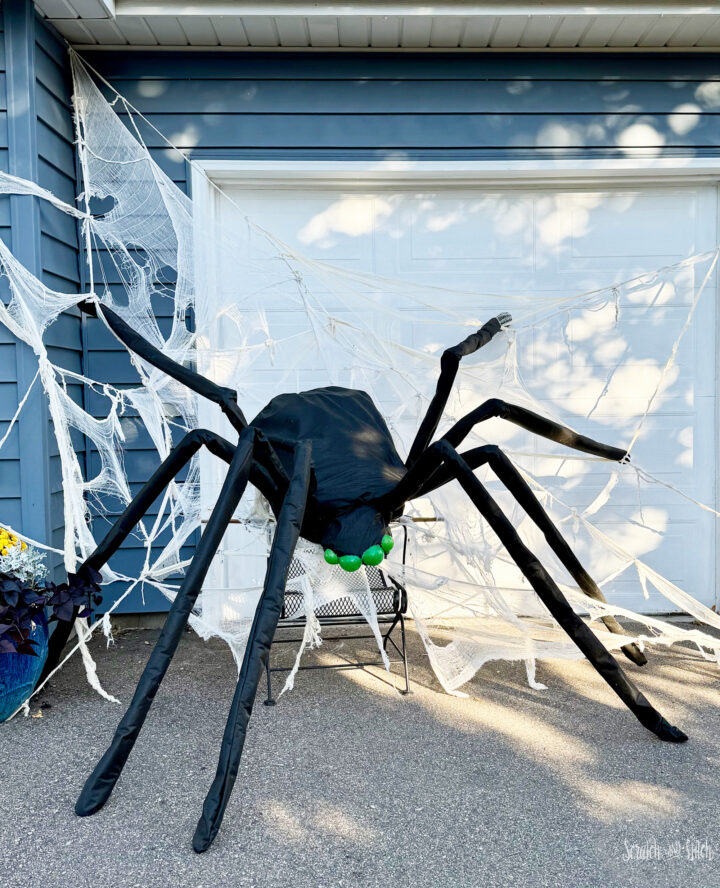
This oversized creepy-crawler is perfect for setting up in front of your home for Halloween enthusiasts to see. Our DIY Giant Spider with Spiderweb spans the width of our third garage stall and surely catches the eye of those passing by.
As we set up the 3 Witches and their Cauldron on our front lawn, I was reminded of a video of someone adding bubbles to a cauldron with clear plastic holiday baubles. We did that, too! In order to attach those bubbles to the cauldron, I used some chicken wire we had in the garden shed. That’s when it struck me that chicken wire would be the perfect sculpting material for this DIY Giant Spider. Of course, I would pair it with one of my favorite DIY spiderweb materials, cheesecloth, and another tremendous outdoor Halloween decorations material: landscape fabric
- Giant Spider and Spiderweb Materials List
- How to Make the Spider
- How to Make the Spiderweb
- How to Make a Giant Spider VIDEO
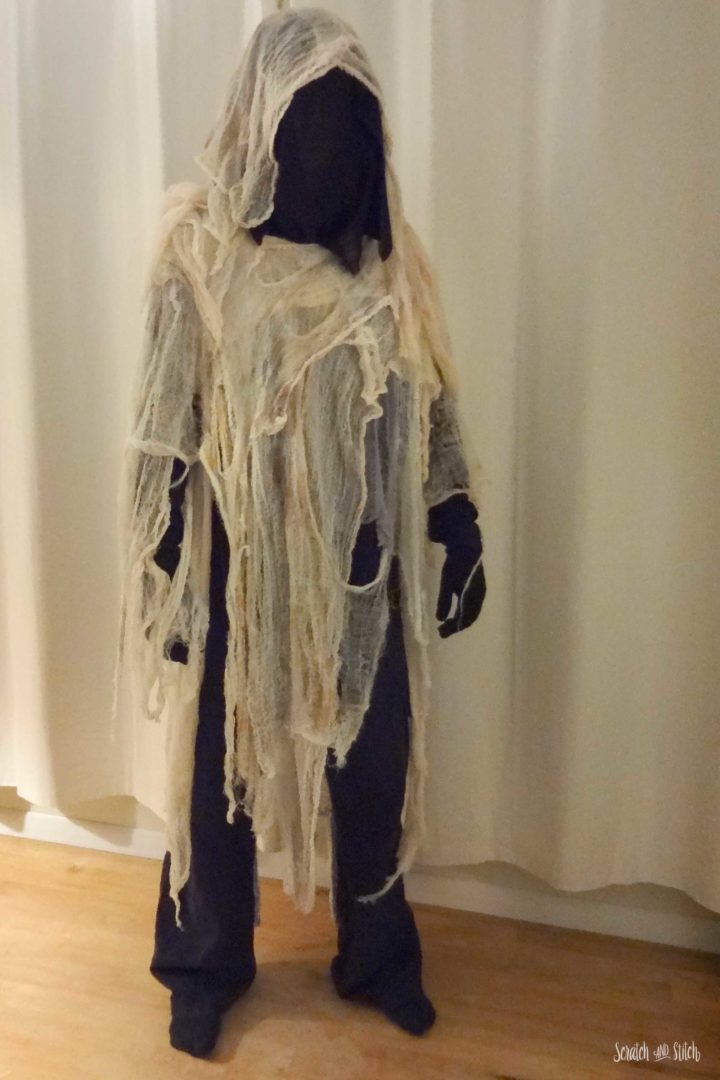
Easy Ghost Costume Idea
Throw together this easy ghost costume made with my favorite creepy Halloween fabric: cheesecloth!
How to Make a Giant Spider and Spiderweb for Halloween
Making your own DIY giant Halloween spider decoration is a project that comes together quickly with minimal materials you may already have on hand. If not, everything used here is readily available at home improvement stores. Get the kids involved with making the giant spider by cutting chicken wire or landscape fabric, sculpting the spider body and wire, wiring the pieces together, and hanging the spiderweb.
DIY Giant Spider Materials
- chicken wire (also known as poultry netting). – You can get a 3′ x 25′ roll for around $20; this is more than enough.
- landscape fabric (weed barrier fabric) – For under $20, you can find a 3′ x 24′ roll, and you’ll have leftovers to use in the gardens.
- 12 wood dowels – I used 5/16″ x 48″ wooden dowels from Home Depot. Similar-sized PVC piping would work great, too.
- 2 ball-crawl balls – I pulled these out of the toy bin and happened to have two different sizes. Painted styrofoam balls would be another great option. Or some giant googly eyes.
- wire, zip ties, or pipecleaners – This is used to attach the legs and head to the body and hold the legs upright.
- cheesecloth – Go for the unbleached cheesecloth, or soak it in coffee or tea for a weathered look.
- hot glue – I always have a stash of Gorilla brand hot glue sticks and a hot glue gun. This is by far the best hot glue to use!
Optional Tools
- gloves
- wire cutter
- fabric scissors
- pins or safety pins
- hot glue/glue gun
DIY Pumpkin Solar Lights
Decorate a tree with these easy-to-make light up pumpkins using the classic pumpkin treat buckets! Once these lights are hanging in the tree, they’re a no-maintenance option for outdoor Halloween deocorations.
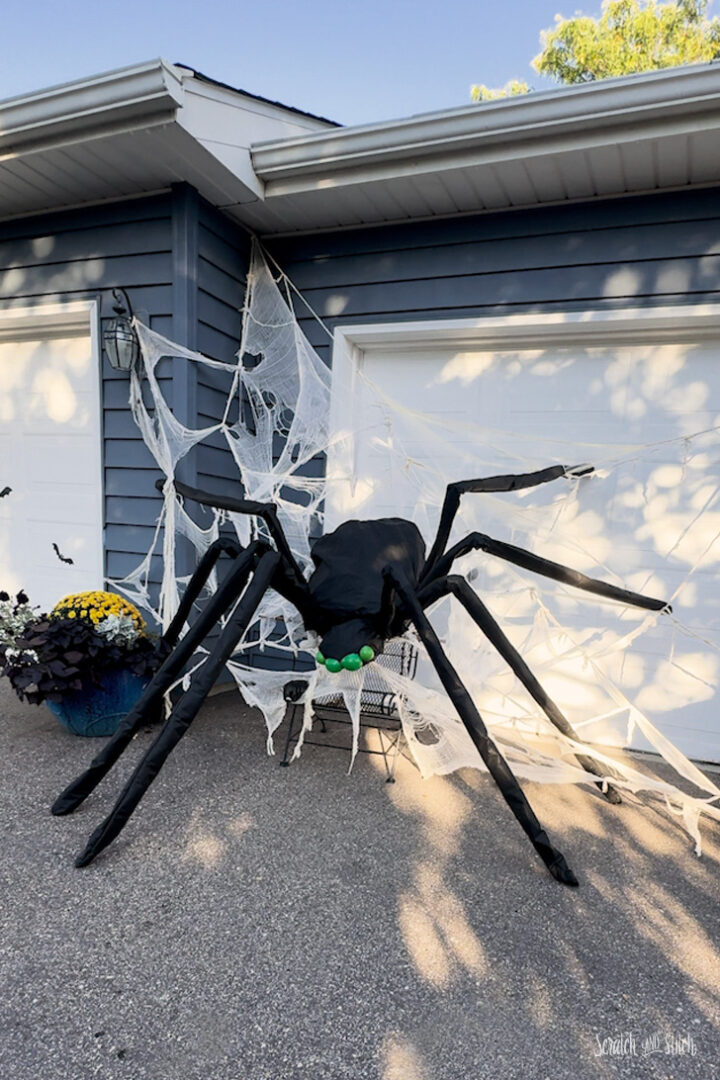
How to Build a DIY Giant Spider for Outdoor Halloween Decoration
This tutorial is how I created our giant spider for Halloween to sit out front of our house. Be inspired by this how-to guide to great creative in making your own oversized Halloween decorations.
How to Make the Giant Spider Legs
Cut 16 strips of chicken wire about 8″-10″ wide x the length of the roll.
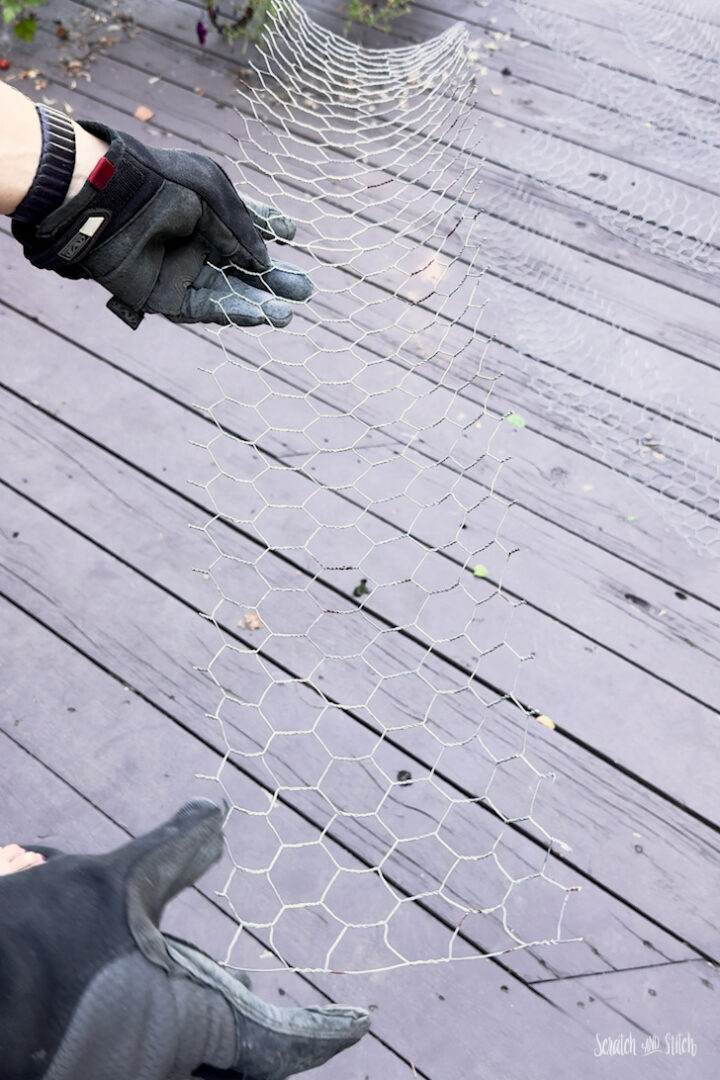
Roll up each strip of wire so it creates a long cylinder.
Connect two pieces of rolled up wire to create one long piece. You’ll have 8 long pieces of rolled chicken wire.
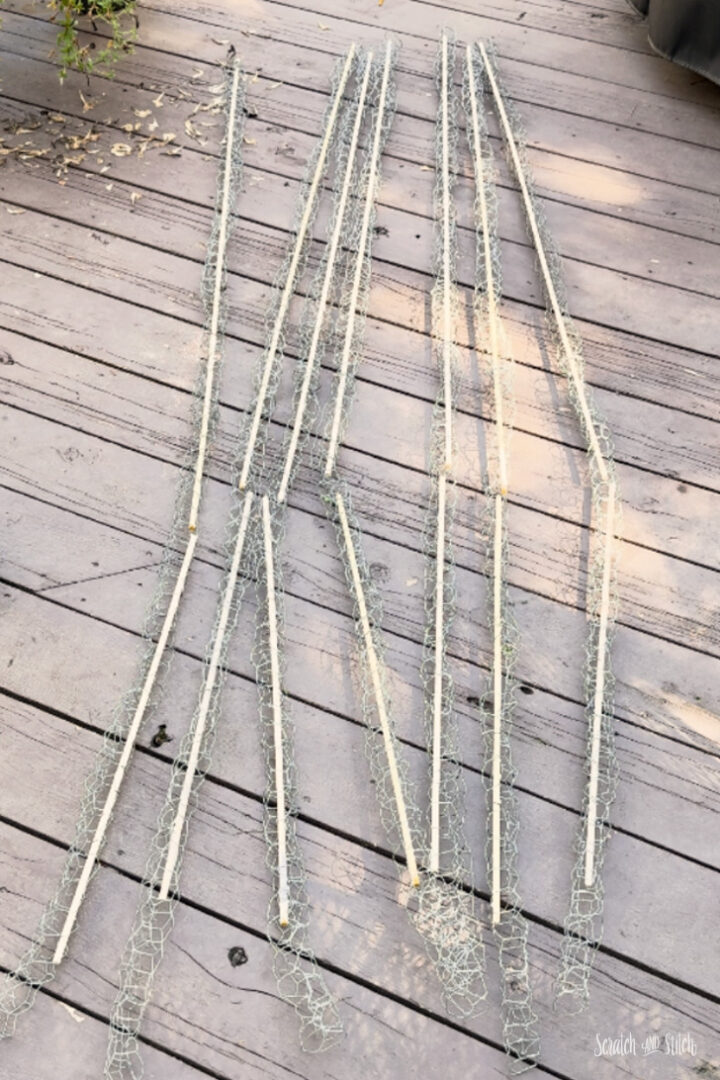
Cut 4 wooden dowels in half to 24″ long.
Stick one wooden dowel into the rolled-up wire legs so it stops near the end of the wire. You’ll need to weave it in, which will help hold it in place. Stick the cut wooden dowel into the other end of the rolled wire. Having the leg segments different lengths gives the giant spider legs a more realistic (and creepy) look. Repeat with all 8 legs and set aside.
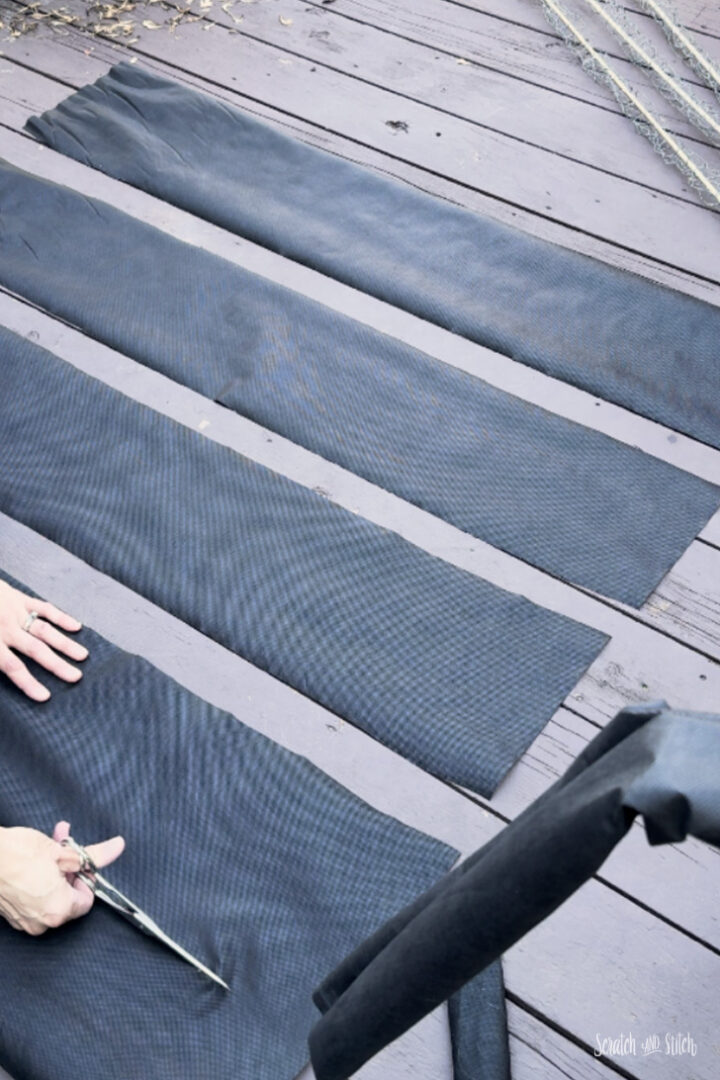
Cut 16 strips of landscape fabric wide enough to wrap around the legs. For mine, I cut the strips about 7″ wide.
Connect two fabric strips to create one long strip. Since I sew, I sewed these together on my sewing machine. Some hot glue would do the trick, too.
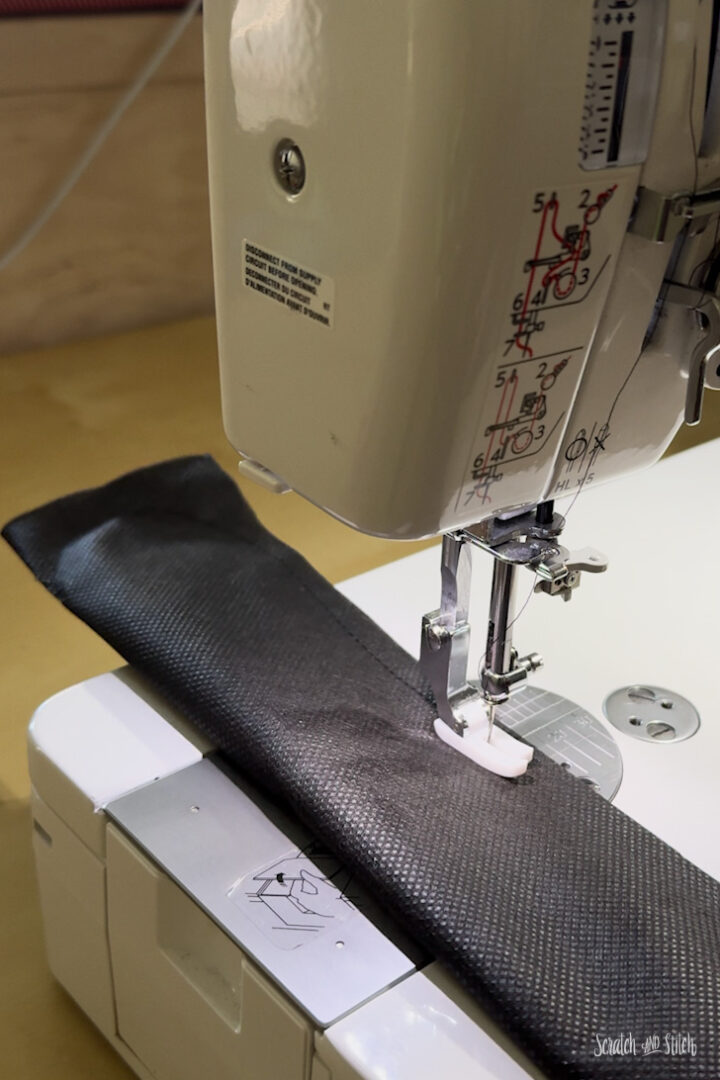
Fold each strip in half and sew (or glue) across one short side and down the long sides, leaving the other end open. I sewed a curve on the short end to be the foot.
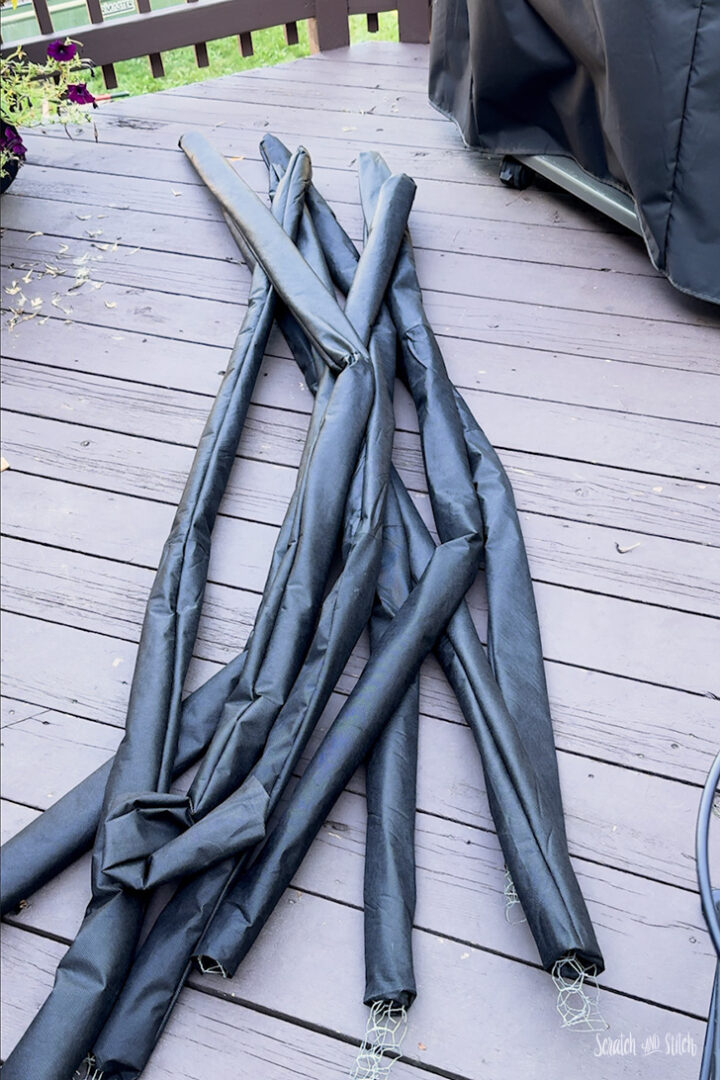
Flip the fabric tubes right side out and insert a wire leg into each tube.
RELATED: Check out this list of DIY Spider Themed Halloween Decorations you can make!
How to Make the Giant Spider Head and Body
Arrange the legs into two sets of four to get a good visual of how large the body should be compared to the legs. I set mine up on the chair that will later be used to hold this big guy up when he’s on display.
Cut a large rectangle of chicken wire to create the top half of the body. Chicken wire is easy to form and bend into the desired shape. Put some gloves on and start bending up the sides to sculpt it into a large egg-like shape into the top portion of the body. Repeat this with another large rectangle to cover the bottom of the body.
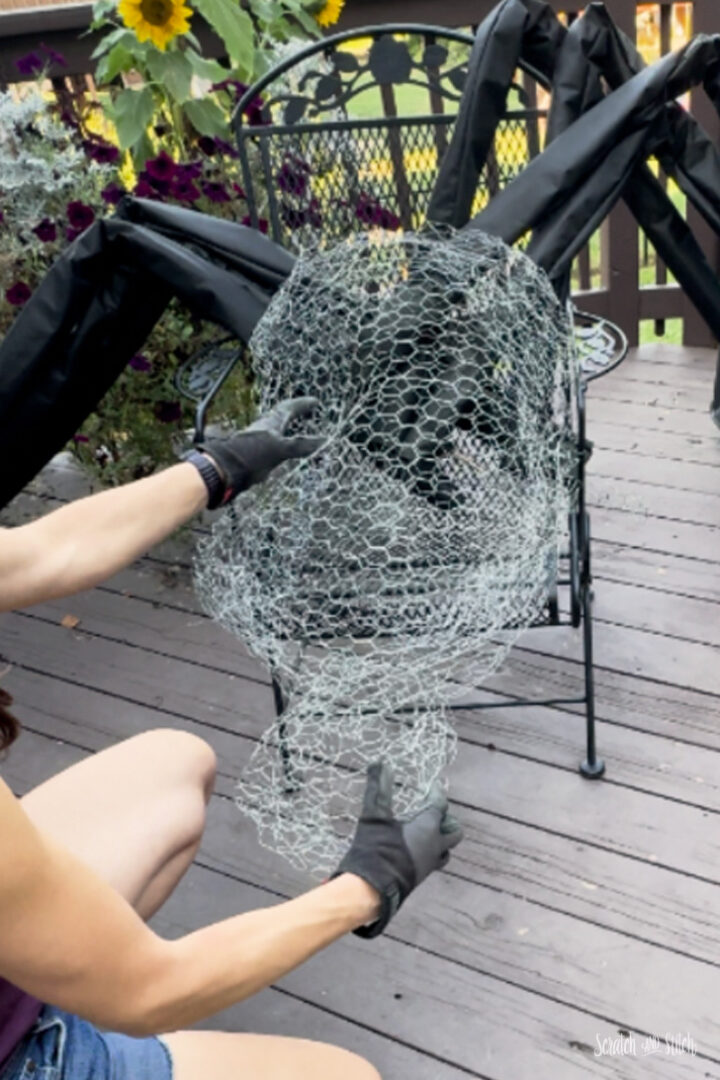
Put the two shapes together to form one large body piece. You can use wire, pipe-cleaners, or zip ties to attach the two shapes or bend the chicken wire together.
Cut another piece of chicken wire to form the head.
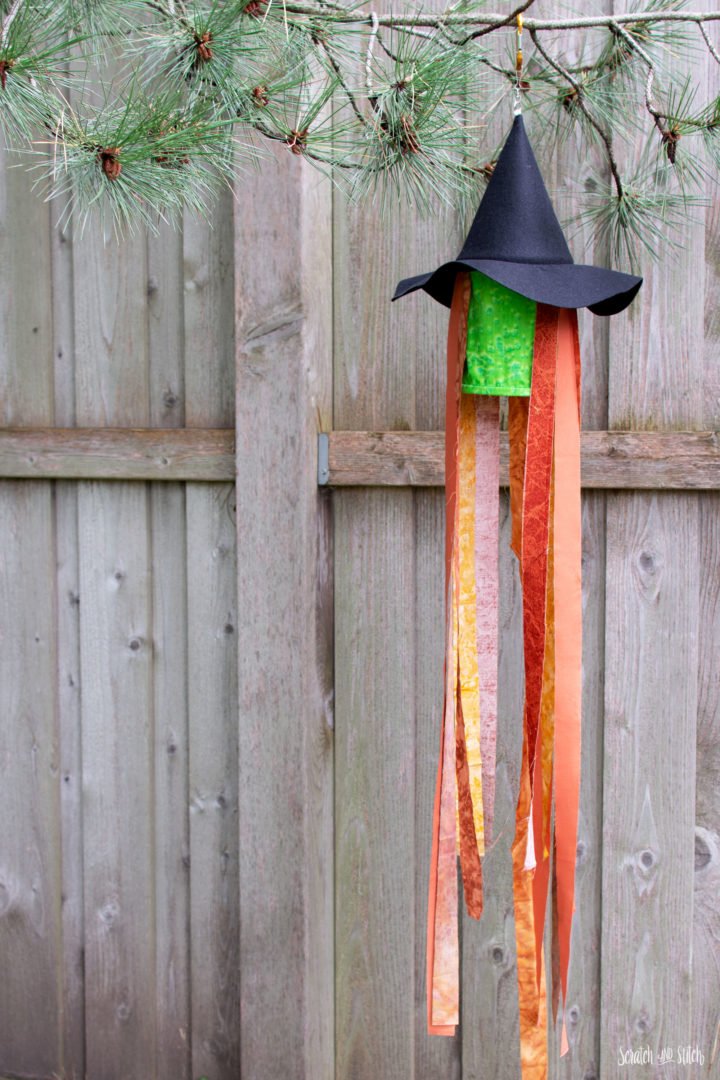
DIY Fabric Witch Windsock
Add a handmade witch windsock to your outdoor Halloween decorations. Tutorial includes a free witch hat pattern!
Assemble the Spider Pieces
Attach the head to the body with wire, pipe cleaners, or zip ties.
Attach the legs to the bottom side of the body near the head. The legs should be pretty close together and towards the front of the body.
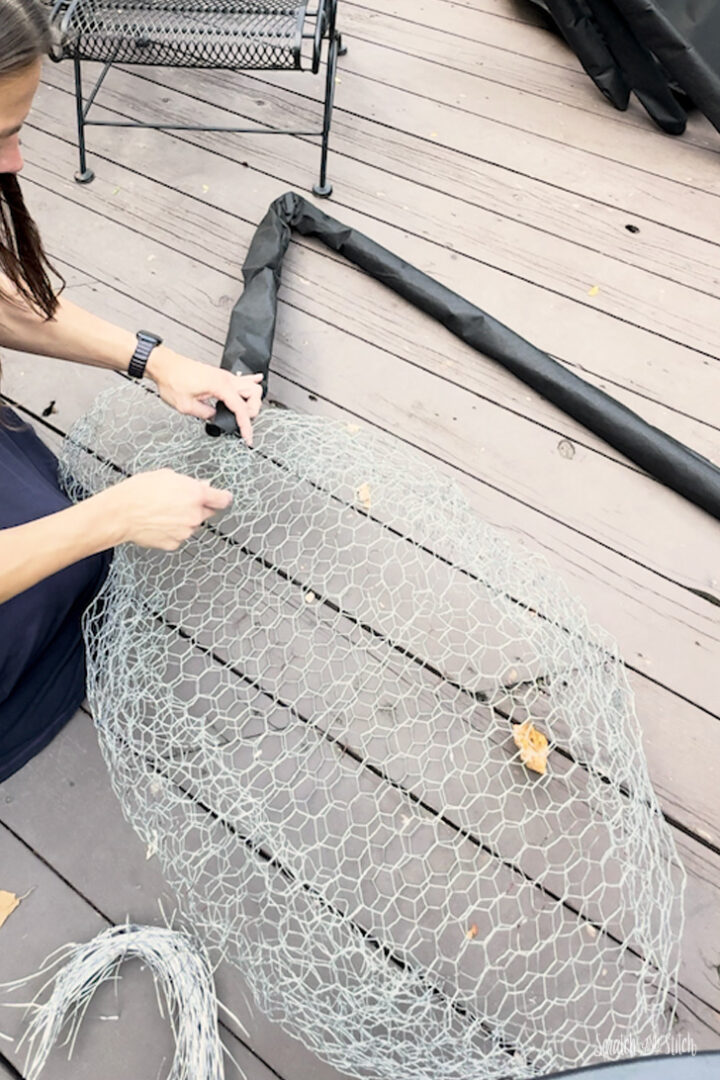
At this point, the legs may be falling all over. Leave them for now.
Cover the Spider Head and Body
Cut a piece of landscape fabric large enough to cover the body and head. I cut a piece large enough to fold in half over the butt that covers the entire body. Again, because I sew, I sewed up the sides so it’s like a pillowcase. You could easily use some hot glue here or even wire.
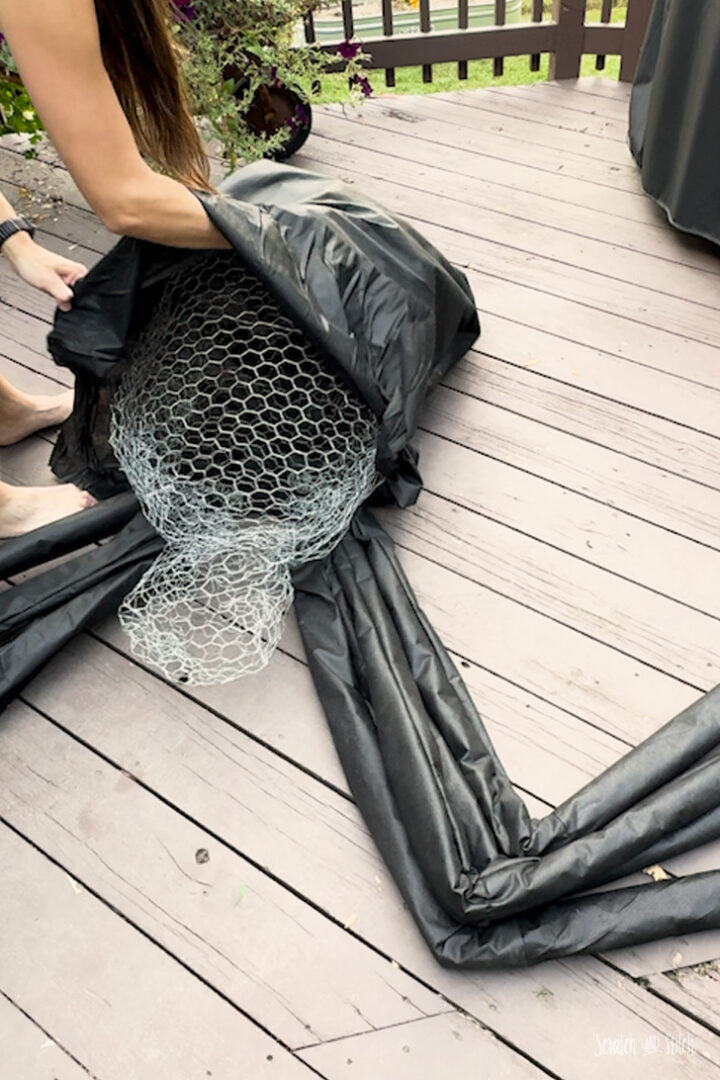
Cover the body and head with the fabric. I pulled the fabric over the head, tied a scrap of fabric around the neck, and pinned and hand-sewed the opening shut. Some hot glue would work well here, too.
Add Giant Spider Eyes to the Giant Spider
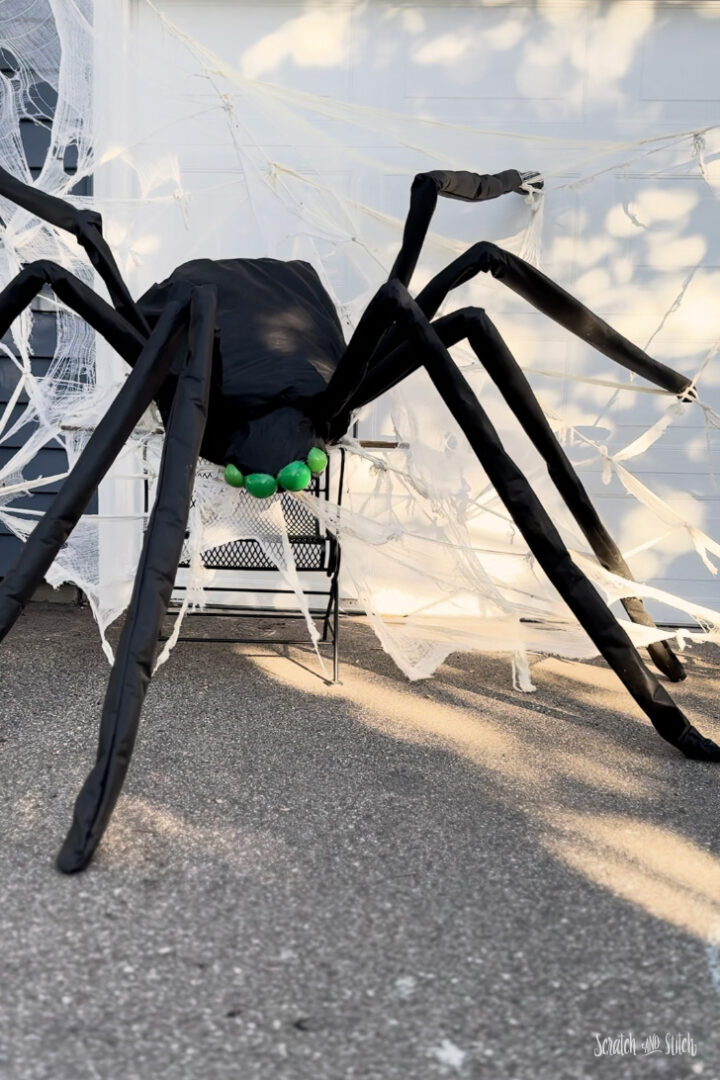
Carefully cut a couple of balls in half for the eyes and glue them to the face.
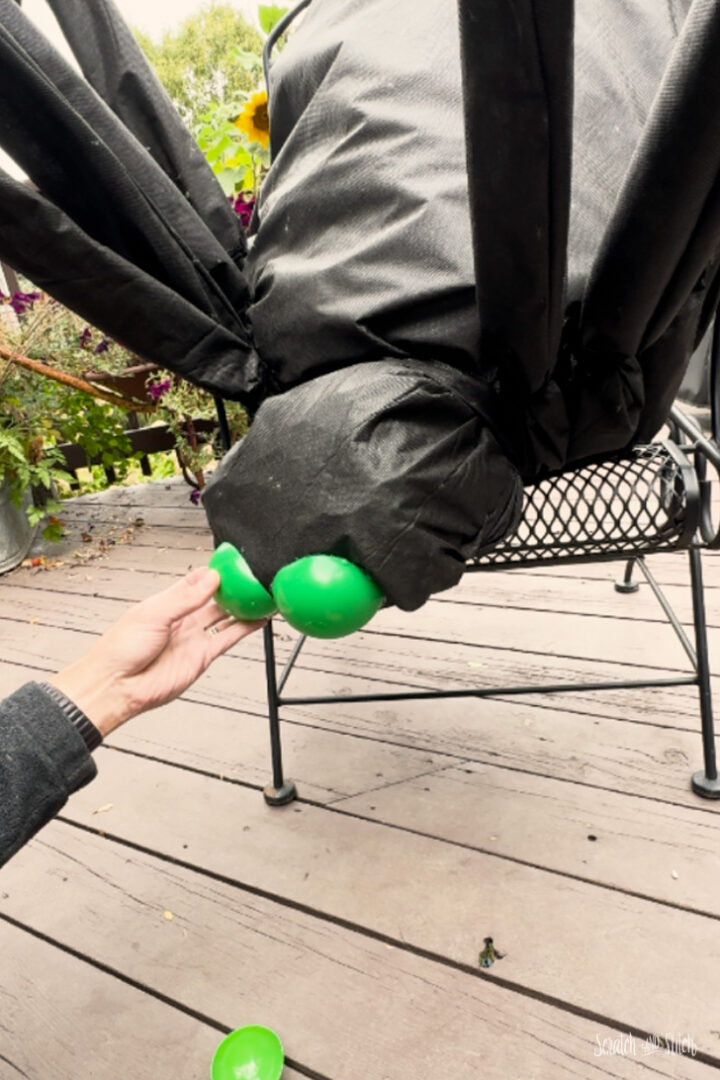
I found two ball-crawl balls in the toy bins to use for the giant spider eyes. These are easily cut in half with a box cutter and scissors and glued to the face. We stopped with just four eyes for this DIY giant spider, but you can add more or less to achieve the look you’re going for.

More DIY Halloween Decoration Ideas
Find inspiration for your handmade Halloween with these 30+ DIY Halloween Decorations! Ghost, bats, jack-o-lanterns, witches, and more!
How to Display the DIY Giant Halloween Spider
Will you be displaying your giant spider as an outdoor Halloween decoration, or is your large arachnid going inside to scare the bejeezus out of someone? Please share your giant spider story!
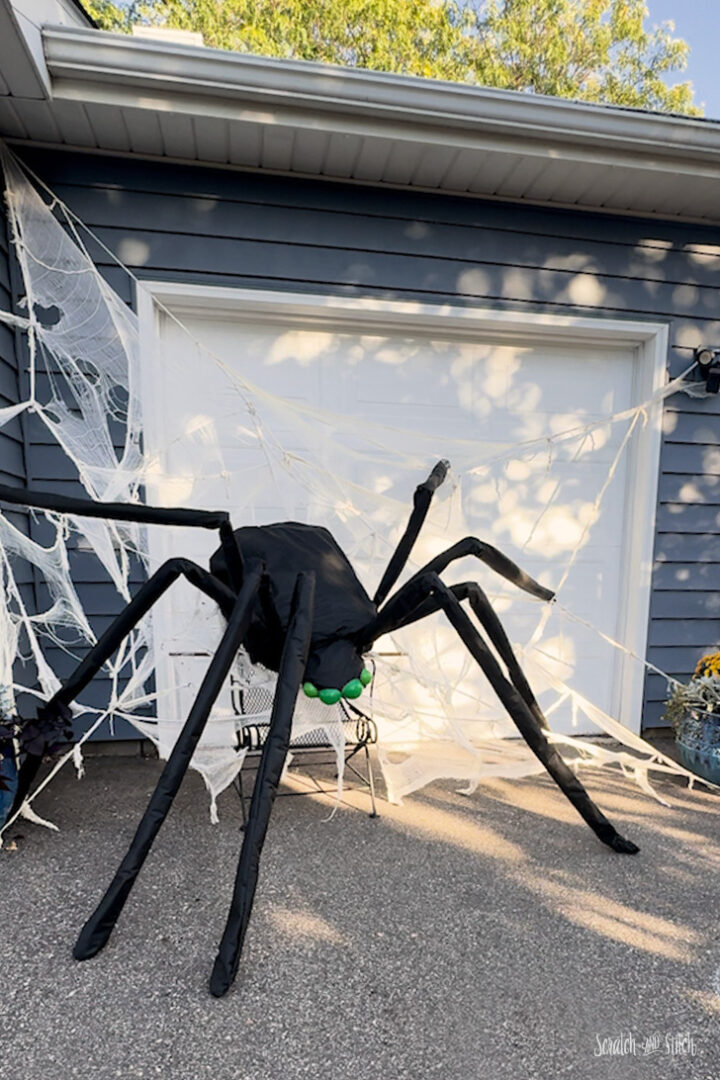
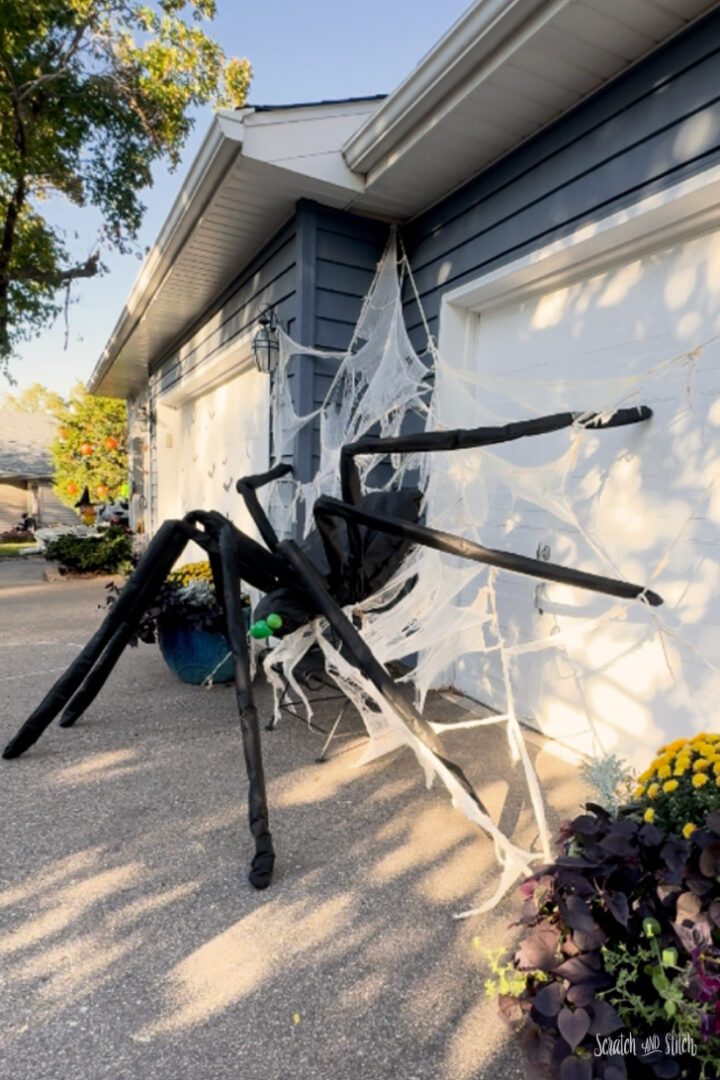
Our spider (officially named Bobby Long-Legs) is set up in front of the third garage stall. He takes up nearly the entire garage door and appears to be climbing downward on an extra-large spider web made from cheesecloth.
DIY Spiderweb for Outdoor Halloween Decorations
At this time of year, leaving the dust and cobwebs around your home is okay. Take in the beautiful fall weather, tree colors, apple orchards, pumpkin patches, corn mazes, and Halloween parties that seem to make October fly by.
Our home is filled to the brim with Halloween decor, with many things being handmade DIY Halloween Decorations. Cheesecloth is my favorite thing to use every Halloween season to compliment all the figures and pumpkins. It’s easy to place anywhere inside and outside and can be reused in the coming years. As a bonus, the more ripped and torn it gets, the better it looks.
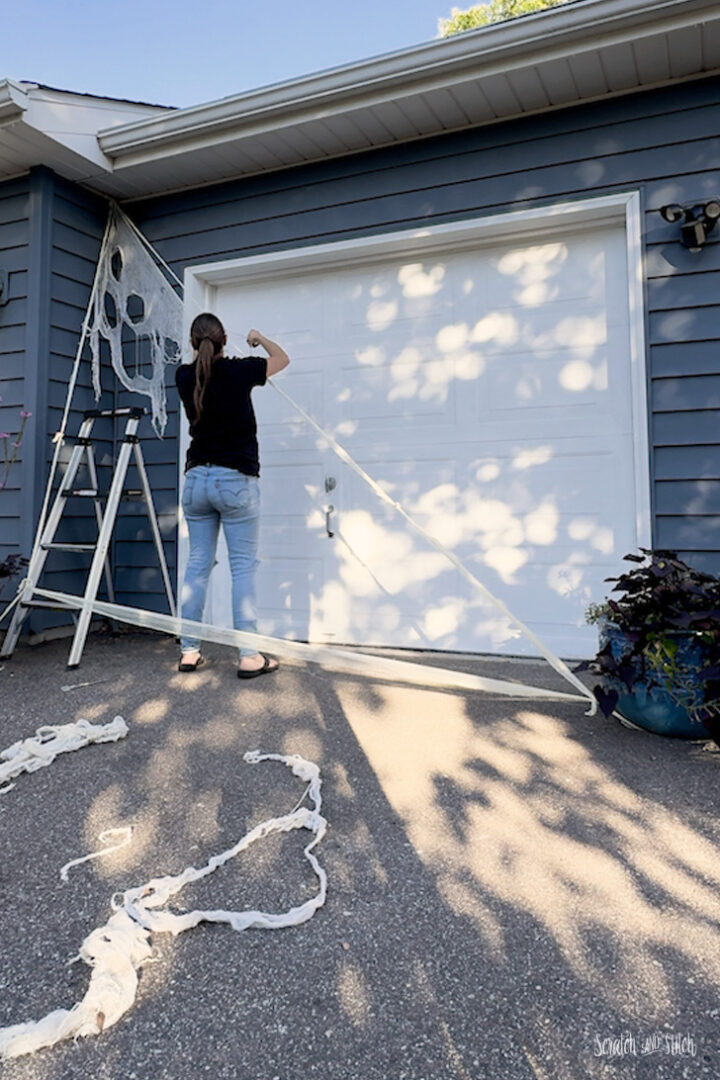
You can use large pieces of cheesecloth to build this oversized spider web or even smaller pieces tied together. For my spiderweb, I did install a screw in a hidden spot above the garage door to attach the top of the web. From there, I stretched and pulled pieces to create a large triangle that acted as the outline of the spiderweb. I was able to put the ends of the cheesecloth under some large flower pots (filled with fall mums, of course) and piece stretched in between. The middle of the web was filled with more pieces of ripped and torn cheesecloth tied together to fill the area.
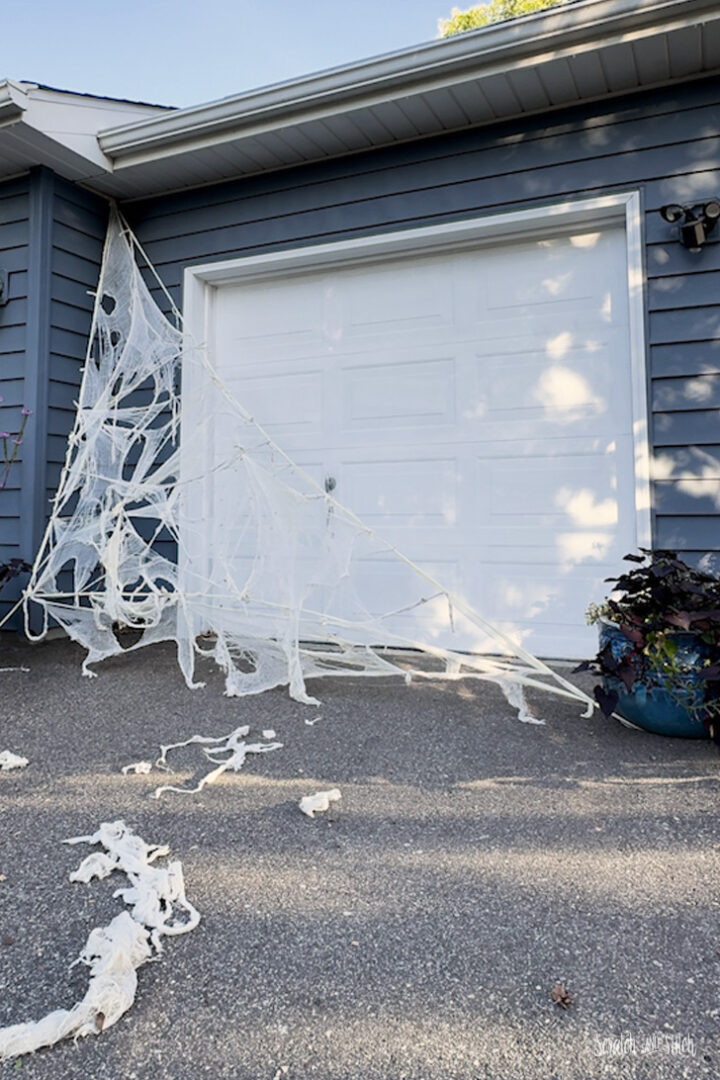
Behind the giant spiderweb, I placed an outdoor chair on which the spider could sit. Using a few pipe cleaners, I attached the back of his butt to the top of the chair to keep him in place.
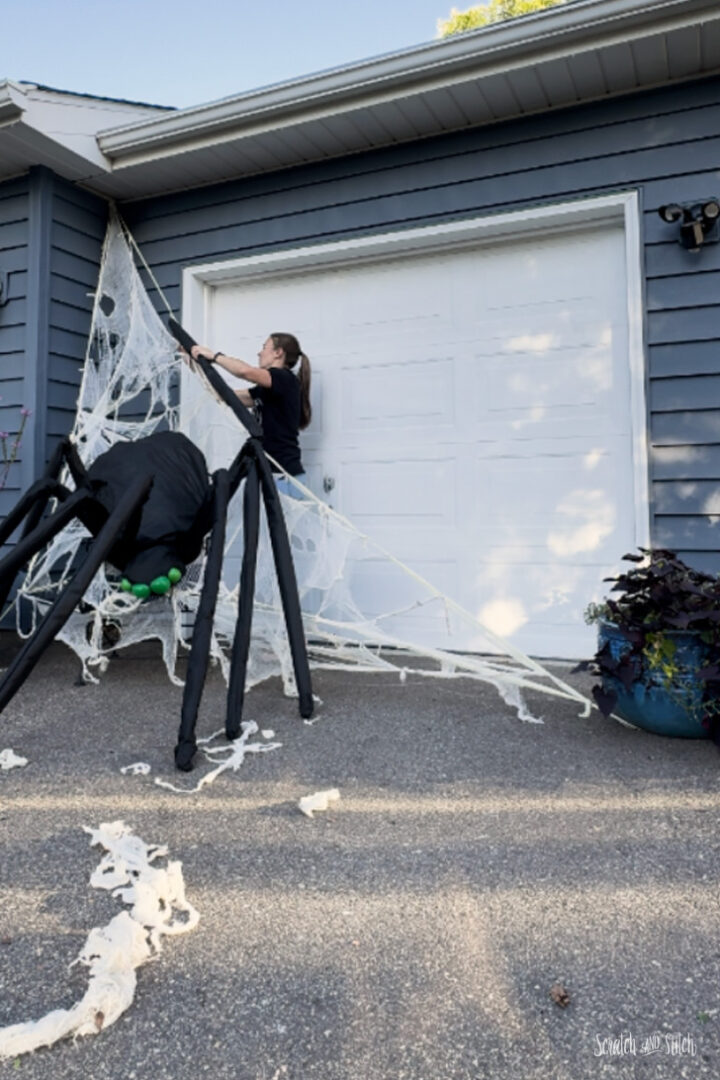
The last part was to arrange his legs so he looks realistic. His four front legs sit in front of him in the driveway, and his four back legs are propped up in spiderwebs.

DIY Fabric Witch Windsock
Add a handmade witch windsock to your outdoor Halloween decorations. Tutorial includes a free witch hat pattern!
More Inspiration for your Giant Spider
Looking for more ways to enhance the display of your giant spider yard decoration? Here are some ideas:
Add Lighting:
- A spotlight on the spider and spiderweb will ensure it’s seen at night.
- Fairy twinkle lights would look great weaved into the spiderweb
- Lights behind the spider will make the spider silhouette pop at night.
- Solar garden path lights around the spider will draw attention to the giant crawler.
- Light up those eyes! Lights on a timer placed behind the balls will make those eyes glow at twilight.
Get creative with your giant spider display:
- Wrap up something dead in the spiderweb. Maybe a skeleton, a body shape, a giant moth, a pumpkin, a scared cat?
- Create a giant spider egg that the spider is protecting. What’s more terrifying than an extra-large spider? Thousands of extra large baby spiders!
- More webs! More spiders!
- Add more details to the spider with hairs, realistic-looking eyes, fangs, and more!
- A spider this big would look great on the roof. Just make sure to secure it well.
- How cool would it be to have a giant spider hanging from a web? We might try this next year!
- Hang your spider higher up so trick-or-treaters need to walk under it to access the Halloween goodies.
Video: How to Make A Giant Spider and Spiderweb for Halloween
Watch the video of the making of the Giant DIY Halloween Spider Craft!
DIY Halloween Spider Decoration
This giant DIY spider is a great addition to our outdoor Halloween decorations! Using garden-ready materials has ensured this big boy will hold up to the Minnesota elements. We’ve had quite a few windy fall days, and the spider hasn’t budged. Since he’s essentially hollow and made from landscape fabric, rain (or snow) won’t bother him.
Since two spiders are creepier than one, we’re already brainstorming ways to create another spider that hangs down the side of the house or sits on the roof for next year. How will you display your handmade spider? Happy Halloween!
Did this giant spider tutorial inspire your DIY Halloween decorations? I’d love to hear about it! Send a message or tag scratchandstitch on your social page.
Leave a Reply