This post may contain affiliate links.
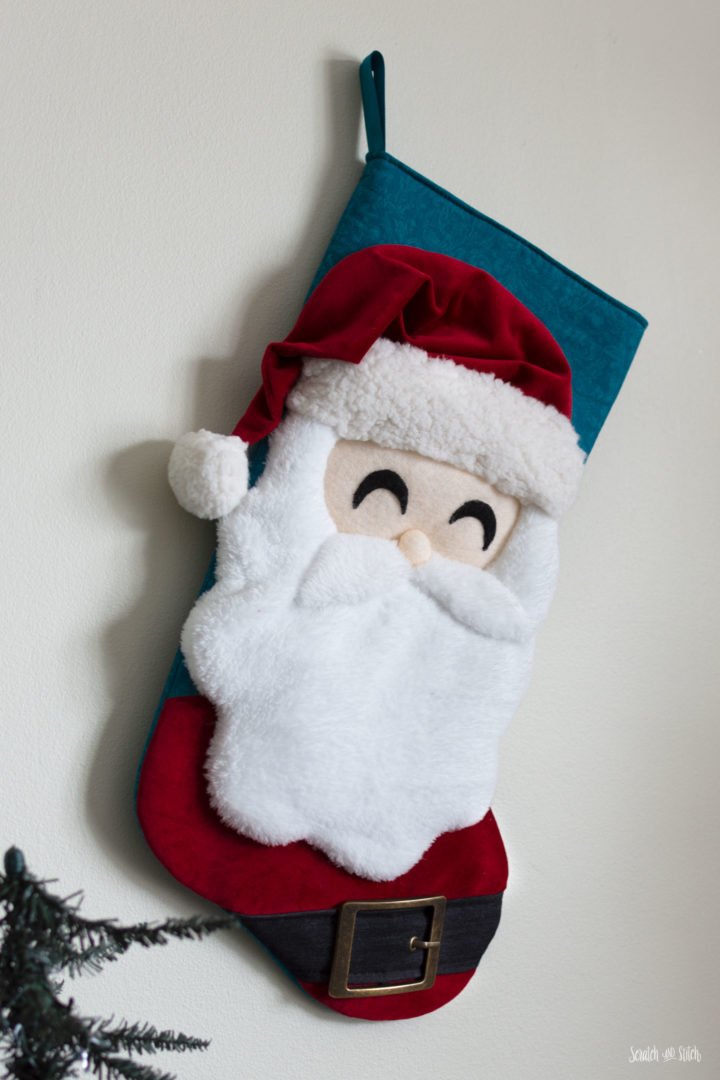
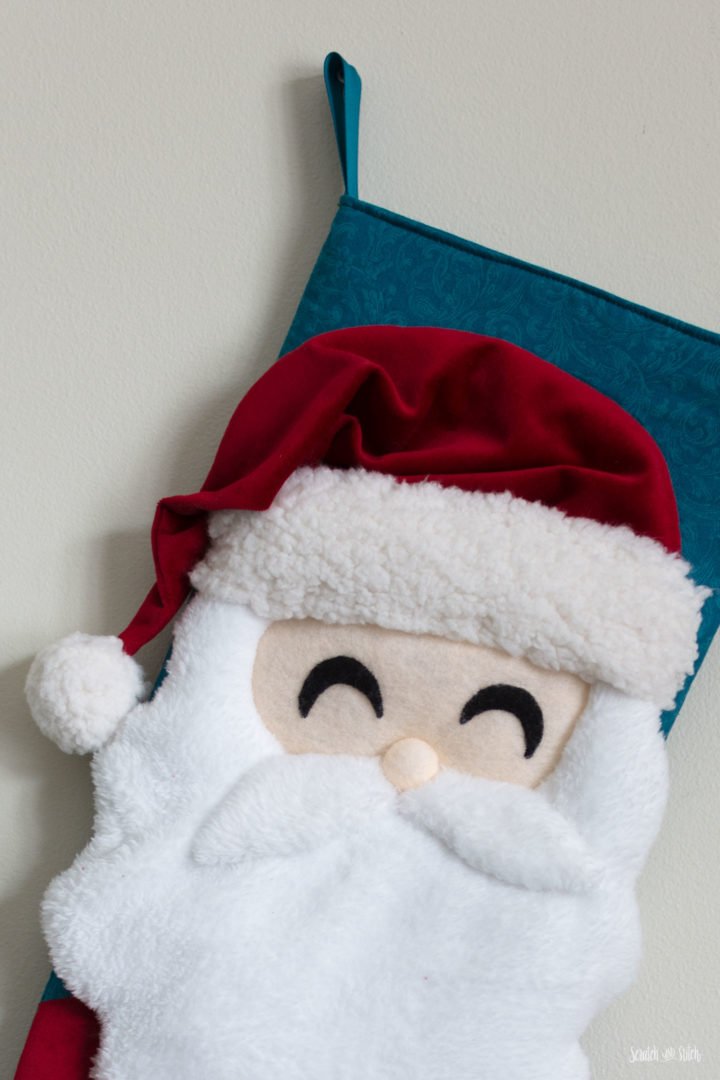
No one can resist the smile of jolly old Santa Claus. Add in that fluffy white beard, the iconic red velvet suit, and that big belt buckle and Christmas is on. The Santa stocking is my favorite of the Christmas stocking pattern series.
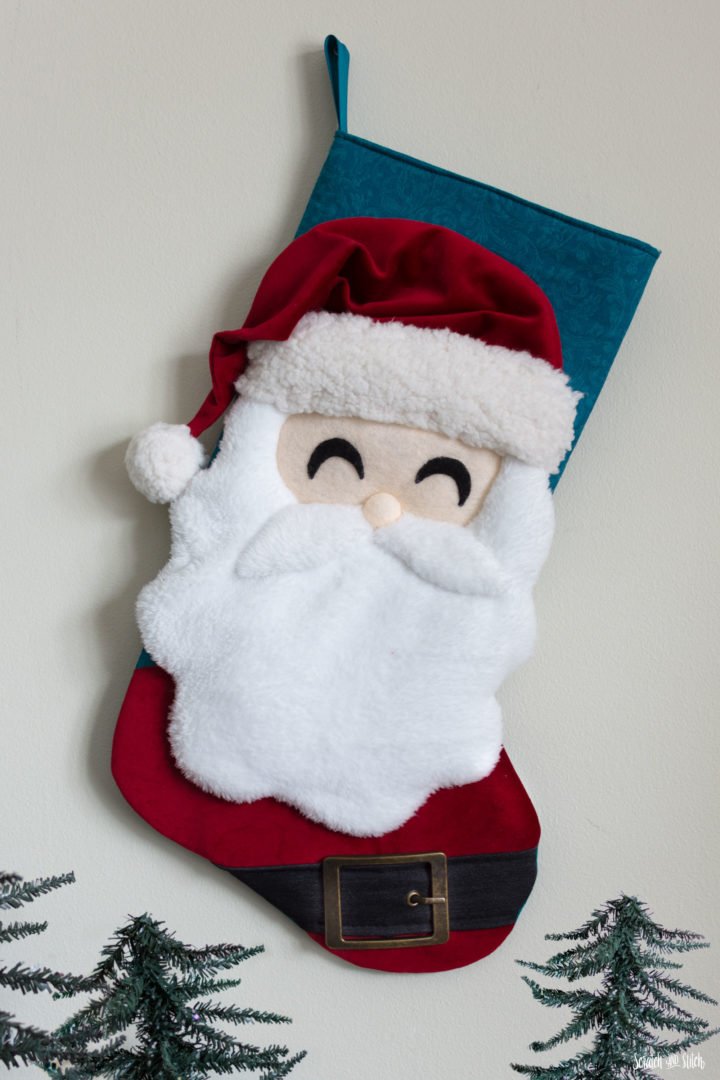
The Santa stocking is part of a stocking pattern series along with the Rudolph and Snowman stocking patterns. Each stocking has unique characteristics like holly and jingle bells on Rudolph, a real scarf on the snowman, and the wrinkles in Santa’s hat. The stockings are nice and big, ready for plenty of goodies.
Choosing Fabric for this Christmas Stocking Pattern
- Quilting cotton works great for the base of the stocking.
- I recommend using byAnnie’s Soft & Stable as a stabilizer in between the main and lining fabrics. It keeps the stocking from drooping over.
- I used a beautiful deep red velvet for the hat and body of Santa. The slight sheen of velvet gives the wrinkles in his hat so much character.
- A soft and fuzzy sherpa fabric is great for the hat ball and cuff. Faux fur or fleece would work too.
- The face, nose, and eyes are made from felt.
- White fleece fabric works great for the beard and mustache and contrasts from the fuzzy hat pieces.
- I used a dark, charcoal gray fabric leftover from another project for his belt. Leather, suede, cotton, or fleece are also great choices.
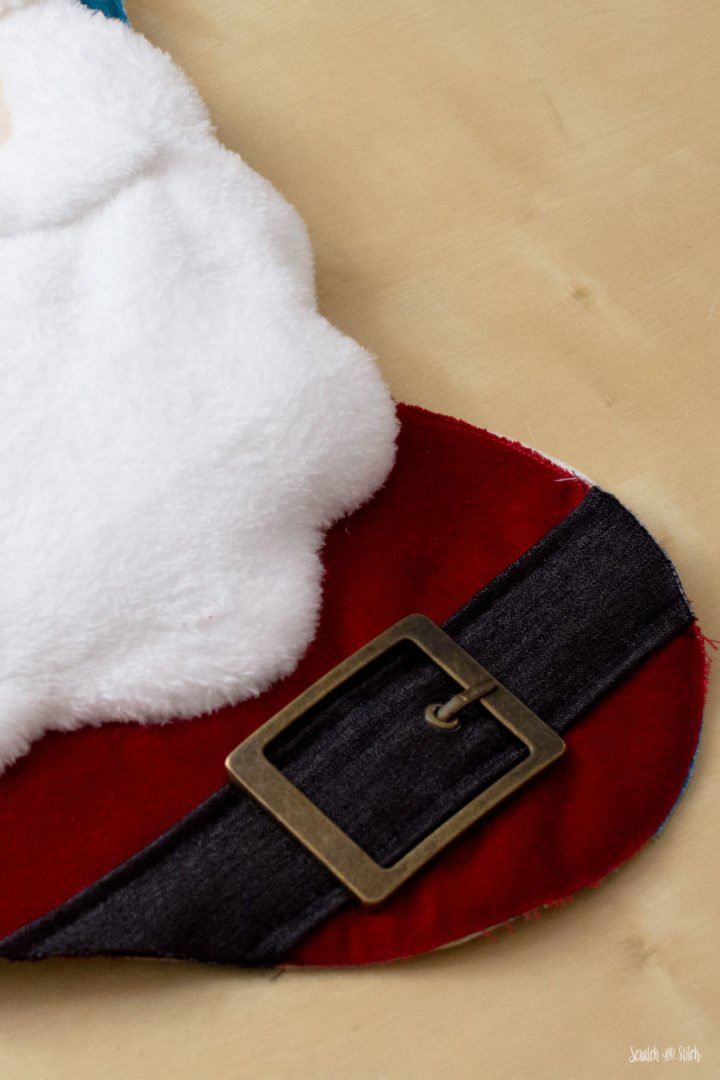
- Santa’s belt buckle is a 2″ antique brass buckle. A different size buckle can be used. Please note that the belt size may need to be adjusted for a different size buckle.
Materials
- quilting cotton for stocking base
- Soft & Stable (quilt batting will work too, Soft & Stable is more rigid)
- 1″ ribbon scrap (approx 5 inches)
- red fabric (hat and body)
- white sherpa (hat cuff and ball)
- white fleece (mustache and beard)
- flesh tone felt (face)
- pink felt scrap (nose)
- black felt scraps (eyes)
- black fabric or leather scrap (belt)
- belt buckle (like this one)
- poly-fil
- coordinating thread
- basic sewing tools and supplies
Download the Free Santa Christmas Stocking Pattern
Download the pattern and print at 100%.
Enter your email to get the free pattern in your inbox.
By submitting your email address you will be added to the Scratch and Stitch email newsletter. You can opt-out at any time :)
How to Make the Santa Christmas Stocking
Download, print, and assemble the Christmas stocking pattern.
Note: Sew all seams at 1/4″ unless noted otherwise.
For the base of the Christmas stocking, you can use two different fabrics for the inside and outside. I chose to use the same teal fabric for both the outside and lining of the stocking. A scrap piece of one-inch ribbon approximately five inches long works great for hanging this large stocking.
Transfer the Christmas stocking pattern onto your fabric and Soft & Stable. Take note that the stabilizer pieces are 1/2″ shorter than the main fabric pieces. You’ll need two reverse pieces for the exterior, two reverse pieces for the interior, and two pieces of stabilizer.
Sew the two lining pieces right sides together with a 1/4″ seam allowance, leaving the top of the stocking open. Back-stitch at the top. Set aside.
With wrong sides facing, sew the back main fabric and piece of stabilizer together with a basting stitch and 1/8″ seam allowance, leaving the top open. Set aside.
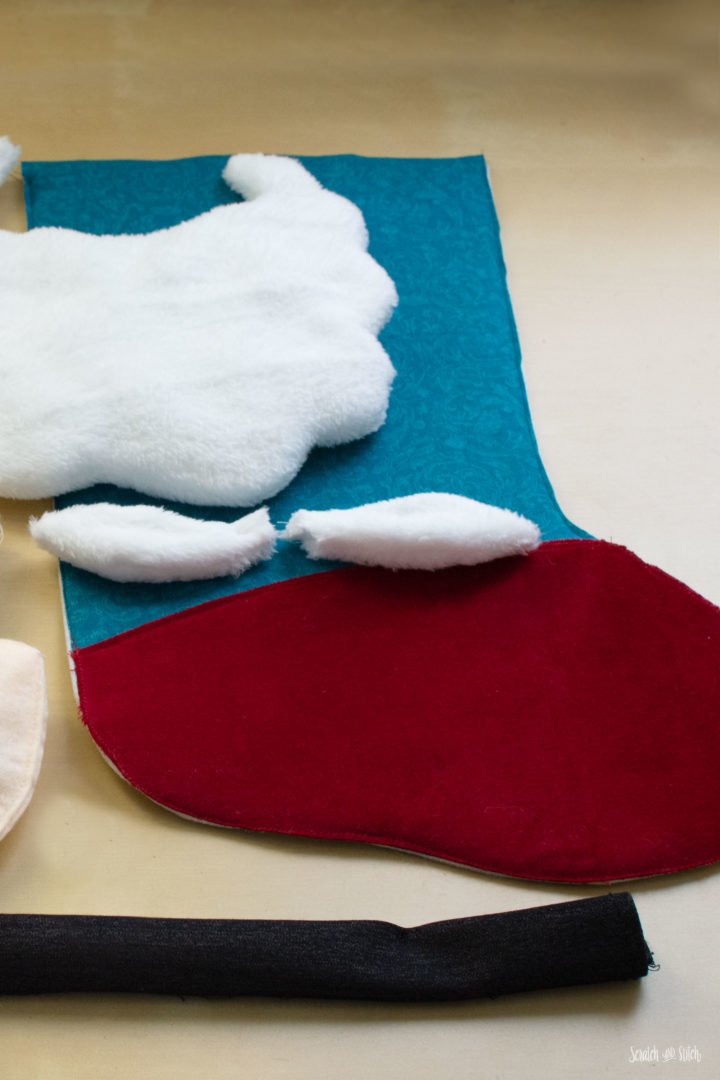
Repeat with the front of the stocking. Then align the bottom of Santa’s body piece to the bottom of the stocking. Fold the seam allowance of the top of the body under and pin in place. Press this seam if it makes it easier. Topstitch the top of the body. Sew around the bottom of the body with a 1/8″ seam allowance. Set aside.
How to Make the Santa Stocking
Download, print, assemble the paper pattern, and cut out pattern pieces.
Transfer the paper pattern piece onto your fabrics and cut out.
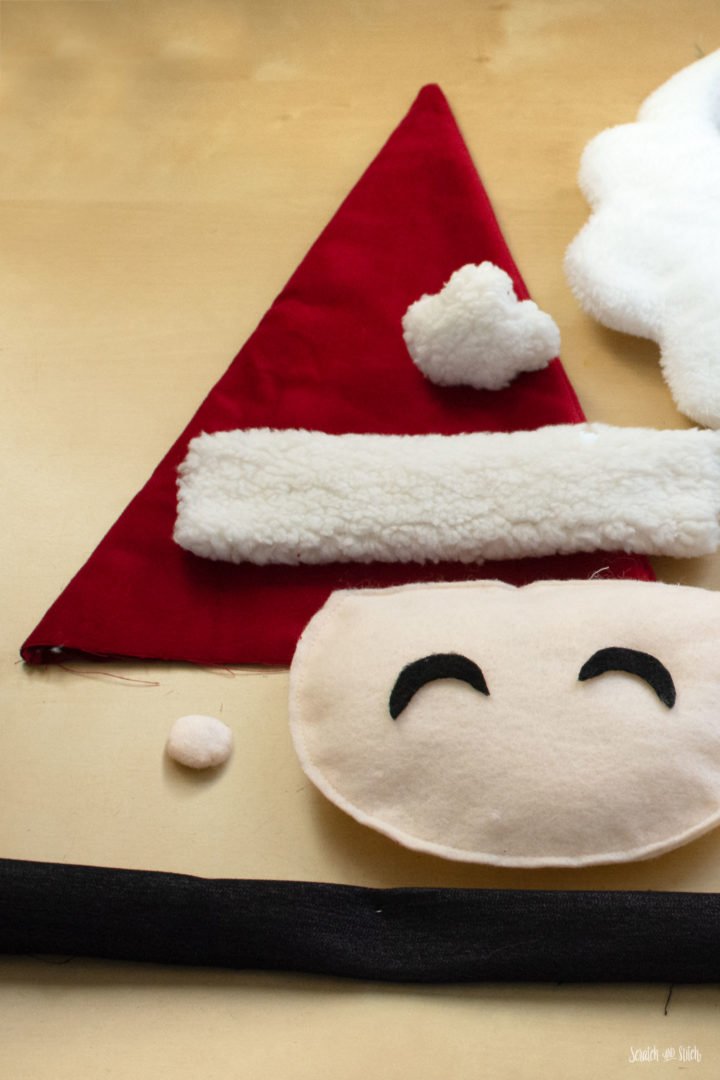
You will have:
- 2 hat
- 1 body
- 2 hat ball
- 1 hat cuff – approx 6″ X 8.5″ (no pattern included)
- 2 face
- 2 nose
- 2 beard (1 reverse)
- 4 mustache (2 reverse)
- eyes
- belt – approx 4.5″ X 10″ for 2″ belt buckle (no pattern included)
Making Santa’s Hat
Place the two hat pieces right sides facing, sew up the long sides leaving the bottom open. Turn right sides out. Set aside.
For the hat ball, hand stitch a basting stitch around the perimeter of the circle with a 1/2″ seam allowance leaving long thread tails. Carefully tug on the thread tails to create a ball with the fabric. Lightly stuff with filling. Set aside.
Fold the hat cuff in half with right sides facing. Stitch down the long sides to create a tube. Turn the tube right sides out. Set aside.
Making Santa’s Face and Nose
Sew the eyes onto one face piece. Place the two face pieces right sides together and sew, leaving an opening. Turn right-sides out and lightly stuff. Hand stitch the opening closed with a ladder stitch. Set aside.
For the nose, place the two nose circles right sides facing and hand stitch with a ladder stitch around the perimeter, leaving an opening. Add a little stuffing and close the hole. Set aside.
Making Santa’s Mustache and Beard
For the beard, place the two beard pieces right sides together and stitch around the perimeter, leaving an opening. Clip the corners. Turn right-sides out and lightly stuff. Sew the opening closed with a ladder stitch.
For the mustache, place two mustache pieces right sides together and sew around, leaving an opening for turning. Turn right sides out and lightly stuff. Repeat with the other side of the mustache. Add a few stitches to close up the hole. Note that this doesn’t have to be closed perfectly as it will get hidden under the nose.
Add Santa’s Head to the Stocking
To get a good idea of where all the pieces should be, lay out all of the pieces on the stocking. Pin each piece as you go and hand stitch each of them onto the stocking in the following order:
- Sew the face in place.
- Sew the bottom of the hat in place just above the face. Let the hat hang loose for now.
- Sew the beard in place making sure the tops will be covered by the hat cuff.
- Sew the two mustache pieces in place with the points touching. Add the nose on top.
- Add the hat cuff.
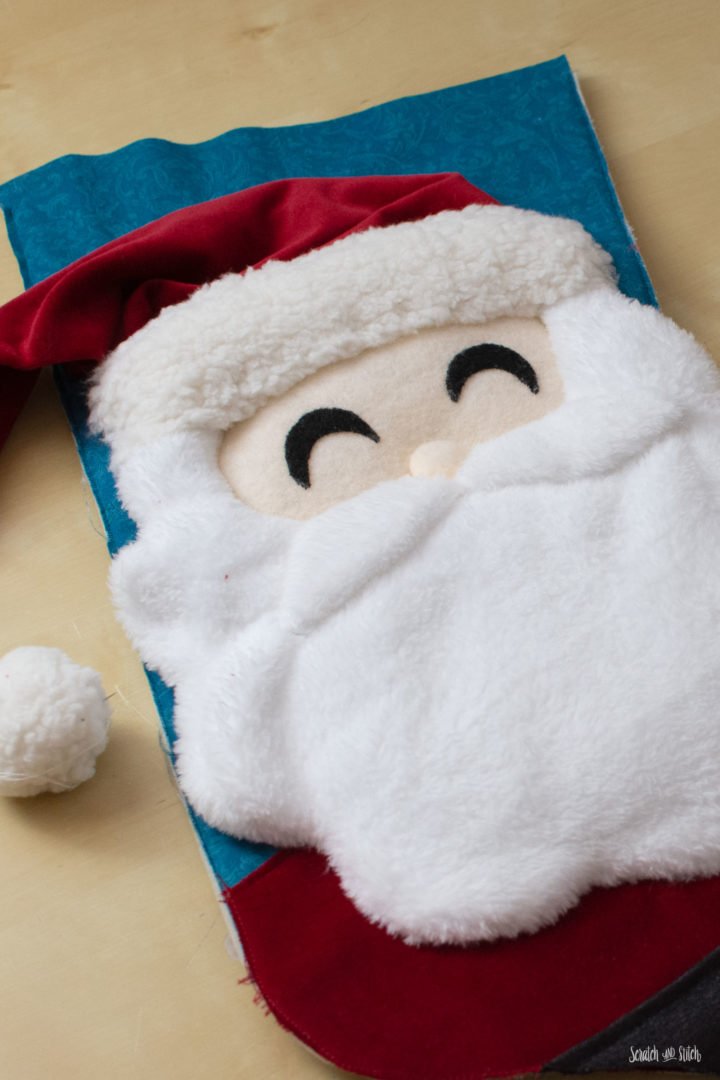
Fold the point of the hat over and gather wrinkles in the fabric. Pin the wrinkles as you like and add small stitches in between the wrinkles to hold it in place. Wait to stitch the point and ball of the hat until after the stocking is fully assembled.
And last-but-not-least, decide on the placement of the belt and belt buckle. Slide the buckle on and pin to hold. Sew the belt and buckle onto the front of the stocking. Trim the excess belt fabric that hangs over the sides
Final Stocking Assembly
Pin the hat point towards the center of the face to keep it out of the way. Place the back of the stocking on top of Santa with the right sides facing. Pin or clip to hold and stitch around the sides with a 1/4″ seam allowance. Carefully turn the stocking right side out. Add the ball to the tip of the hat and add stitches to the side of the stocking as needed to hold in place.
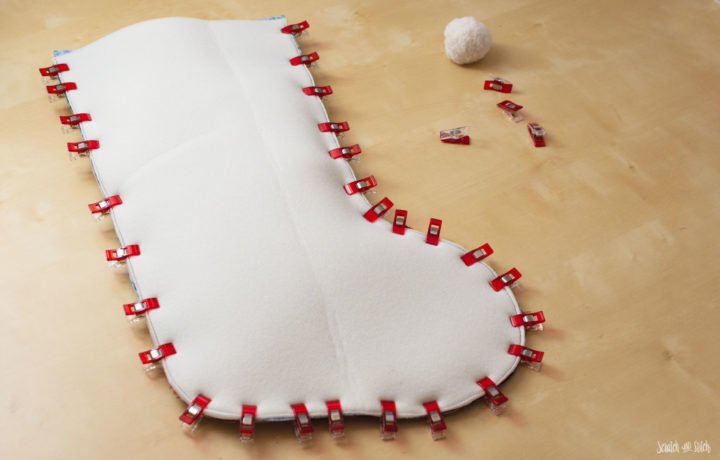
Insert the lining into the stocking. Fold the top of the lining and main fabric inside so the stabilizer is hidden. Press to get a crisp fold. Pin the hanging ribbon on the side. Topstitch around the top of the stocking.
I recommend adding a few stitches to the toe so the lining doesn’t pull out of the stocking.
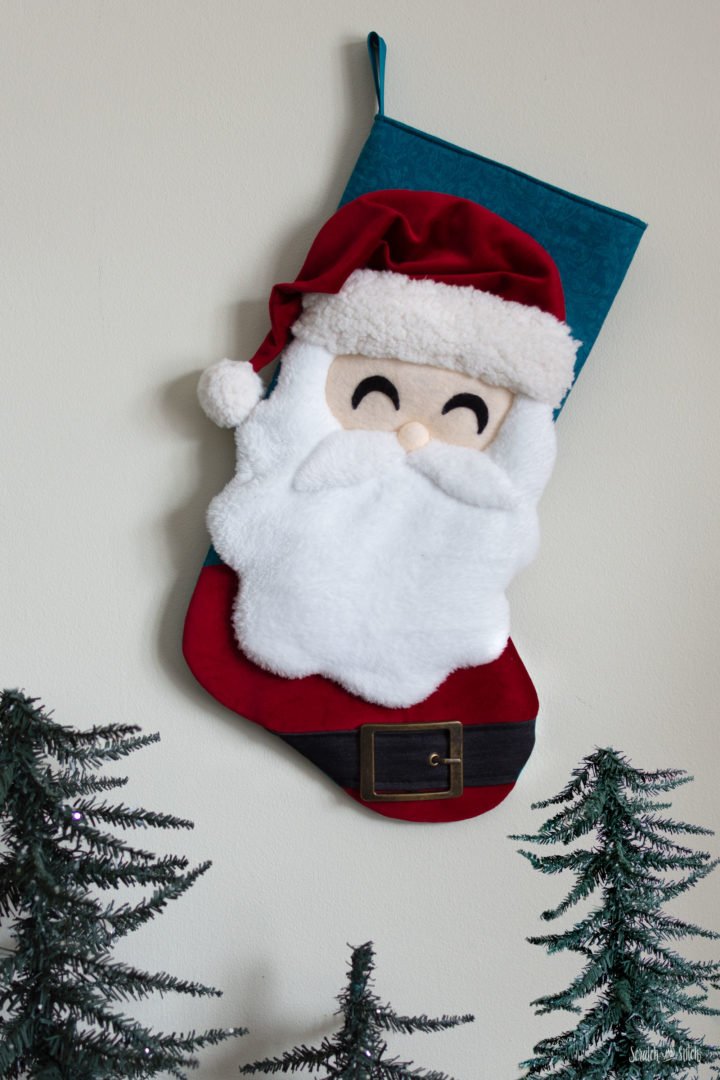
I hope you can enjoy using this Santa Christmas Stocking Pattern. Be sure to send me photos or tag @scratchandstitch on IG with your creations.

Hi Sharon – At this time I do not have a printable download included for my free sewing patterns. You can, however, print straight from the website. I have had this request multiple times and plan to have paid printable versions of my sewing patterns. I appreciate your commenting so I know there is a want for a printable version. :)