Some big news over here…I’m pregnant! That’s right, holy crap it’s happening. Our little bundle of joy is due March 2017.
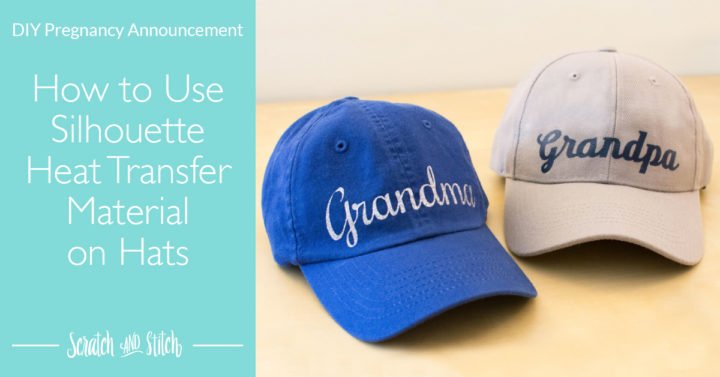
We waited until I was 10 weeks along to break the news to family and of course needed creative ways to tell each of them. Not too long after we saw those two little lines, I came up with the idea to make my in-laws hats to reveal their newly bestowed titles using Silhouette Heat Transfer Material.
I was so excited to tell everyone but especially my mother-in-law because this will be her first grandchild. I know she’s been patiently (and quietly) waiting to become Grandma. Her reaction when she opened the gift was priceless and I’ll remember it vividly forever:).
Silhouette Heat Transfer Hats
Check out my list of pro tips below
Materials and Tools
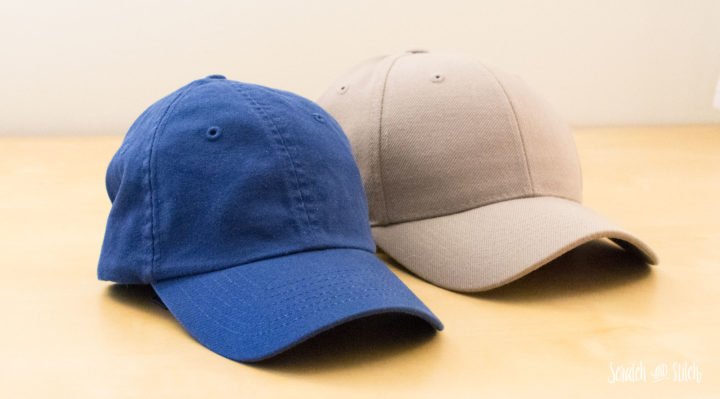
- blank hat
- ruler
- Silhouette cutter
I have the original Silhouette Cameo - Silhouette Studio software
I use the free version in conjunction with Adobe products - Silhouette Heat Transfer Material
I used Silhouette’s Sliver Glitter as well as Cricut’s Iron-On Heat Transfer Vinyl in Navy - scissors or rotary cutter
- a picker tool
Silhouette has their own branded picker tools, I used a seam ripper - pressing cloth or lightweight cotton scrap fabric
- tailor’s ham or something to stuff the hat
I used a pillow - iron
Tips & Recommendations for Using Silhouette Heat Transfer Material
- You’re design needs to be a mirrored image of the final before sending to the Silhouette. Then once you remove the design from the adhesive backing, the design will be correct.
- I highly recommend cutting a trial on some plain paper so you can test sizing of graphic on your fabric.
- Some graphics may have very thin lines that will not work well with the heat transfer material. You can manually thicken up those areas in the Silhouette Studio software so ensure a better final result.
- If you’ve never worked with iron-on material, I recommend cutting a small shape to test the heat transfer process. Different heat transfer materials and fabrics will react different to the iron-on process. A flat t-shirt design goes on much smoother and quicker than the roundness of a hat. I created two small hearts for the back of the “Grandma” hat to test the material on the hat fabric.
- After cutting your design with the Silhouette, leave at least a 1/2″ of “breathing room” around the design. This will make sure you have enough adhesive backing around the design to help it stick to the surface. This is especially helpful with the roundness of a hat.
- Cut straight lines around your design. This will leave your heat transfer material with straight edges for the next time you use the material.
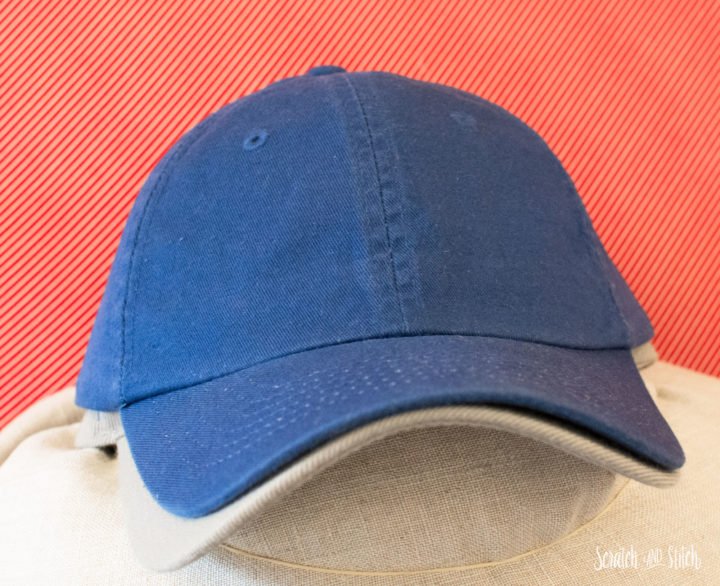
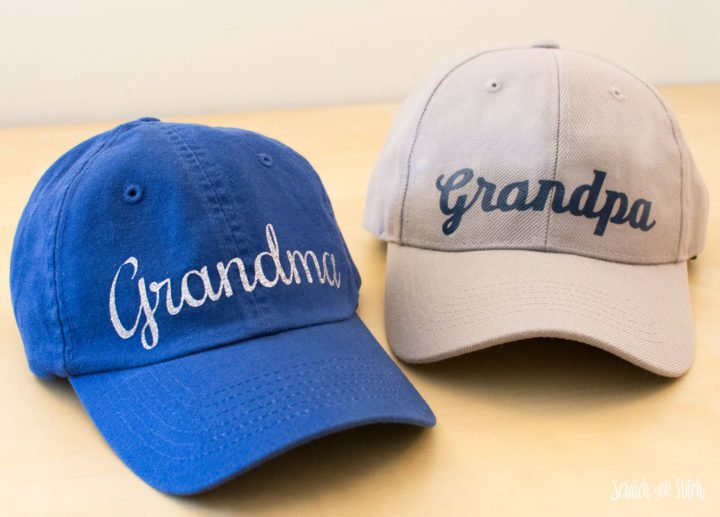
- Before ironing heat transfer material onto a hat, check the inside of the hat. The hat I used for “Grandpa” has a stiff lining to allow the front of the hat to stand up straight and flat. This lining is not intended to handle high-heat and may warp when ironed. This happened to me with the “Grandpa” hat so while it was still hot from the iron, I attempted to flattened out the warps. I was content with the final results, even with a few bumps (the message was the important part anyway).
- After the design is adhered to the hat, remove the adhesive backing, replace the pressing cloth on the design and iron over another time. This will ensure a strong hold.
How to make custom hats using Silhouette heat transfer material
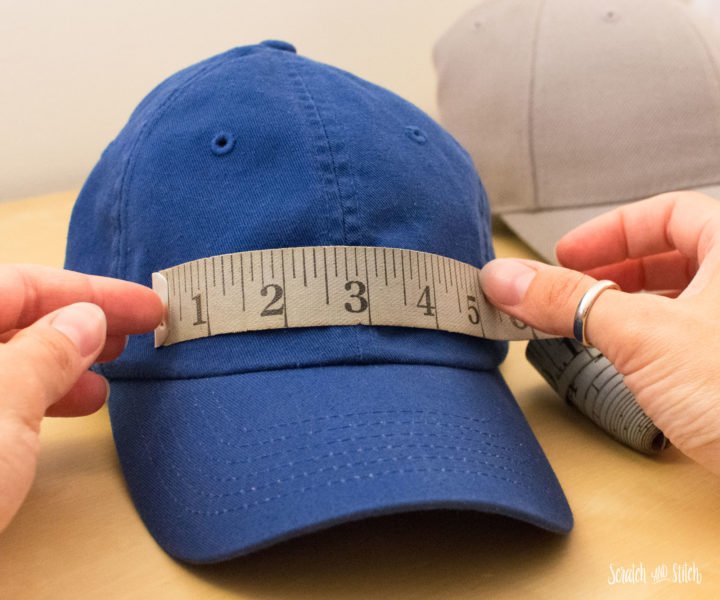
First measure the area of the hat that will be used to place the text or graphic. For these hats, the max area is 5″x 2″.
Creating Type Design in Silhouette Studio for Cutting Heat Transfer Material
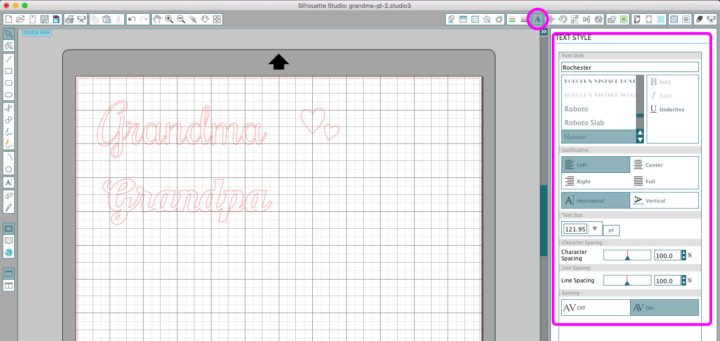
In Silhouette Studio, create your text or graphic.
For “Grandma” I used the font Rochester, for “Grandpa” I used Moonface Script
Ungrouping Letters
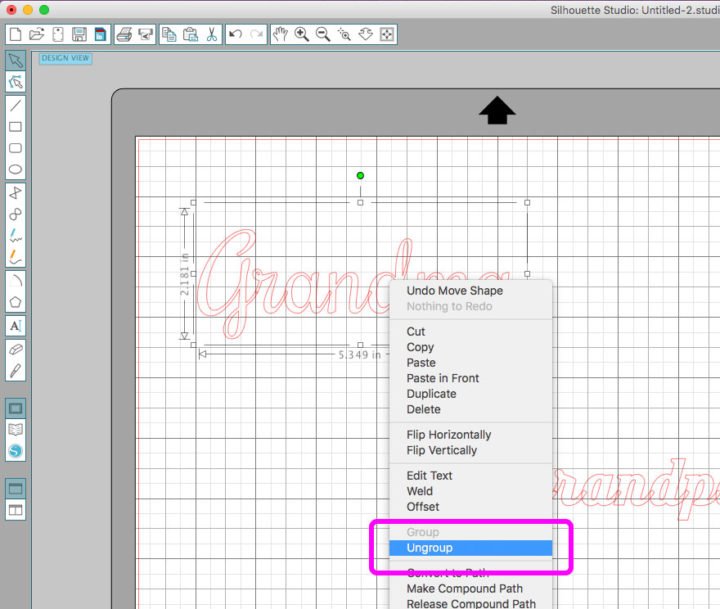
The Silhouette Studio software creates text as one whole graphic but each letter is an individual shape. These will need to be ungrouped and then combined to create a single shape.
First select your text, right-click, and ungroup.
Adjust Letter Spacing
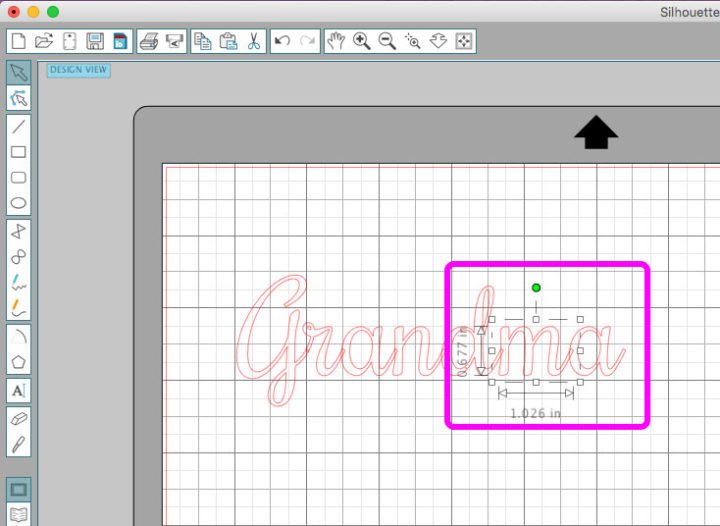
Now each letter is its own shape and you can adjust the spacing in between letters. Graphic designer and font-fanatic here so this was really important to me. :)
Welding Letters into One Shape
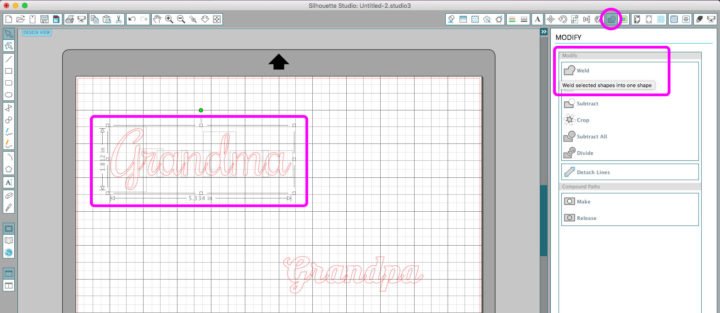
Once your letters are in place, select the entire word, open the Modify panel, and select Weld. This will make your entire letter a single shape.
Sizing Graphic for Cutting
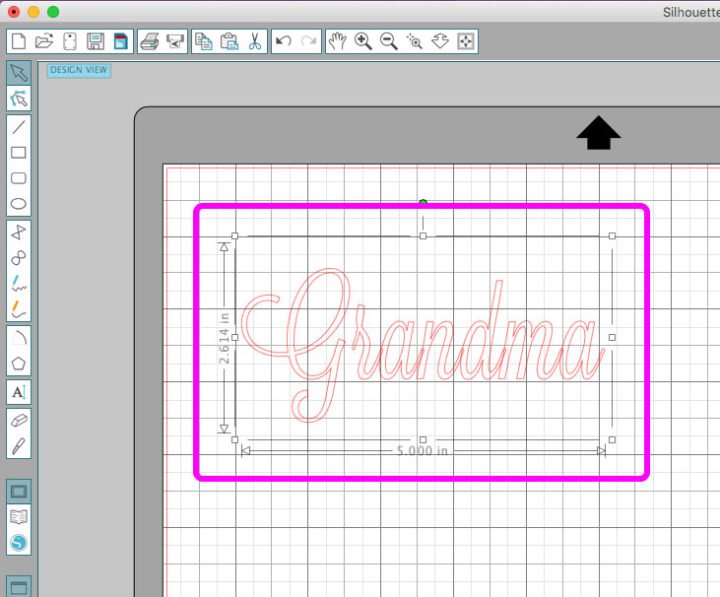
Resize your graphic to the desired final size. While resizing, hold down the shift key to keep the graphic proportionate.
Mirroring the Graphic
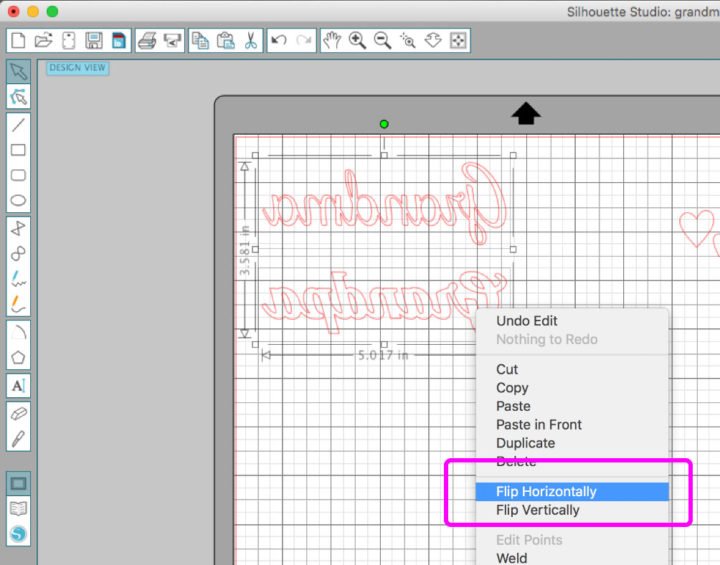
With your graphic still selected, right-click and select “Flip Horizontally”. Your graphic must be a mirrored version of the final.
Preparing Cut Settings
Once you’re satisfied with your design, select the graphic you’d like to have cut. Position the design on the page where you’d like your Silhouette to cut on the heat transfer material.
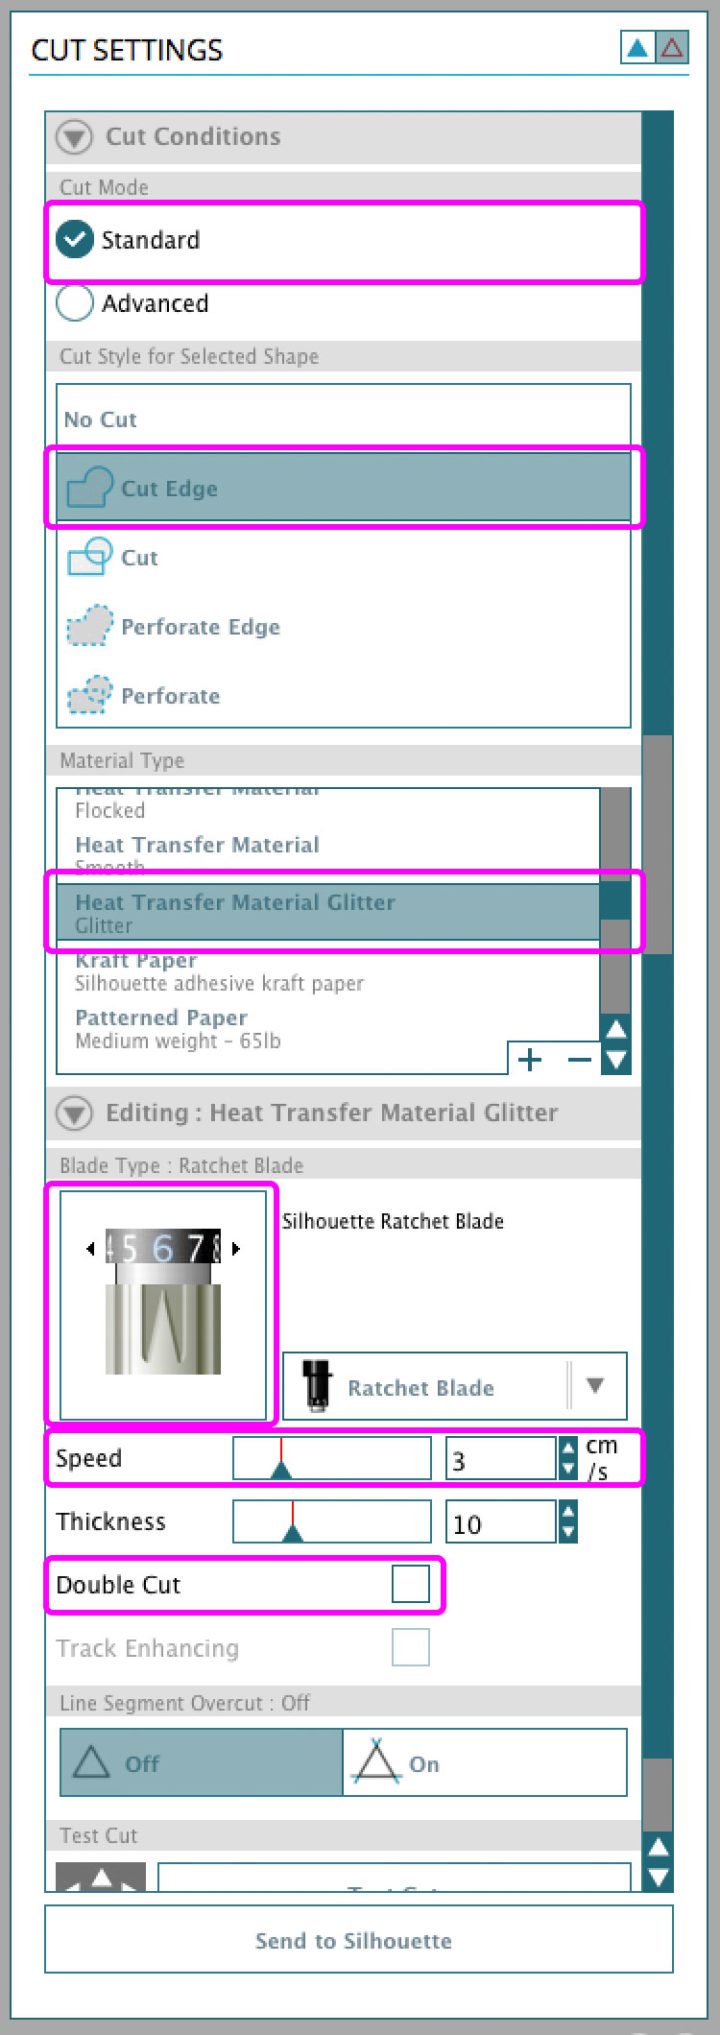
Go to the Cut Settings panel. With the graphic selected, choose “Cut”. If you have more than one graphic on your page but only want to cut some at a time, select the other graphics and change to “No Cut”.
Change the material to the selected material you’re using.
*The default settings for the Silhouette Glitter Heat Transfer Material were set to blade depth of 10, speed of 5, and double-cut. After my test cut with a brand new blade, a depth of 10 cut right through the material. I used a depth of 6 (4 probably would have even worked well) and did not double cut.
On your machine change your blade to match the selected depth. Load your material. Select Send to Silhouette.
Preparing Cut Design
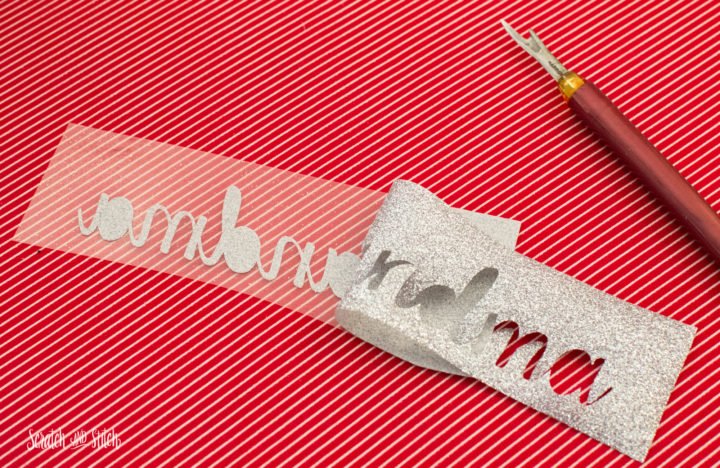
Cut around the outside of your design. I found it best to cut a straight line and left some breathing room around the design. This will help the design stick to your fabric and also give you a nice straight edge for the next time you use the heat transfer material in your Silhouette machine.
Using your picker tool (or seam ripper), pull away the heat transfer material that’s not part of the final design. Make sure to pick out any inner pieces as well.
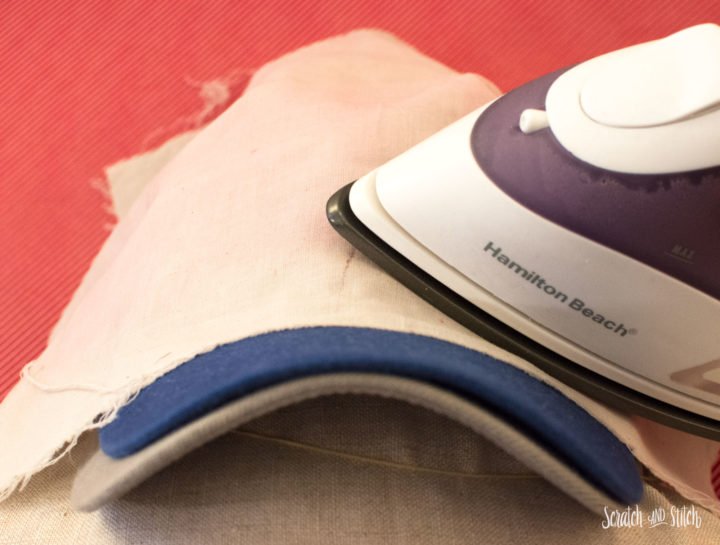
Stuff your hat with a pillow, fabric, or tailor’s ham so you have a flat, firm surface to work on. You want to be able to put pressure on the surface without it bending.
Heat your iron to the setting specified on the heat transfer material. This is most likely the cotton setting.
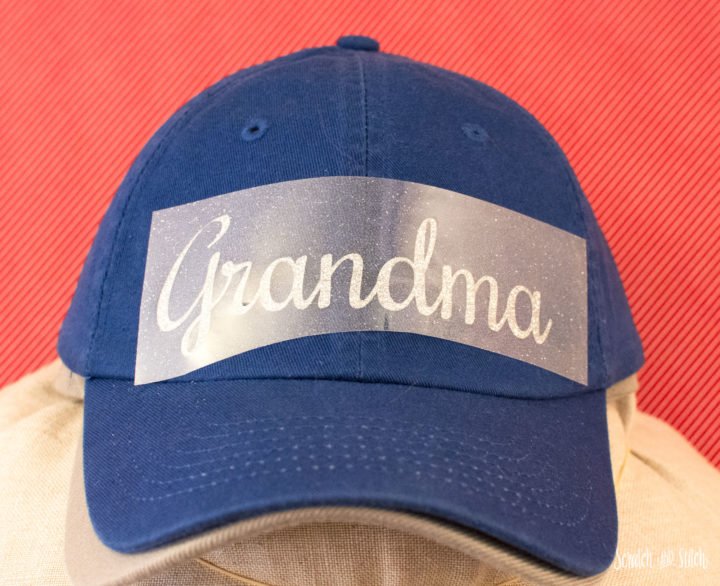
Place your graphic onto the hat surface, cover the design with a pressing cloth, firmly press the iron over the design and hold for 30 seconds. Repeat until you’ve pressed over the entire design.
Gently pull away a corner of the adhesive backing to check if the material is fully stuck onto the hat. If not, replace the pressing cloth and press more until the adhesive backing can be removed without pulling off the design.
Once the design is adhered to the hat and adhesive backing removed, place your pressing cloth over the design and give it one last iron over.
And that’s it! Using the Silhouette Heat Transfer Material is super easy to get the hang of and the possibilities for custom DIY fashion are endless.
Here are the soon-to-be Grandparents shortly after they got their new hats and the news! :)
Have questions about your project using your Silhouette and Heat Transfer Material? Leave a comment below, I’m glad to help.
And send me your pictures so I can feature them here on Scratch and Stitch! :)

Thanks for the tip on the warping. Was there any issue with the HTV over the stitching?
I don’t recall having an issue over the stitching on these hats.